34
Function setup
Customizing the Function Settings (continued)
Setting details
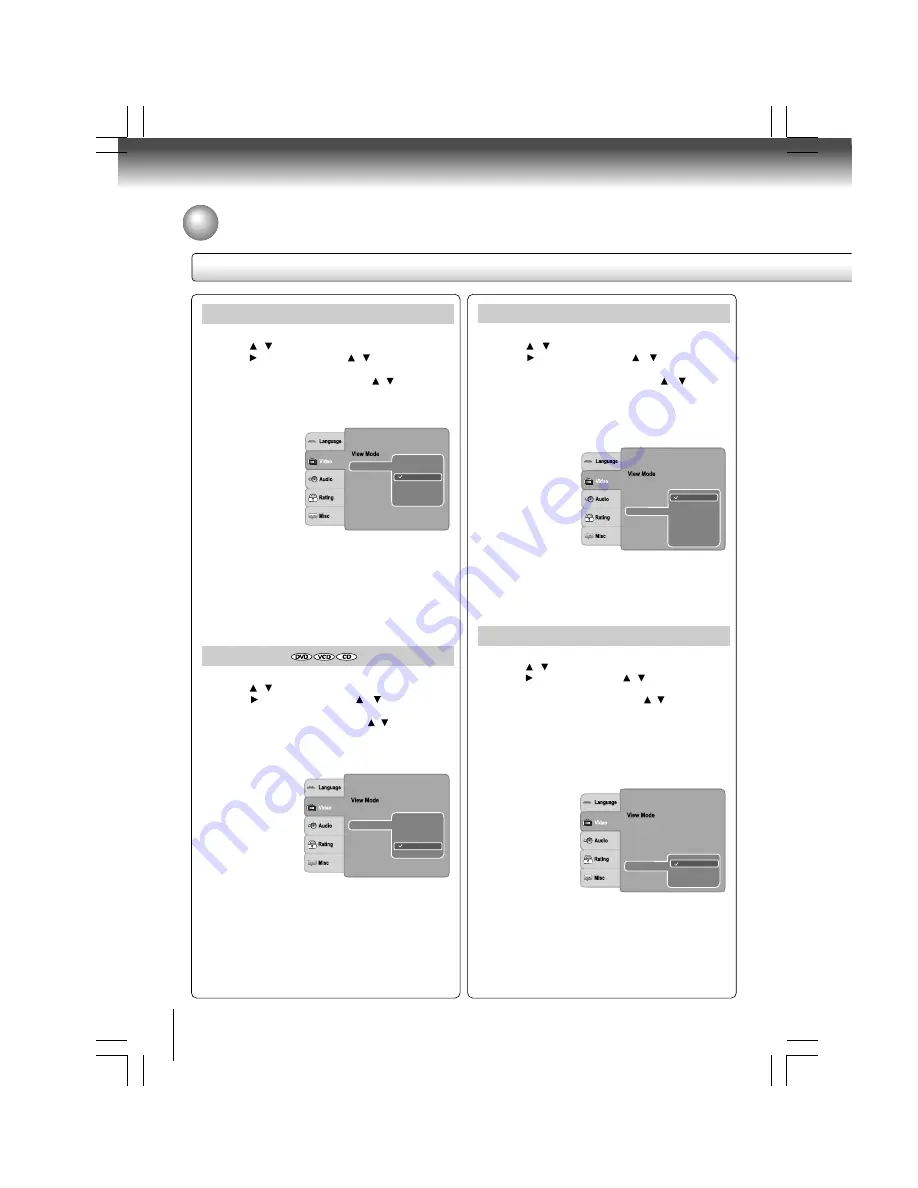
Video Out
1) Press SETUP button.
2) Press / button to select Video.
3) Press button, then use the / button to select
Video Out.
4) Press ENTER button, then use the / button to select
the output mode (Composite, RGB or HDMI).
5) Press ENTER button.
6) Press SETUP button to exit the menu.
Composite:Select if you connect the DVD to your TV via
composite video (yellow) input.
RGB: Select if you connect the DVD to your TV which has
RGB inputs by scart cable.
HDMI: High Definition Multimedia Interface. Select if you
connect the DVD to TV via HDMI input.
HDMI Resolution
1) Press SETUP button.
2) Press / button to select Video.
3) Press button, then use the / button to select
HDMI Resolution.
4) Press ENTER button, then use the / button to
select the options (Auto, 480p/576p, 720p, 1080i or
1080p).
5) Press ENTER button.
6) Press SETUP button to exit the menu.
Notes
• If the Video Output is not set to “HDMI”, you cannot select
the “HDMI Resolution”.
• Select the HDMI resolution according to the performance
of the connected TV.
Aspect Ratio
: 16 : 9
HDMI Resolution
: Auto Fit
: PAL
HDMI
Video Out
HD
Mode
JPEG
TV System
RGB
Composite
JPEG Interval
: 5 seconds
Aspect Ratio
: 16 : 9
: Auto Fit
Video Out
: PAL
480p/576p
1080i
1080p
720p
Auto
HDMI Resolution
HD
Mode
JPEG
TV System
JPEG Interval
Aspect Ratio
: 16 : 9
: Auto Fit
: Auto
Off
On
Video out
HDMI Resolution
HD
ode
JPEG M
: PAL
TV System
: HDMI
JPEG Interval
HD JPEG Mode
1) Press SETUP button.
2) Press / button to select Video.
3) Press button, then use the / button to select HD
JPEG Mode.
4) Press ENTER button, then use the / button to select
On or Off mode.
5) Press ENTER button.
6) Press SETUP button to exit the menu.
On: JPEG image is displayed in a suitable picture quality
(480p/576p, 720p, 1080i or 1080p).
Off: The picture quality is fixed to 480p/576p.
TV System
1) Press SETUP button.
2) Press / button to select Video.
3) Press button, then use the / button to select TV
System.
4) Press ENTER button, then use the / button to shift
and change the TV system.
5) Press ENTER button.
6) Press SETUP button to exit the menu.
NTSC: Select if your TV system is NTSC.
PAL:
Select if your TV system is PAL.
Auto:
The DVD player automatically identifies PAL or
NTSC video system of a disc. Connect a multisystem TV
(PAL / NTSC compatible) to view a picture. A playback picture
may be distorted when detected a signal change between
PAL and NTSC on the disc. For the case of Progressive
mode, your multisystem TV must be able to support 525p
and 625p.
Aspect Ratio
: 16 : 9
HDMI Resolution
: Auto Fit
Auto
Video Out
NTSC
TV System
PAL
HD
Mode
JPEG
JPEG Interval
: 5 seconds
Notes
• If the Video Out is not set to “HDMI”, you cannot select
the “HD JPEG Mode”.
• All JPEG pictures will not be output through the VIDEO
OUT jack and SCART socket when 720p, 1080i, 1080p
or Auto is selected with HD JPEG Mode on.
• For HDMI output, DISPLAY and ZOOM buttons only work
in 480p/576p resolution mode when HD JPEG Mode is
On.


