background image

1-26

Initial Settings - DVD (Continued)

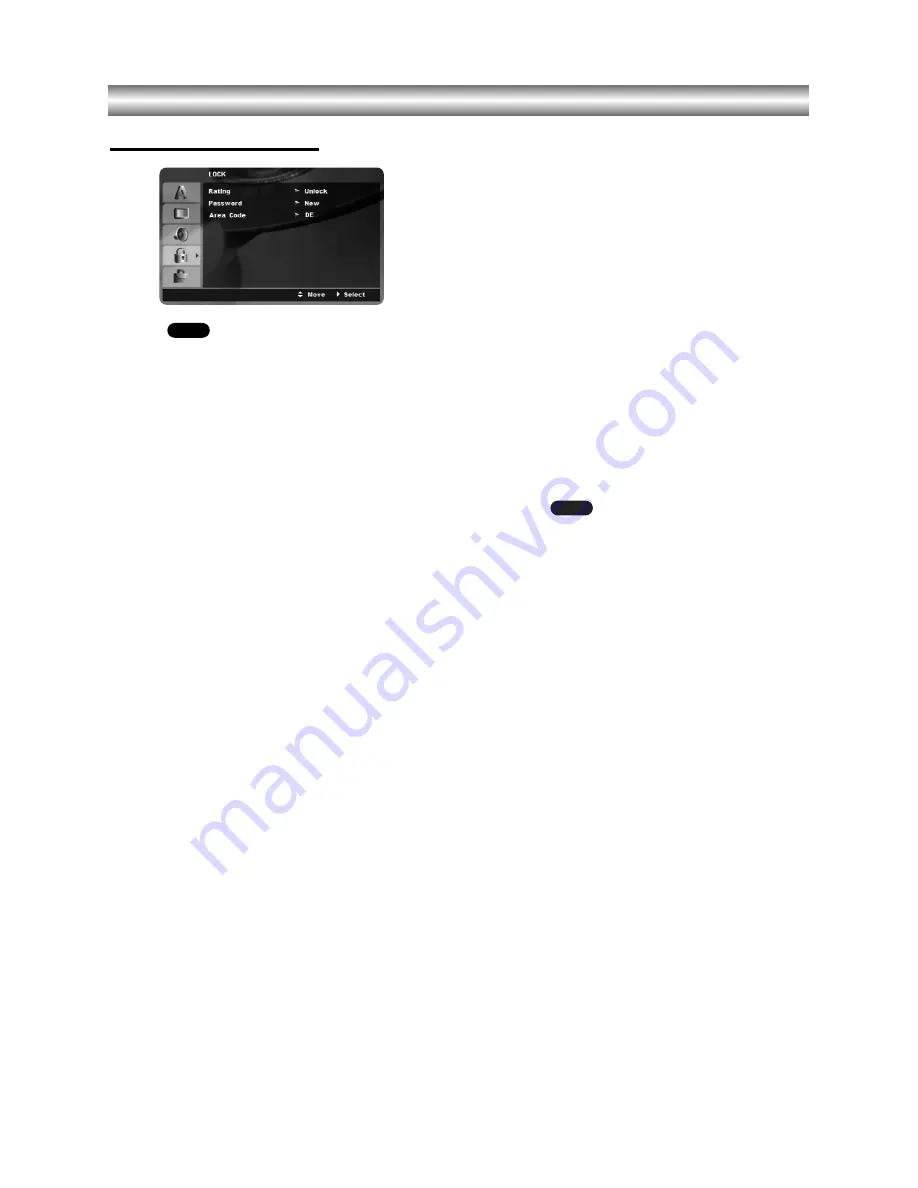
LOCK (Parental Control)  

Rating  

Some movies contain scenes that may not be suitable
for children to view. Many of these discs contain
parental control information that applies to the complete
disc or to certain scenes on the disc. Movies and
scenes are rated from 1 to 8, depending on the area.
DVD video discs may or may not respond to the
parental control setting if the Area code of the disc is
set wrongly. Some discs offer more suitable scenes as
an alternative. Ratings are area dependent. 

The parental control feature allows you to block access
to scenes below the rating you input, thereby preventing
your children from being able to view material you
believe is unsuitable. 

1. Select “Rating” on the LOCK menu then 

press 

B

.

2. To access the Rating, Password and Area Code fea-

tures, you must input the 4-digit security code you
created. 

If you have not yet entered a security code you are
prompted to do so. Input a 4-digit code and press
ENTER/OK. Enter it again and press ENTER/OK to
verify. If you make a mistake before pressing
ENTER/OK, press CLEAR.

3. Select a rating from 1 to 8 using the 

v

/

V

buttons. 

1-8: 

Rating one (1) has the most restrictions and rat-

ing eight (8) has the least restrictive.

Unlock : 

If you select unlock, parental control is not

active and the disc plays in full.

4. Press ENTER/OK to confirm your rating selection,

then press SETUP to exit the menu.

5. Press OPEN/CLOSE (

/

) to activate parental 

control.

Note:

If you set a rating for the player, all disc scenes with the same
rating or lower are played. Higher rated scenes are not played
unless an alternate scene is available on the disc. The alterna-
tive must have the same rating or a lower one. If no suitable
alternative is found, playback stops. You must enter the 4-digit
password or change the rating level in order to play the disc.

Password (Security Code)

You can enter or change password.

1. Select “Password” on the LOCK menu then press 

B

2. Follow step 2 as shown left column (Rating). 

To change the password, select the “Change”, press
ENTER/OK and input the new 4-digit code then
press ENTER/OK. Input it again to verify.

3. Press SETUP to exit the menu.

If you forget your Security Code

If you forget your security code you can clear it 
using the following steps:

1. Press SETUP to display the Setup menu.

2. Input the 6-digit number “210499” 

and the security code is cleared. 

3. Enter a new code as described above.

Area Code 

Enter the Area Code whose standards were used to
rate the DVD video disc, based on the list in the 
reference chapter (see page 37).

1. Select “Area Code” on the LOCK menu then press

B

.

2. Follow step 2 as shown left (Rating).

3. Select the first character using 

v

/

V

buttons.

4. Press 

B

and select the second character using 

v

/

V

buttons.

5. Press ENTER/OK to confirm your area code 

selection.

DVD

DVD

Содержание SD-26VESE

Страница 1: ...PLAYER VIDEO CASSETTE RECORDER Before connecting operating or adjusting this product please read this instruction booklet carefully and completely 2005 Toshiba Corporation This device does not tape record copy protected DVD Video Discs ...

Страница 2: ...lic or rent copyright material without permission This product features the copy protection function developed by Macrovision Copy protection signals are recorded on some discs This product incorporates copyright protection technology that is protected by method claims of certain U S patents and other intellectual property rights owned by Macrovision Corporation and other rights owners Use of this...

Страница 3: ...be exposed to dripping or splashing or objects filled with liquids such as vases to be placed on the equipment DON T place hot objects or naked flame sources such as lighted candles or nightlights on or close to equipment High temperatures can melt plastic and lead to fires DON T use makeshift stands and NEVER fix legs with wood screws to ensure complete safe ty always fit the manufacturer s appro...

Страница 4: ...Fi Stereo Sound System NIC 26 Blank Search 26 On Screen Display F OSD 26 Tape Counter Memory Stop 26 Video Doctor Self Diagnosis 27 To set the decoder 27 Wide Screen Compatibility 16 9 27 Recording from External Components 28 Copying from DVD to VCR 28 Operation with DVD and Video CD 29 32 Playback Setup 29 General Features 29 31 Moving to another TITLE 29 Moving to another CHAPTER TRACK 29 Slow M...

Страница 5: ...iece that are smaller than titles A title is composed of one or several chap ters Each chapter is assigned a chapter number enable you to locate the chapter you want Depending on the disc chapters may not be recorded Track Video CD and audio CD only Sections of a picture or a musical piece on a video CD or an audio CD Each track is assigned a track number enabling you to locate the track you want ...

Страница 6: ...ter playing store the disc in its case Do not expose the disc to direct sunlight or sources of heat or leave it in a parked car exposed to direct sun light as there may be a considerable temperature increase inside the car Cleaning discs Fingerprints and dust on the disc can cause poor pic ture quality and sound distortion Before playing clean the disc with a clean cloth Wipe the disc from the cen...

Страница 7: ...nd VCR z z REC To record normally or to activate One touch Timer Recording by repeated presses M M DVD Skip to next chapter or track Press and hold for two seconds for a fast forward search VCR Advances the tape during the STOP mode or for fast forward picture search N N Starts playback m m DVD Skip to beginning of current chapter or track press twice in quick successions to go to previous chapter...

Страница 8: ...e VCR deck The VCR deck is selected DVD VCR is Recording VCR part only Lights when TV mode is active A disc is in the DVD deck Lights when a disc is in the DVD deck and Flashes when no disc Indicates total playing time elapsed time remaining time or current deck status Playback Pause etc The DVD deck is selected Indicates repeat mode ...

Страница 9: ...s tracks in random order CM SKIP Fast forwards picture search through 30 seconds of recording A B RPT Repeats sequence between two points A and B SP LP Selects recording speed of the tape SLOW y Forward slow playback EJECT OPEN CLOSE Ejects the tape in the VCR deck Opens and closes the disc tray INPUT SELECT INSTANT REPLAY Selects the VCR deck s source Tuner AV 1 AV 2 or AV 3 Replays through 10 se...

Страница 10: ...nnect to pay TV decoder Set Top Box or another video recorder EURO AV1 AUDIO VIDEO VCR IN OUT DVD OUT Connect to your TV set or another video recorder RF OUT Connect to your TV using this jack AC Power Cord Connect to a power source COAXIAL DVD EXCLUSIVE OUT Digital audio out jack Connect to digital coaxial audio equipment Do not touch the inner pins of the jacks on the rear panel Electrostatic di...

Страница 11: ...necting to a TV Make one of the following connections depending on the capabilities of your existing equipment Basic connection AV 1 Connect the EURO AV1 AUDIO VIDEO on the rear panel of this unit to the SCART input socket on the TV using a SCART lead not supplied For TV without SCART connect the yellow VIDEO OUT jack and DVD VCR AUDIO OUT jacks of this unit to the TV 2 Some TV broadcasters transm...

Страница 12: ...A digital multi channel connection provides the best sound quality For this you need a multi channel Audio Video receiver that supports one or more of the audio formats supported by your unit MPEG 2 Dolby Digital and DTS Check the receiver manual and the logos on the front of the receiver Warning Due to the DTS Licensing agreement the digital output will be in DTS digital out when DTS audio stream...

Страница 13: ...ure and sound signals from the DVD VCR through the RF cable If you have used a SCART lead you will not have to tune your TV simply select the AV channel The AV channel is already pre tuned for optimum video playback on your TV 1 Turn on DVD VCR and TV 2 Set the vacant position 60 on your TV 3 Press POWER I 1 on the remote control to enter the standby mode 4 Press and hold PROG v v or V V on the fr...

Страница 14: ... NICAM digital sound see p 26 3 Press 1 and 2 to select the desired menu Press ENTER OK and use 3 or 4 to select 4 Press VCR MENU i to return to a TV picture Setting the clock Manually The clock in your DVD VCR controls time and date settings for your DVD VCR The clock is set automatically during ACMS Automatic Channel Memory System when your DVD VCR detects a channel that broadcasts a Teletext si...

Страница 15: ... the TV screen Press 1 or 2 to select the ACMS Press ENTER OK 3 Select the country according to your area with 1 or 2 A Austria B Belgium CH Switzerland D Germany DK Denmark E Spain F France I Italy N Norway NL Nertherlands P Portugal S Sweden SF Finland OTHERS 4 Press ENTER OK to start the automatic storing of the channels of the TV stations in your area 5 The TV STATION TABLE will appear when tu...

Страница 16: ...r example PR 04 4 Press ENTER OK Press INPUT SELECT to select C Standard stations or S Cable stations C02 C69 S01 S41 Enter the channel number of station that you want to tune use 3 or 4 to find the required station 5 Searching will stop when it locates a stations Press 2 to select MFT Control the fine tuning of the station by using 3 or 4 6 Press 2 to select STATION so that you may name your TV s...

Страница 17: ... PR 05 4 Press ENTER OK The selected programme will be moved to the new programme number If you wish to move other TV stations repeat stages 1 4 5 Press VCR MENU i to remove the menus from the TV screen Deleting TV Stations After tuning TV stations into your DVD VCR you may wish to delete a station The instructions given on this page will show you how you can easily delete any unwanted TV stations...

Страница 18: ...current setting for the selected item as well as alter nate setting s 4 Use v V to select the second desired option then press B to move to the third level 5 Use v V to select the desired setting then press ENTER OK to confirm your selection Some items require additional steps 6 Press SETUP or PLAY N to exit the Setup menu LANGUAGE Menu Language Select a language for the VCR and DVD s setup menu a...

Страница 19: ...MPEG will be automatically downmixed to two channel PCM audio Off for DTS If you select Off the DTS signal is not output through the DIGITAL AUDIO OUT jack Sample Freq Frequency If your receiver or amplifier is NOT capable of handling 96 kHz signals select 48 kHz When this choice is made this unit automatically converts any 96 kHz sig nals to 48 kHz so your system can decode them If your receiver ...

Страница 20: ...sc plays in full 4 Press ENTER OK to confirm your rating selection then press SETUP to exit the menu 5 Press OPEN CLOSE to activate parental control Note If you set a rating for the player all disc scenes with the same rating or lower are played Higher rated scenes are not played unless an alternate scene is available on the disc The alterna tive must have the same rating or a lower one If no suit...

Страница 21: ...o CDs Auto Play You can set up the DVD VCR so a DVD disc automati cally starts playing whenever the DVD is inserted If Auto Play mode is set to On this DVD VCR will search for title that has the longest playback time and then play back the title automatically On Auto Play function is active Off Auto Play function is not active Note The Auto Play function may not work for some DVDs DVD VCD Initial ...

Страница 22: ...re quality can be improved slightly by using v or V 4 Press PLAY N to continue playing your tape Picture search During playing back press either REW m or FWD M to this will enable you to rapidly wind the tape 7 times normal playback see where you are on the tape Logic search During fast forwarding or rewinding press and hold REW m or FWD M the picture will be played back at 7 times normal playback...

Страница 23: ...g from EURO AV1 SCART socket on the rear of your unit AV 2 for recording from EURO AV2 SCART socket on the rear of your unit AV 3 for recording from VIDEO IN and AUDIO IN Left Right jacks on the front of your unit 5 Press SP LP if you wish to record in Long Play or Standard Play SP will produce improved picture and sound quality however LP will provide twice as much recording time as SP 6 Press RE...

Страница 24: ...o select the event that you wish to remove and replace Press b to delete the event 5 Use the PR TRK v V to enter the date of the pro gramme If you press ENTER OK before entering the date you may select one of the following automated recording features Press 1 or 2 to select then press ENTER OK to confirm DLY To record every day except Saturday and Sunday at the same time SU SA To record at the sam...

Страница 25: ...overlap If they do the earlier pro gramme will always be given priority Example Programme 1 is programmed to start at 16 00 and end at 17 00 Programme 2 is programmed to start at 16 30 and end at 17 30 In this case Programme 1 will be recorded in its entirety but only the last 30 minutes of Programme 2 will be recorded To watch a DVD while performing a timer recording press DVD to select DVD mode ...

Страница 26: ...n the audio setting is MONO Please note that when adjusting the tracking control Hi Fi stereo sound may revert to MONO Note When OFF is selected in NIC only mono sound will be output Blank Search The Blank Search enables you to locate the end of any recording Whenever a recording creates a blank con tent is recorded on the tape Press BLANK SEARCH in the stop mode and it rapidly advanced to find bl...

Страница 27: ...NAL on page 11 For the recording of an encoded station you do not have to control anything You just select the station and wait shortly until the decoding will start 1 Press VCR MENU i The main menu will appear on the TV screen Press F or G to select the DECODER Press ENTER OK 2 Press D or E to select ON When the decoder is connected to the AV2 socket OFF When another VCR is connected to the AV2 s...

Страница 28: ...yGuard you will not be able to record it using this unit See Copyright on page 2 for more details To record for a fixed length of time see One touch Timer Recording Copying from DVD to VCR You can copy the contents of a DVD to a VHS tape 1 Insert the disc you wish to copy into the DVD deck and close the disc tray 2 Insert a blank VHS video tape into the VCR deck 3 Find the place on the DVD from wh...

Страница 29: ...may set PBC to Off See PBC on page 20 Notes If parental control is set and the disc is not within the rating settings you must input the password See LOCK on page 21 DVDs may have a region code Your player will not play discs that have a region code different from your player The region code for this player is 2 two General Features Notes Unless stated otherwise all operations described use the re...

Страница 30: ...that you want to recall or clear 3 Press ENTER OK and playback starts from the marked scene Or Press CLEAR and the marker number is erased from the list 4 You can play any marker by inputting its number on the marker search menu Repeat You can repeat a title chapter all track on a disc Press REPEAT during playback to select a desired repeat mode DVD Video Discs Repeat Chapter Title Off Chapter rep...

Страница 31: ...s special features To use the disc menu press MENU Input the corresponding number or use the b B v V buttons to highlight your selection Then press ENTER OK Title Menu 1 Press TOP MENU If the current title has a menu the menu appears on the screen Otherwise the disc menu may appear 2 The menu offers features such as camera angles spoken language and subtitle options and chapters for the title 3 Pr...

Страница 32: ...y Keeping the exterior surfaces clean Do not use volatile liquids such as insecticide spray near the unit Do not leave rubber or plastic products in contact with the unit for a long period of time since they leave marks on the surface Cleaning the unit To clean the player use a soft dry cloth If the surfaces are extremely dirty use a soft cloth lightly moistened with a mild detergent solution Do n...

Страница 33: ...ysical format should be ISO 9660 If you record MP3 files using software that cannot create a file system eg Direct CD it is impossible to playback MP3 files We recommend that you use Easy CD Creator which creates an ISO 9660 file system File names should have a maximum of 8 letters and must incorporate an mp3 extension They should not contain special letters such as l etc The total number of conte...

Страница 34: ...ack the repeat playback will be cancelled Search 1 Press REW m or FWD M during playback 2 Press REW m or FWD M repeatedly to select the required speed X2 X4 and X8 backward or forward 3 To exit SEARCH mode press PLAY N Random 1 Press RANDOM during playback Random Playback begins immediately and Random appears on the menu screen 2 To return to normal playback press RANDOM repeatedly until Random di...

Страница 35: ... playback from programmed play back select a track of AUDIO CD or MUSIC list and then press PLAY N or ENTER OK Note When you play the programmed track the mark will disap pear then the program edit mode will disable Repeat Programmed Tracks 1 Press REPEAT when playing a disc The repeat icon appears 2 Press REPEAT to select a desired repeat mode Track repeats the current track All repeats all the t...

Страница 36: ...Press PAUSE STEP X C during slide show The player will now go into PAUSE mode 2 To return to the slide show press PLAY N or press PAUSE STEP X C again Moving to another File Press SKIP or or cursor b or B once while viewing a picture to advance to the next or previous file Zoom Use zoom to enlarge the photo image see page 30 To rotate picture Press v V during showing a picture to rotate the pictur...

Страница 37: ...5 Samoan 8377 Sanskrit 8365 Scots Gaelic 7168 Serbian 8382 Serbo Croatian 8372 Shona 8378 Sindhi 8368 Language Code Singhalese 8373 Slovak 8375 Slovenian 8376 Somali 8379 Spanish 6983 Sudanese 8385 Swahili 8387 Swedish 8386 Tagalog 8476 Tajik 8471 Tamil 8465 Tatar 8484 Telugu 8469 Thai 8472 Tibetan 6679 Tigrinya 8473 Tonga 8479 Turkish 8482 Turkmen 8475 Twi 8487 Ukrainian 8575 Urdu 8582 Uzbek 8590...

Страница 38: ...Tape is a rental or was recorded on another VCR Clock in DVD VCR is not set to correct time Timer has been programmed incorrectly indicator light does not appear after programming timer Correction Plug the power cord into the wall out let securely Refer to page 6 Insert a disc or tape Check that the disc or tape indicator in the display window is lit Select the appropriate video input mode on the ...

Страница 39: ...The remote control is too far from the DVD VCR This remote control use the same but tons for VCR and DVD functions ex PLAY Camcorder is off DVD VCR SOURCE SELECT is not set to AV1 or AV3 Correction Insert a playable disc Check the disc type and Regional code Place the disc with the playback side down Place the disc on the disc tray correctly inside the guide Clean the disc Cancel the Rating functi...

Страница 40: ... 0 dBm more than 10 kohms SCART 6 0 dBm more than 47 kohms RCA Video 1 0 V p p 75 ohms unbalanced SCART RCA RF IN PAL B G I I SECAM D K Outputs DVD Audio output digital audio 0 5 V p p 75 ohms RCA jack x 1 Audio output analog audio 2 0 Vrms 1 kHz 0 dB 600 ohms RCA jack L R x 1 Outputs VCR DVD Audio 6 0dBm less than 1 kohms SCART RCA Video 1 0V p p 75 ohms unbalanced SCART RCA Accessories RF 75 ohm...

Страница 41: ...1 47 ...

Отзывы: