background image

E

ng

lis

h

Introduction

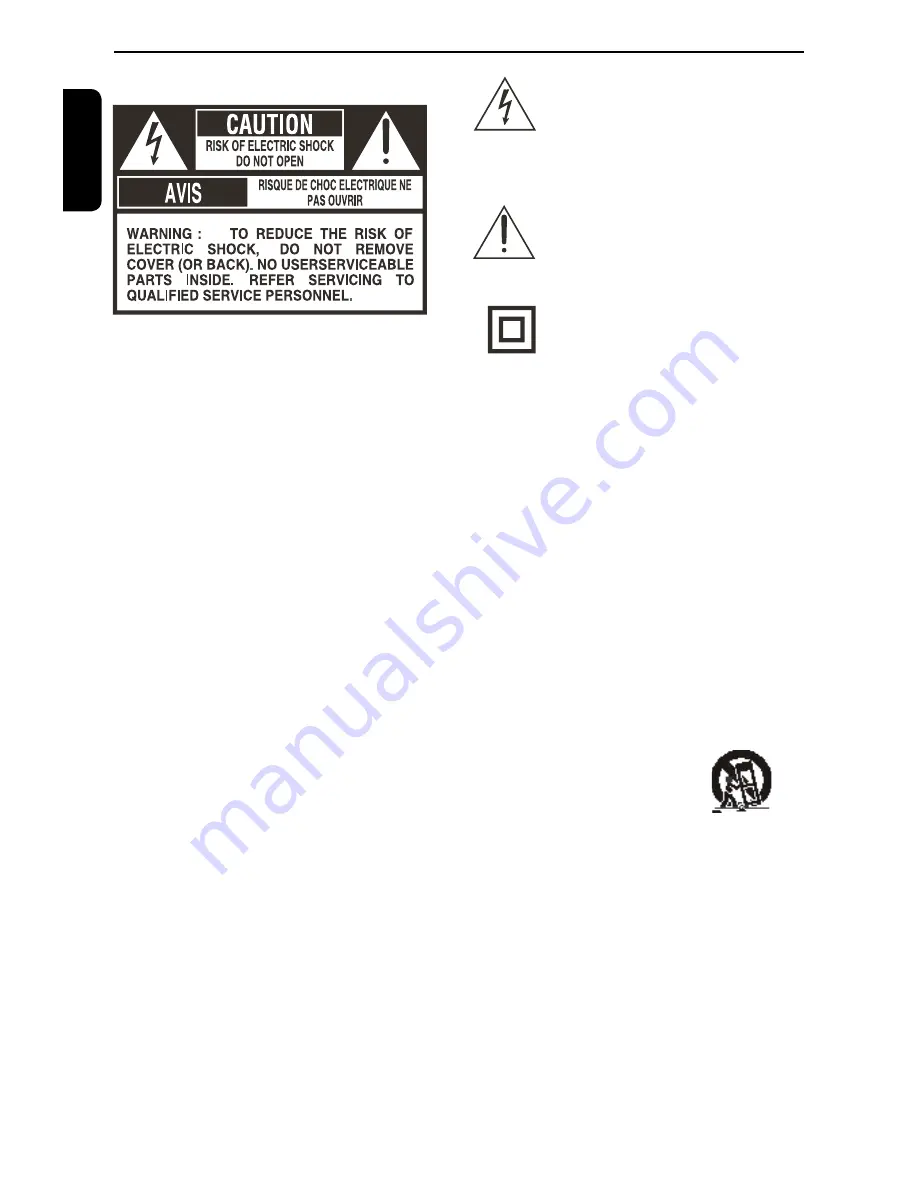
WARNING:

TO REDUCE THE RISK OF FIRE OR ELECTRIC SHOCK, DO NOT EXPOSE THIS APPLIANCE TO 

RAIN OR MOISTURE. DANGEROUS HIGH VOLTAGES ARE PRESENT INSIDE THE ENCLOSURE. 

DO NOT OPEN THE CABINET. REFER SERVICING TO QUALIFIED PERSONNEL ONLY.

CAUTION:

PLEASE READ AND OBSERVE ALL WARNINGS AND INSTRUCTIONS GIVEN IN THIS OWNER

'

 S

MANUAL  AND THOSE MARKED ON THE UNIT. RETAIN THIS BOOKLET FOR FUTURE REFERENCE.

Changes or modifications made to this equipment, not expressly approved by Toshiba, or parties authorized by 

Toshiba, could void the user

s authority to operate the equipment. 

1.  Read these instructions.

2.  Keep these instructions.

3.  Heed all warnings.

4.  Follow all instructions.

5.  Do not use this apparatus near water.

6.  Clean only with dry cloth.

7.  Do not block any ventilation openings. Install in accordance with the manufacturer’s instructions.

8.  Do not install near any heat sources such as radiators, heat registers, stoves, or other apparatus  (including ampli-

fiers) that produce heat.

9.  Protect the power cord from being walked on or pinched particularly at plugs, convenience receptacles, and the 

point where they exit from the apparatus.

10.  Only use attachments/accessories specified by the manufacturer.

11.  Use only with the cart, stand, tripod, bracket, or table specified by the manufacturer, or sold with 


the apparatus. When a cart is used, use caution when moving the cart/apparatus combination 


to avoid injury from tip-over.

12.  Unplug this apparatus during lightning storms or when unused for long periods of time.

13.  Refer all servicing to qualified service personnel. Servicing is required when the apparatus has been damaged in 

any way, such as power-supply cord or plug is damaged, liquid has been spilled or objects have fallen into the ap-

paratus, the apparatus has been exposed to rain or moisture, does not operate normally, or has been dropped.

14.  When you use headphones, keep the volume at a moderate level. If you use the headphones continuously at high 

volumes, it may cause hearing damage.

15.  Do not overload wall outlets; extension cords, or integral convenience receptacles as this can result in a risk of fire 

or electric shock.

16.  Apparatus shall not be exposed to dripping or splashing and no objects filled with liquids, such as vases, shall be 

placed on the apparatus.

17.  Keep your fingers well clear of the disc tray as it is closing. Neglecting to do so may cause serious personal injury.

18.  Do not place a heavy object on or step on the apparatus. The object may fall, causing serious personal injury and 

serious damage to the apparatus.

19.  Do not use a cracked , deformed, or repaired disc. These discs are easily broken and may cause serious personal 

injury and apparatus malfunction.

20.  If the apparatus should smoke or smell,immediately disconnect the power cord from the wall outlet. Wait until the 

smoke or smell stops, then ask your dealer for a check and repair. Neglecting to do so may cause fire.

21.  While it is thundering, do not touch the connecting cables or the apparatus.

22.  The apparatus includes lead, an ingredient of solder used on the PCB, which is a harmful substance to human and 

the environment.When disposing of this apparatus, follow the rules and regulations in your area.


The lightning flash with arrowhead 

symbol, within an equilateral triangle, is 

intended to alert the user to the presence 

of uninsulated 

'

dangerous voltage

'

 within 

the product

s enclosure that may be of 

sufficient magnitude to constitute a risk of 

electric shock to persons.


The exclamation point within an equila-

teral triangle is intended to alert the user 

to the presence of important operating 

and maintenance (servicing) instructions 

in the literature accompanying the appli-

ance.


The symbol for CLASS II (Double Insula-

tion)

SAFETY PRECAUTIONS

IMPORTANT SAFETY INSTRUCTIONS

Содержание SD-170EKB

Страница 1: ...SD 170EKB SD 170EKE ...

Страница 2: ...d to rain or moisture does not operate normally or has been dropped 14 When you use headphones keep the volume at a moderate level If you use the headphones continuously at high volumes it may cause hearing damage 15 Do not overload wall outlets extension cords or integral convenience receptacles as this can result in a risk of fire or electric shock 16 Apparatus shall not be exposed to dripping o...

Страница 3: ...cally stated that it is designed for unattended operation or has a stand by mode Switch off using the switch on the equipment and make sure that your family know how to do this Special arrangements may need to be made for infirm or handicapped people DON T continue to operate the equipment if you are in any doubt about it working normally or if it is damaged in any way switch off withdraw the main...

Страница 4: ... in standby mode To disconnect this equipment completely from the mains power pull out the power plug from the wall outlet The use of the symbol indicates that this product may not be treated as household waste By ensuring this product is disposed of correctly you will help prevent potential negative consequences for the environment and human health which could otherwise be caused by inappropriate...

Страница 5: ...ses due to the type of disc or condition of the recording If you are having trouble playing a certain disc remove the disc and try a different one Improperly formatted disc will not play on this DVD Player WARNING RISK OF ELECTRIC SHOCK Never attempt to service this product yourself Open ing and removing the covers may expose you to dangerous voltage or other hazards Failure to follow this WARNING...

Страница 6: ...aiwan Korea Australia New Zealand Latin America Russia and India regions China Calcos Islands Walls and Futuna Islands ALL ALL 5 6 Discs that can be played ALL 1 ALL ALL 2 3 Helpful hint before making or changing any connections make sure that all the devices are disconnected from the power outlet ...

Страница 7: ...ressive Scan feature 11 12 Setting the language 12 Playback from Disc Playable discs 12 13 Playback Feature Starting disc playback 13 Basic playback control 13 14 Operations for video playback DVD VCD SVCD 14 Selecting various repeat functions 14 15 Viewing the disc playback Information 15 Special DVD Features 15 Special VCD and SVCD Features 15 Playing JPEG Kodak picture CD 16 DVD Menu Options Us...

Страница 8: ...is DVD player through your TV use the audio cables white red to connect AU DIO OUT L R jacks of the DVD player to correspond ing AUDIO IN jacks on the TV cable supplied Using Component Video Jacks Y PB PR MAINS IMPORTANT The progressive scan video quality is only pos sible when using Y PB PR and a progressive scan TV is required A Use the component video cables red blue green to connect the DVD pl...

Страница 9: ...ctions SCART IN CVBS VIDEO IN or COMPONENT VIDEO IN depending on the options available on your TV B Use the audio cables white red to connect AUDIO OUT L R jacks of the DVD Player to the corres ponding AUDIO IN jacks on the stereo system Tip Analogue audio out will not have sound if DTS playback is selected Connecting to a Digital AV Receiver MAINS Receiver has a PCM Dolby Digital or MPEG decoder ...

Страница 10: ...onnects to CVBS Video input of a TV I 2ON STANDBY Turns the player on or switches it to standby mode Disc tray Place a disc here Display Shows information about the current status of the DVD Player IR Sensor Points the remote control towards this sensor MAINS Connects to a standard AC outlet Audio Out Left Right Connects to Audio input of a TV an amplifier receiver or stereo system COAXIAL Digital...

Страница 11: ...from point A to B on a disc 14 SLOW Do a slow forward 14 CLEAR Delete the mistyped entries or cancel some functions REMOTE SIGNAL EMITTER 11 Point remote control to the sensor on the front panel 2ON STANDBY 8 13 To switch the DVD player to ON or standby mode T SEARCH 15 Start playback from a designated point SETUP 11 17 Enters or exits the system setup menu 14 16 17 Cursor buttons for moving to th...

Страница 12: ...creen Usually these channels are between the lowest and highest channels and may be called FRONT A V IN or VIDEO See your TV s manual for more details Or you may go to channel 1 on your TV then press the Channel down button repeatedly until you see the Video In channel Or the TV remote control may have a button that chooses different video modes Or tune the TV until you can see the signal from the...

Страница 13: ... then press D Press to select a language and press OK Subtitle Audio and DVD menu language You can choose your own preferred language or soundtrack from audio subtitles and DVD menu languages If the language selected is not available on the disc the disc s default language will be used instead A Press SETUP B Press to select Language then press C Press to highlight one of the options below then pr...

Страница 14: ... CLOSE ç to open the disc tray D Place a disc onto the disc tray with the label facing up then press OPEN CLOSE For double sided discs load the side which you want to play facing up E Playback may start automatically If not press PLAY PAUSE If a disc menu appears on the TV see page 14 Using the disc menu If the parental control was activated for the insert ed disc you have to enter your four digit...

Страница 15: ...feature or item Use or number buttons on the remote then press OK to start playback To access or remove the menu Press MENU on the remote Zooming In This function allows you to enlarge the picture on the TV screen and to pan through the enlarged picture A During playback press ZOOM repeatedly to display the picture with different scales Use to pan through the enlarged picture Playback will continu...

Страница 16: ...layback skips to the selected title chapter track time Playback Feature Angle When Angle information appears on the screen press ANGLE button on the remote control repeatedly to switch between different angles Playback will go to the selected angle Special DVD Features Playing a Title A Press TITLE The disc title menu appears on the TV screen B Use or number buttons 0 9 to select a play option C P...

Страница 17: ...ckwise by 90º Tip It may not be possible to play certain JPEG disc due to the configuration and characteristics of the disc or condition of the recording Helpful hint The operating features described here might not be possible for certain discs Always refer to the instructions supplied with the discs Playing JPEG Kodak picture CD IMPORTANT You have to turn on your TV and set to the correct Video I...

Страница 18: ...n screen with out distortion This DVD Player setup is carried out via the TV enabling you to customise the DVD player to suit your particular requirement Using the Language setup menu A Press SETUP on the remote control The system setup menu appears OSD Language Subtitle Audio DVD Menu English Auto English English Language Video Audio Misc Rating B Press to select Language then press C Press to se...

Страница 19: ...teps D G The setup menu appears Brightness 0 Contrast 0 Tint 0 Color 0 D Press to highlight one of the following options Brightness Increase the value to brighten the picture or vice versa Choose zero 0 for average setting Contrast Increase the value to sharpen the picture or vice versa Choose zero 0 to balance the contrast Tint Increase the value to darken the picture or vice versa Choose zero 0 ...

Страница 20: ...o disc with Dolby Digital 5 1 bitstream DVD Menu Options Using the Rating setup menu A Press SETUP on the remote control The system setup menu appears Parental Control 8 Aduit Set Password Language Video Audio Misc Rating B Press to select Rating then press C Press to select an item then press to access Example Parental Control The options for the selected item appears If the selection in the menu...

Страница 21: ...d 0000 If you forget your old four digit password enter the default password 0000 C Press OK again to enter the new four digit password The new four digit password will now take effect Enter New Password D Press OK to confirm Using the Misc Miscellaneous setup menu A Press SETUP on the remote control The system setup menu appears Use Default Settings Language Video Audio Misc Rating B Press to sel...

Страница 22: ... video output Y 1 0 p p 75 Ω negative sync pin jack x 1 P B P R 700 mV p p 75 Ω pin jack x 2 Audio output SCART 2 0 rms 680 Ω SCART socket x 1 Audio output COAXIAL DIGITAL 0 5 V p p 75 Ω pin jack x 1 Audio output ANALOG 2 0 V rms 680 Ω pin jacks L R x 1 Supplied Accessories Audio Video cable OPEN CLOSE DISPLAY 1 2 3 6 5 4 7 8 9 10 0 T SEARCH SETUP MENU RETURN TITLE OK F R F F PREV NEXT STEP STOP P...

Страница 23: ... a small amount of picture distortion may appear depending on the disc being played back This is not malfunction May be caused by View Mode Setting see page 17 Set to Original for normal viewing Connect DVD Player directly to the TV Make sure the disc is compatible with the DVD player Ensure that the DVD Player s setting is set to match that of the disc and your TV Adjust the volume Check that the...

Страница 24: ...sounds as realistic as pos sible by converting even compressed Dolby Digital and MPEG audio to PCM Region code Regions associate discs and players with particular areas of the world This unit will only play back discs that have compatible region codes You can find the region code of your unit by looking on the rear panel Some discs are compatible with more than one region or all regions Sampling f...

Отзывы: