– 13 –
Installation Manual
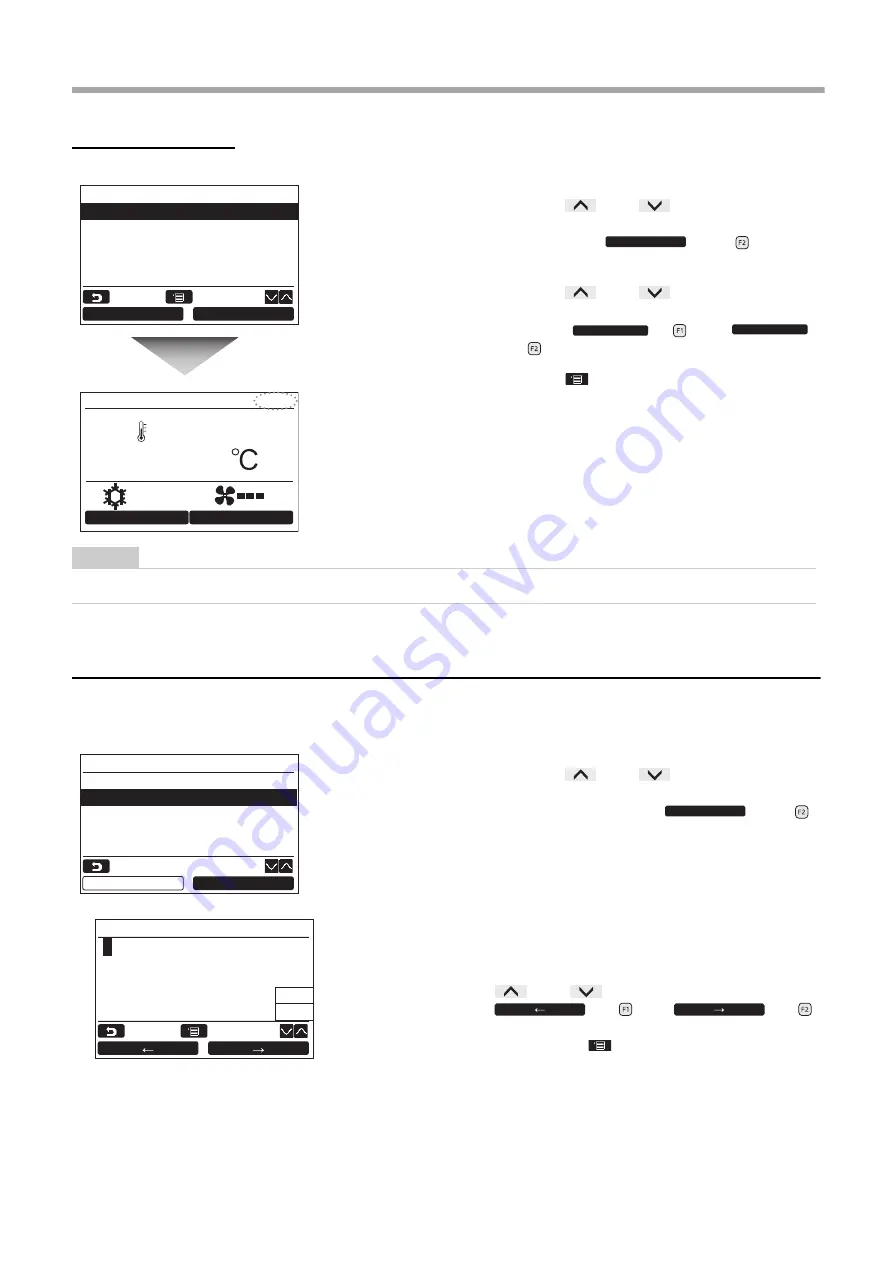
To adjust the clock
2. Name of room
Set the name of the room or place where the remote controller is installed. (Operations of the air conditioner are
possible without this setting.)
1
Push the [
∧
] / [
∨
] button to select
“1. Clock” on the “Initial setting” screen,
then push the “
Set” [
F2]
button.
2
Push the [
∧
] / [
∨
] button to select
the Year, Month, Day, and time.
Push the “
-” [
F1] / “
+” [
F2] button to set the value.
3
Push the [
MENU] button.
The screen returns to the “Initial setting” screen.
The clock display appears on the upper right of the
screen.
• The clock display blinks if the clock setting has
been reset due to power failure or other cause.
NOTE
The available date range is from January 1
st
, 2021 to December 31
st
, 2099.
1
Push the [
∧
] / [
∨
] button to select
“2. Name of room” on the “Initial setting”
screen, then push the “
Set” [
F2] button.
2
Set the name of the remote controller.
Enter the characters of the name in the screen
(1).
Move the cursor to select the character with the
[
∧
] / [
∨
] button and
“
←
” [
F1] / “
→
” [
F2] button (the selected character is highlighted),
then push the [
MENU] button.
Name of the remote controller appears.
Up to 16 characters can be entered for Name of
room.
Clock
Day
Month
Year
Hour
Minute
01
01
2021
00
00
–
+
Return
Fix
Set
–
+
24
Room A
12:00
Mode
Fan Speed
Cool
Initial setting(1/3)
1.Clock
2.Name of room
3.Screen contrast
4.Backlight
5.Key lock
Set
Return
Set
Return
Set
Fix
Del
A
B C D E
F G H I J
K L M N O
P Q R S T
UVWXY
Z & / : ·
a b c d e
f g h i j
k l m n o
p q r s t
u v w x y
z–+!?
1 2 3 4 5
6 7 8 9 0
. # ()
(1)
Содержание RBC-AMSU51 -EN
Страница 34: ... 33 Installation Manual ...
Страница 35: ... 34 Installation Manual EN ...
Страница 36: ...DEB9109102 ...


