– 59 –
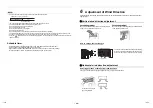
Setting and releasing the horizontal air flow direction
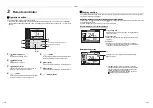
To swing louvers horizontally
To stop the louver swing
1
Push the [
MENU] button.
2
Push the [
∧
] / [
∨
] button to select
“1. Wind direction” on the menu screen,
then push the “
Set” [ F2]
button.
1
Push the “
Swing ON” [ F2]
button on the “Wind direction” screen.
2
Push the [
CANCEL] button.
The screen returns to the menu screen.
1
Push the “
Swing OFF” [ F2]
button on the “Wind direction” screen.
Push the “
Swing OFF” [
F2]
button to stop swinging. The louver stops in the
position where the button is pushed.
2
Push the [
CANCEL] button.
The screen returns to the menu screen.
Set
Return
Menu
(1/3)
1.Wind direction
2.Individual louver
3.Louver setting
4.Off reminder timer
5.Schedule timer
Set
Wind direction
Return
Swing OFF
Louver
*
* When the vertical louver is stopped,
“
Swing ON” is displayed.
Swing ON
Swing ON
Wind direction
Return
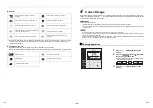
Swing ON
Louver
*
* When the vertical louver is swinging,
“
Swing OFF” is displayed.
Swing OFF
Swing OFF
Swing OFF
NOTE
• If pointing louvers downward for cooling, dew may form on the surface of the cabinet or louvers and may drop down.
• If pointing louvers horizontally for heating, the room temperature may be uneven.
• Do not change the louver manually during swing operation. Doing so may cause a trouble of the louver related parts.
To change the louver position, stop an air conditioner and confirm its operation completely stops.
• For group control status, refer to the "Group control".
Group control
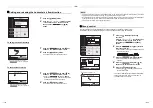
“Swing operation” can be set individually for each unit when the operation is in group control.
Operate the remote controller according to the procedure below before setting each function.
1
Push the [
MENU] button during
operation.
Push the [
∧
] / [
∨
] button to select
“1. Wind direction” on the menu screen,
then push the “
Set” [ F2]
button.
2
Push the “
unit” [ F1] button to
select the unit to set.
The selected unit changes as follows each time
the button is pushed:
3
Push the “
Set” [
F2] button.
The setting display for the selected unit
appears.
4
Push the “
Swing ON” [ F2]
button on the “Wind direction” screen.
5
Push the [
CANCEL] button.
Pushing the [
CANCEL] button returns to
the previous screen.
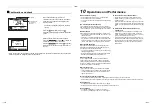
• The number (address) of the selected unit appears
on the upper left of the screen, unless “ALL” is
selected for the unit selection.
Return
Unit
Set
Wind direction
1 – 1
1 – 2
1 –
–
3
1
–
4
1 –
–
–
–
5
ALL
–
–
Set
Unit
1-1
1-2
ALL
Set
Swing ON
Return
Unit
Set
Wind direction
1 – 1
1 – 2
1 – 3
1
–
4
1 –
–
–
5
ALL
–
–
–
–
Return
Wind direction
Swing ON
Louver
1–1
Address is displayed here.
117-EN
118-EN


