background image

iv

ENGLISH

FR

ANÇAIS

DEUTSC

H

IT

ALIANO

ESP

AÑOL

ǼȁȁǾȃǿȀǹ

POR

TUGUÊS

РУ

ССКИЙ

 ЯЗЫК

SVENSKA

ACESSÓRIOS ................................................................................ 1
PRECAUÇÕES DE SEGURANÇA................................................. 1
NOMES DAS PEÇAS ..................................................................... 3
NOMES E FUNÇÕES DOS INDICADORES E CONTROLOS DA 

UNIDADE INTERIOR................................................................... 3

TELECOMANDO E FUNÇÕES ...................................................... 4
NOMES E FUNÇÕES DOS INDICADORES DO 

TELECOMANDO ......................................................................... 5

PREPARAÇÃO E VERIFICAÇÃO ANTES DA UTILIZAÇÃO......... 5
UTILIZAÇÃO DO TELECOMANDO ............................................... 7
OPERAÇÃO AUTOMÁTICA........................................................... 8
OPERAÇÃO AUTOMÁTICA (COMUTAÇÃO AUTOMÁTICA) ....... 8
OPERAÇÃO DO AQUECIMENTO/REFRIGERAÇÃO ................... 9
OPERAÇÃO A SECO..................................................................... 9
OPERAÇÃO SÓ VENTOINHA (Apenas nos modelos só de 

refrigeração)................................................................................. 9

OPERAÇÃO PURE ...................................................................... 10
OPERAÇÃO DE ALTA POTÊNCIA .............................................. 11
OPERAÇÃO DO TEMPORIZADOR ............................................. 11
OPERAÇÃO PRÉ-CONFIGURADA/MEMÓRIA ........................... 13
AJUSTE DA DIRECÇÃO DO FLUXO DE AR .............................. 14
FUNÇÃO DE REPOSIÇÃO EM MARCHA AUTOMÁTICA........... 15
COMO FUNCIONA O AR CONDICIONADO ............................... 16
OPERAÇÃO TEMPORÁRIA ........................................................ 17
OPERAÇÃO DE LIMPEZA ........................................................... 17
MANUTENÇÃO ............................................................................ 18
MANUTENÇÃO ESPECIAL ......................................................... 20
OPERAÇÃO E DESEMPENHO DO AR CONDICIONADO.......... 23
RESOLUÇÃO DE PROBLEMAS.................................................. 24
ESPECIFICAÇÕES ...................................................................... 27
RESOLUÇÃO DE PROBLEMAS (TELECOMANDO) .................. 28

• As unidades interiores 

RAS-B10GKVP-E

,

RAS-B13GKVP-E

 e 

RAS-B16GKVP-E

 podem ligar-se a uma unidade exterior única ou 

a uma unidade exterior múltipla.

Para fazer a ligação a uma unidade única

Utilize as combinações indicadas abaixo.
RAS-B10GKVP-E/RAS-10GAVP-E
RAS-B13GKVP-E/RAS-13GAVP-E
RAS-B16GKVP-E/RAS-16GAVP-E

Para fazer a ligação a uma unidade múltipla

Consulte as especificações fornecidas com o sistema de 
unidades exteriores múltiplas.

• As unidades interiores 

RAS-M10GKCVP-E

,

RAS-M13GKCVP-E

 e 

RAS-M16GKCVP-E

 podem ligar-se a um sistema de unidades 

exteriores múltiplas. Consulte as especificações fornecidas com o 
sistema de unidades exteriores múltiplas.

Modelos com bomba de calor 

(

RAS-B10GKVP-E

,

RAS-B13GKVP-E

 e 

RAS-B16GKVP-E

)

Estas unidades interiores podem executar operações de 
refrigeração e de aquecimento.

Modelos só de refrigeração 

(

RAS-M10GKCVP-E

,

RAS-M13GKCVP-E

 e 

RAS-M16GKCVP-E

)

Estas unidades interiores são modelos só de refrigeração e não 
podem executar operações de aquecimento.

TILLBEHÖR.................................................................................... 1
SÄKERHETSFÖRESKRIFTER ...................................................... 1
DELARNAS NAMN......................................................................... 3
NAMN OCH FUNKTIONER FÖR INNEDELENS INDIKATORER 

OCH KONTROLLER.................................................................... 3

FJÄRRKONTROLLEN OCH DESS FUNKTIONER........................ 4
NAMN OCH FUNKTIONER FÖR FJÄRRKONTROLLENS 

INDIKATORER............................................................................. 5

FÖRBEREDELSE OCH KONTROLL FÖRE ANVÄNDNING ......... 5
ANVÄNDA FJÄRRKONTROLLEN ................................................. 7
AUTOMATISK DRIFT..................................................................... 8
AUTOMATISK DRIFT (AUTOMATISK VÄXLING) ......................... 8
KYLNING/VÄRMNING ................................................................... 9
TORKNING..................................................................................... 9
ENDAST FLÄKT (endast enbart kylande modeller) ....................... 9
PURE-FUNKTIONEN ................................................................... 10
DRIFT MED HÖG EFFEKT .......................................................... 11
TIMER .......................................................................................... 11
MINNE/FÖRINSTÄLLNING .......................................................... 13
AUTOMATISK ÅTERSTART ........................................................ 14
SÅ HÄR FUNGERAR LUFTKONDITIONERINGEN..................... 16
TILLFÄLLIG HANTERING ............................................................ 17
RENGÖRING ............................................................................... 17
VANLIGT UNDERHÅLL ............................................................... 18
SPECIELLT UNDERHÅLL ........................................................... 20
LUFTKONDITIONERINGENS DRIFT OCH PRESTANDA .......... 23
FELSÖKNING .............................................................................. 24
SPECIFIKATIONER ..................................................................... 27
FELSÖKNING (fjärrkontroll) ......................................................... 28

• Innedelarna 

RAS-B10GKVP-E

,

RAS-B13GKVP-E

 och 

RAS-B16GKVP-E

 kan anslutas till en enkel utedel eller utedel för 

flera system.

För anslutning av enkel enhet

Ska följande kombinationer användas.
RAS-B10GKVP-E/RAS-10GAVP-E
RAS-B13GKVP-E/RAS-13GAVP-E
RAS-B16GKVP-E/RAS-16GAVP-E

För anslutning av flera system

Ska du läsa de specifikationer som levereras med utedelen.

• Innedelarna 

RAS-M10GKCVP-E

,

RAS-M13GKCVP-E

 och 

RAS-M16GKCVP-E

 kan anslutas till en utedel för flera system. Läs 

de specifikationer som levereras med utedelen.

Värmepumpmodeller 

(

RAS-B10GKVP-E

,

RAS-B13GKVP-E

 och 

RAS-B16GKVP-E

)

Dessa innedelar kan utföra både kylning och värmning.

Endast kylande modeller 

(

RAS-M10GKCVP-E

,

RAS-M13GKCVP-E

 och 

RAS-M16GKCVP-E

)

Dessa innedelar är endast kylande modeller som inte kan utföra 
värmning.

ÍNDICE/INNEHÅLL

PORTUGUÊS

Combinações da unidade interior e exterior

Nomes dos modelos de unidade interior

SVENSKA

Om kombinationer av inne- och utedelar

Om innedelarnas modellnamn

Содержание RAS-B10GKVP-E

Страница 1: ... RAS M14GACV E RAS M18GACV E Thank you for purchasing this TOSHIBA Air Conditioner Please read this owner s manual carefully before using your Air Conditioner Avant tout merci d avoir porté votre choix sur un climatiseur TOSHIBA Veuillez lire attentivement ce mode d emploi avant de mettre en service le climatiseur Wir danken Ihnen für den Kauf dieses TOSHIBA Klimageräts Lesen Sie die Bedienungsanl...

Страница 2: ... INDICATEURS DE LA TELECOMMANDE 5 PREPARATION ET VERIFICATION AVANT UTILISATION 5 UTILISATION DE LA TELECOMMANDE 7 FONCTIONNEMENT AUTOMATIQUE 8 FONCTIONNEMENT AUTOMATIQUE PERMUTATION AUTOMATIQUE 8 REFROIDISSEMENT CHAUFFAGE 9 DESHUMIDIFICATION 9 VENTILATEUR SEULEMENT modèles refroidissement seulement 9 MODE PURE 10 MODE Hi POWER 11 MODE MINUTERIE 11 MODE MEMOIRE PREREGLAGE 13 REGLAGE DU SENS DU FLU...

Страница 3: ...REZZA 1 NOME DEI COMPONENTI 3 NOMI E FUNZIONI DEGLI INDICATORI DELLE SPIE E DEI COMANDI SULL UNITÀ INTERNA 3 FUNZIONAMENTO DEL TELECOMANDO 4 NOMI E FUNZIONI DEGLI INDICATORI E DELLE SPIE SUL TELECOMANDO 5 OPERAZIONI PRELIMINARI E CONTROLLO PRIMA DELL USO 5 USO DEL TELECOMANDO 7 FUNZIONAMENTO AUTOMATICO 8 FUNZIONAMENTO AUTOMATICO COMMUTAZIONE AUTOMATICA 8 RAFFREDDAMENTO RISCALDAMENTO 9 DEUMIDIFICAZ...

Страница 4: ...ȉǹ 1 ȆȇȅĭȊȁǹȄǼǿȈ ǹȈĭǹȁǼǿǹȈ 1 ȅȃȅȂǹȉȅȁȅīǿǹ ȂǼȇȍȃ 3 ȅȃȅȂǹȉȅȁȅīǿǹ Ȁǹǿ ȁǼǿȉȅȊȇīǿǼȈ ǼȃǻǼǿȄǼȍȃ Ȁǹǿ ȋǼǿȇǿȈȉǾȇǿȍȃ ȉǾȈ ǼȈȍȉǼȇǿȀǾȈ ȂȅȃǹǻȅȈ 3 ȉǾȁǼȋǼǿȇǿȈȉǾȇǿȅ Ȁǹǿ ȅǿ ȁǼǿȉȅȊȇīǿǼȈ ȉȅȊ 4 ȅȃȅȂǹȉȅȁȅīǿǹ Ȁǹǿ ȁǼǿȉȅȊȇīǿǼȈ ǼȃǻǼǿȄǼȍȃ Ȉȉȅ ȉǾȁǼȋǼǿȇǿȈȉǾȇǿȅ 5 ȆȇȅǼȉȅǿȂǹȈǿǹ Ȁǹǿ ǼȁǼīȋȅȈ Ȇȇǿȃ ǹȆȅ ȉǾ ȋȇǾȈǾ 5 ȋȇǾȈǾ ȉǾȁǼȋǼǿȇǿȈȉǾȇǿȅȊ 7 ǹȊȉȅȂǹȉǾ ȁǼǿȉȅȊȇīǿǹ 8 ǹȊȉȅȂǹȉǾ ȁǼǿȉȅȊȇīǿǹ ǹȊȉȅȂǹȉǾ ǼȃǹȁȁǹīǾ 8 ȁǼǿȉȅȊȇīǿǹ ȌȊȄǾȈ ĬǼȇȂǹȃȈǾȈ 9 ȁǼǿȉȅȊ...

Страница 5: ...odem executar operações de refrigeração e de aquecimento Modelos só de refrigeração RAS M10GKCVP E RAS M13GKCVP E e RAS M16GKCVP E Estas unidades interiores são modelos só de refrigeração e não podem executar operações de aquecimento TILLBEHÖR 1 SÄKERHETSFÖRESKRIFTER 1 DELARNAS NAMN 3 NAMN OCH FUNKTIONER FÖR INNEDELENS INDIKATORER OCH KONTROLLER 3 FJÄRRKONTROLLEN OCH DESS FUNKTIONER 4 NAMN OCH FUN...

Страница 6: ...ульт ДУ 28 Внутренние блоки RAS B10GKVP E RAS B13GKVP E и RAS B16GKVP E могут быть подсоединены к одиночному наружному блоку или к многоэлементному наружному блоку Для подсоединения к одиночному блоку Используйте следующие комбинации RAS B10GKVP E RAS 10GAVP E RAS B13GKVP E RAS 13GAVP E RAS B16GKVP E RAS 16GAVP E Для подсоединения к многоэлементному блоку обращайтесь к техническим характеристикам ...

Страница 7: ...hing is wrong it can cause machine failure electric shock fire and so on Do not spill water or other liquid on the indoor unit If the unit is wet it can cause an electric shock Do not attempt to move or repair the unit by yourself Since there is high voltage inside the unit you can get an electric shock when removing the cover and main unit Always ask the dealer to move the air conditioner for re ...

Страница 8: ...e Do not touch the operation buttons with wet hands Doing so could cause an electric shock Do not place any combustion device in a place where it is directly exposed to wind from the air conditioner Doing so could cause incomplete combustion When the air conditioner will not be used for an extended period of time turn off the main switch or the circuit breaker for added safety Disconnecting from t...

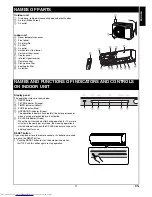
Страница 9: ... c TIMER indicator Yellow d PURE indicator Blue e OPERATION indicator Green The operation indicators flash rapidly five times per second when a safety protection feature is activated f S CLEAN indicator Green When the unit shuts down after having operated for 10 or more minutes in the cooling or dry mode the cleaning operation is started automatically and the S CLEAN indicator on the unit s displa...

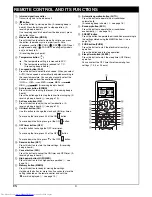
Страница 10: ...r times To move up the time press of the ON button To move down the time press of the ON button i OFF timer button OFF Use this button to change the OFF timer times To move up the time press of the OFF button To move down the time press of the OFF button j Reserve button SET Press this button to store the time settings A receiving beep is heard k Cancel button CLR Press this button to cancel the O...

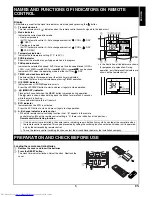
Страница 11: ...during operation The mark is shown when holding down the button for more than 3 seconds while the mark is flashing Press another button to turn off the mark i ECO indicator Indicates when the ECO is activated Press the ECO button to start and press it again to stop operation j A B change indicator remote control When the remote control switching function is set B appears in the remote control disp...

Страница 12: ...control the clock panel displays AM 0 00 and flashes a ON button Press the ON button to set the current time Each press of the ON button changes the time in one minute increments Holding down the ON button changes the time in ten minute increments b SET button Press the SET button The current time is displayed and the clock starts Adjusting the clock a CLOCK button Press the CLOCK button The clock...

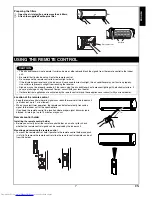
Страница 13: ... remote control To mount the remote control hold it parallel to the remote control holder and push it in fully To remove the remote control slide the remote control upwards and out from the holder USING THE REMOTE CONTROL CAUTION The air conditioner will not operate if curtains doors or other objects block the signals from the remote control to the indoor unit Be careful that liquids do not spill ...

Страница 14: ...n you set the air conditioner to A mode or switch over from AUTO operation because of a change in settings the air conditioner automatically selects cooling heating heat pump models only or fan only operation depending on the room temperature see page 16 Start a button Press this button to start the air conditioner b Mode select button MODE Select A c Temperature button Set the desired temperature...

Страница 15: ...ndicator green on the display panel of the indoor unit turns on and operation starts after approximately 3 minutes Stop button Press this button again to stop the air conditioner Start a button Press this button to start the air conditioner b Mode select button MODE FAN ONLY c Fan speed button FAN Select one of AUTO LOW LOW MED MED HIGH The OPERATION indicator green on the display panel of the ind...

Страница 16: ...ON The air ionizer starts in conjunction with air purifying operation During the air purifying operation a small amount of ozone is produced and you might notice the smell When the air flow is automatic it changes between LOW and MED LOW operation is performed when the indoor air becomes clean During operation the position of the vertical air flow louvers may change if the room temperature is low ...

Страница 17: ...e in one hour increments b SET button Press the SET button to set the timer The timer time is displayed and the timer starts c CLR button Press the CLR button to cancel the timer setting Once you select timer operation mode the settings are saved in the remote control Thereafter the air conditioner will start operating under the same conditions as if you pressed the or button of the remote control...

Страница 18: ...conditioner may stop operating Daily combined timer setting the ON and OFF timers simultaneously and activating every day This feature is useful when you want to use the combined timers at the same time every day Setting combined TIMER 1 Press the ON button to set the ON timer 2 Press the OFF button to set the OFF timer 3 Press the SET button 4 After step 3 an arrow mark or flashes for about 3 sec...

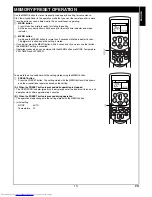
Страница 19: ...led Operation modes which can be stored with the MEMO button are MODE Temperature FAN TIMER and Hi POWER To operate the air conditioner with the setting stored using the MEMO button a PRESET button Press the PRESET button The setting stored with the MEMO button will be shown and the air conditioner operates based on the setting A When the PRESET button is pressed while operation is stopped The OPE...

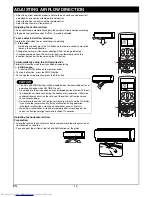
Страница 20: ...nge the swing direction press the FIX button Adjusting the horizontal air flow Preparation Grasp the lever on the horizontal air flow louver and move them to adjust the air flow direction as required You can adjust the air flow at the left and right locations of the grilles ADJUSTING AIR FLOW DIRECTION CAUTION The FIX and SWING buttons will be disabled when the air conditioner is not operating inc...

Страница 21: ...use the remote control to restart the air conditioner During the subsequent operation the green indicator is turned on The auto restart operation will not accept a command if timer operation with the remote control is activated After restarting the air conditioner by the AUTO RESTART OPERATION the louver swing AUTO operation does not resume To cancel the auto restart operation proceed as follows R...

Страница 22: ...operating condition ECO operation When you press the ECO button during cooling heating or A operation the air conditioner starts the following operation The fan speed is controlled automatically Cooling operation In the minimum operation zone where the air conditioner is operated at minimum capacity overcooling is prevented by raising the temperature setting The room temperature is thus regulated ...

Страница 23: ...10 seconds to start the cooling operation Cleaning operation This function is used to dry the inside of the air conditioner to reduce the growth of mold etc inside the air conditioner When the unit shuts down after having operated for 10 or more minutes in the cooling or dry mode the cleaning operation is started automatically and the S CLEAN indicator on the unit s display panel turns on Cleaning...

Страница 24: ...it up slightly and then pull it downward to take it out from the filter holder 3 Use a vacuum cleaner to remove the dust from the filters or wash them with water After washing the air filters dry them in the shade USUAL MAINTENANCE WARNING Before you clean the air conditioner be sure to turn off the circuit breaker or main power switch CAUTION Use a dry cloth to wipe the indoor unit and remote con...

Страница 25: ...tallic scrubbing brush or other hard brushes Use of such hard objects will cause scratches on the surface of the grille and the metal coating to peel off If extremely dirty clean the air inlet grille with a neutral kitchen detergent and rinse it off with water 3 Wipe off the water from the air inlet grille and dry it 4 Fit the left and right arms of the air inlet grille to the shafts on the two si...

Страница 26: ...cuum cleaner to remove the dirt before washing with water Also be sure to always use clean water when washing If dirty water is used the debris in the water can adhere to the filter Do not rub the filter surface In the final of the water washing be sure to always rinse the filter with clean water If the filter is particularly dirty add a neutral detergent at the standard concentration and then rin...

Страница 27: ... turns on during the night the air conditioner can still be used until the morning without a problem but be sure to perform cleaning as soon as possible Preparation 1 Turn off the power supply 1 Open the air inlet grille Lift up the air inlet grille until it clicks into place 2 Grasp the left and right handles of the air filter and lift up slightly and then pull downward to remove the filter from ...

Страница 28: ...l the way in Press both ends of the plasma pure filter in the direction of c until the protrusions on both sides of the plasma pure filter are completely inserted into the holders Press in the plasma pure filter until the protrusions on both sides are completely inserted into the holders If installation is incomplete the FILTER indicator orange may light 6 Attach the air filter and then close the ...

Страница 29: ...ubjected to snow drifts accumulation of leaves or other seasonal debris It is important that the air flow of the outdoor unit is not blocked as this will result in reduced heating or cooling performance During the heating mode and at sub zero temperatures the water drained off the outdoor unit as a result of the automatic defrost may accumulate and freeze It is important that adequate drainage or ...

Страница 30: ...ollowing points Recheck Inoperative The power main switch is turned off The circuit breaker is activated to cut off the power supply The main power fuse has blown The electric current has stopped The batteries in the remote control used up The ON timer is set As a protective mechanism for the air conditioner it does not operate for three minutes immediately after restarting operation or turning on...

Страница 31: ...p models Water is drained from the outdoor unit Frost sometimes forms on the outdoor unit during heating operation In that case the unit automatically performs defrosting for 2 to 10 minutes for improving the heating efficiency In the defrosting operation the airflow from both the indoor and outdoor units stops A hiss sound is heard when the flow of the refrigerant is changed for defrosting The wa...

Страница 32: ...hen it is dirty When the power is turned on or the air conditioner is stopped the vertical air louvers may make a rattling sound or shuttling sound Some parts may expand or shrink due to temperature fluctuations and this can result in a slapping sound When the refrigerant is flowing a hissing sound or gurgling sound can result A buzzing sound is sometimes made from the air ionizer A hissing sound ...

Страница 33: ... 3 2 4 2 Cooling current A AMP 0 15 2 48 2 26 0 15 4 25 3 89 Cooling power W WATT 30 520 30 890 Heating current A AMP 0 15 3 25 2 96 0 15 4 52 4 13 Heating power W WATT 30 680 30 1 060 Dimensions Width mm 790 780 790 780 Height mm 250 550 250 550 Depth mm 215 290 215 290 Net weight kg 9 35 9 37 Type Reverse cycle Split type Model Indoor Unit Outdoor Unit RAS B16GKVP E RAS 16GAVP E Power supply 220...

Страница 34: ...splay are not shown after a short time Check whether the timer operation is over when the OFF TIMER is shown on the display The air conditioner stops since the setting time has elapsed The TIMER display turns off after a certain period of time Check whether the timer operation has started when the ON TIMER is shown on the display When the time reaches the time setting for the ON timer operation th...

Страница 35: ... Stromschlag Feuer usw führen Verschütten Sie kein Wasser oder andere Flüssigkeiten auf dem Innenraumgerät Wenn das Gerät nass ist können elektrische Schläge verursacht werden Versuchen Sie weder das Gerät zu bewegen noch selbst zu reparieren Da sich im Gerät Hochspannung befindet können Sie beim Abnehmen des Deckels und des Hauptgeräts einen elektrischen Schlag bekommen Wenden Sie sich immer an I...

Страница 36: ...nzureichende Belüftung kann ein Sauerstoffmangel entstehen Berühren Sie die Bedienungstasten nicht mit nassen Händen Es besteht die Gefahr elektrischer Schläge Stellen Sie kein Brenngerät an einem Ort auf an dem es direkt dem Luftstrom des Klimageräts ausgesetzt ist Dies könnte eine unvollständige Verbrennung zur Folge haben Wenn das Klimagerät über längere Zeit nicht verwendet wird schalten Sie z...

Страница 37: ...ge c Anzeige TIMER gelb d Anzeige PURE blau e Anzeige OPERATION grün Wenn eine Sicherheitsfunktion aktiviert wird blinken die Betriebsanzeigen in kurzen Intervallen auf fünfmal pro Sekunde f S CLEAN Anzeige grün Wenn sich das Gerät nach mindestens 10 Minuten Kühl oder Entfeuchtungsbetrieb abschaltet wird der Reinigungsbetrieb automatisch gestartet und die S CLEAN Anzeige am Anzeigefeld des Geräts ...

Страница 38: ...nktion siehe Seite 14 h Taste Einschalt Timer ON Mit dieser Taste verstellen Sie die Uhr und Einschaltzeit des ON Timers Zum Einstellen einer späteren Zeit drücken Sie auf der Taste ON Zum Einstellen einer früheren Zeit drücken Sie auf der Taste ON i Taste Ausschalt Timer OFF Mit dieser Taste verstellen Sie die Ausschaltzeit des OFF Timers Zum Einstellen einer späteren Zeit drücken Sie auf der Tas...

Страница 39: ...rd eingeblendet wenn Sie die Taste während die Anzeige blinkt länger als 3 Sekunden gedrückt halten Drücken Sie eine andere Taste um die Anzeige wieder auszublenden i Anzeige ECO Zeigt an wenn der Sparbetrieb eingeschaltet ist Mit der Taste ECO starten Sie den Sparbetrieb Durch erneutes Drücken der Taste stoppen Sie ihn wieder j A B Änderungsanzeige der Fernbedienung Wenn die Schaltfunktion der Fe...

Страница 40: ...wird als Uhrzeit AM 0 00 0 00 Uhr morgens blinkend angezeigt a Taste ON Stellen Sie mit der Taste ON die aktuelle Zeit ein Durch jede Betätigung der Taste ON ändert sich die Zeiteinstellung in Minutenschritten Wenn Sie die Taste ON gedrückt halten ändert sich die Zeiteinstellung in 10 Minuten Schritten b Taste SET Drücken Sie die Taste SET Die aktuelle Uhrzeit wird angezeigt und die Uhr beginnt zu...

Страница 41: ...nbedienung parallel zur Halterung und drücken Sie diese vollständig hinein Um die Fernbedienung aus der Halterung zu entfernen schieben Sie sie nach oben aus der Halterung heraus HANDHABUNG DER FERNBEDIENUNG VORSICHT Das Klimagerät reagiert nicht wenn Vorhänge Türen oder andere Gegenstände die Signale der Fernbedienung zum Innenraumgerät blockieren Achten Sie darauf dass keine Flüssigkeit in die F...

Страница 42: ...halten Sie das Klimagerät wieder aus Wenn das Klimagerät in der Betriebsart A läuft oder wegen einer Einstellungsänderung von AUTO in diese Betriebsart wechselt wird automatisch je nach Raumtemperatur der Kühl Heizbetrieb nur bei Modellen mit Wärmepumpe oder Nur Ventilatorbetrieb ausgewählt siehe Seite 16 Start a Taste Mit dieser Taste schalten Sie das Klimagerät ein b Betriebsarten Auswahltaste M...

Страница 43: ...ngezeigt Die OPERATION Anzeige grün am Innenraumgerät leuchtet auf und das Gerät beginnt nach ca 3 Minuten zu laufen Stop Taste Wenn Sie diese Taste erneut drücken schalten Sie das Klimagerät wieder aus Start a Taste Mit dieser Taste schalten Sie das Klimagerät ein b Betriebsarten Auswahltaste MODE NUR VENTILATOR c Ventilator Geschwindigkeitstaste FAN Wählen Sie AUTO NIEDRIG NIEDRIG MITTEL MITTEL ...

Страница 44: ...bs bilden sich geringe Mengen Ozon was Sie möglicherweise am Geruch wahrnehmen Wenn der Luftstrom auf Automatik eingestellt ist wechseln die Einstellungen zwischen NIEDRIG und MITTEL Der Betrieb läuft auf NIEDRIG wenn die Innenraumluft sauber ist Die Stellung der Luftstromklappe für vertikale Luftverteilung kann sich bei niedriger Raumtemperatur während des Betriebs verändern Wenn Sie das Frontpan...

Страница 45: ...Taste OFF gedrückt halten ändert sich die Zeiteinstellung in Stundenschritten b Taste SET Bestätigen Sie mit der Taste SET die Timer Einstellungen Die Timer Zeit wird angezeigt und der Timer beginnt zu laufen c Taste CLR Löschen Sie mit der Taste CLR die Timer Einstellungen Wenn der Timer Betrieb aktiviert ist werden die entsprechenden Einstellungen in der Fernbedienung gespeichert Sobald Sie die ...

Страница 46: ...er Betrieb nicht ausgeführt Unter Umständen schaltet sich das Klimagerät auch ganz aus Kombinierte Timer Einstellung für den täglichen Betrieb gleichzeitige Einstellung des ON und OFF Timers zum täglichen Ein und Ausschalten Diese Funktion ist sinnvoll wenn das Gerät täglich zu denselben Zeiten ein und wieder ausschalten soll Kombinierte TIMER Einstellung 1 Drücken Sie die Taste ON um den ON Timer...

Страница 47: ...n wird die MEMORY Einstellung aufgehoben Mit der Taste MEMO können die Betriebsarten MODE Temperatur FAN TIMER und Hi POWER gespeichert werden Einschalten des Klimageräts mit der unter der MEMO Taste gespeicherten Einstellung a Taste PRESET Drücken Sie die Taste PRESET Die mit der Taste MEMO gespeicherte Einstellung wird angezeigt und das Klimagerät läuft entsprechend dieser Einstellung A Wenn Sie...

Страница 48: ...hwenkrichtung drücken Sie die Taste FIX Einstellen des horizontalen Luftstroms Vorbereitung Stellen Sie die horizontalen Luftstromleitlamellen mit dem Hebel von Hand entsprechend ein Sie können den Luftstrom auf der linken oder rechten Seite der Gitter einstellen REGULIERUNG DER LUFTSTROMRICHTUNG VORSICHT Die Tasten FIX und SWING lassen sich nicht bedienen wenn das Klimagerät außer Betrieb ist auc...

Страница 49: ...sschalten soll schalten Sie es mit der Fernbedienung wieder ein Während des folgenden Vorgangs leuchtet die grüne Anzeige Die Neustartautomatik wird nicht ausgeführt wenn ein Timer Betrieb über die Fernbedienung aktiviert ist Wenn das Klimagerät durch die NEUSTARTAUTOMATIK eingeschaltet wurde wird die automatische Bewegung der Luftstromklappe nicht ausgeführt Zum Ausschalten der Neustartautomatik ...

Страница 50: ...tisch umgeschaltet Sparbetrieb ECO Wenn Sie im Kühl oder Heizbetrieb oder im A Betrieb die Taste ECO drücken reagiert das Klimagerät folgendermaßen Die Ventilatorgeschwindigkeit wird automatisch geregelt Kühlbetrieb Im minimalen Betriebsbereich wenn die Leistung des Geräts auf ein Minimum beschränkt ist wird eine zu starke Kühlung verhindert indem die voreingestellte Temperatur angehoben wird Die ...

Страница 51: ...das Klimagerät nicht auf die Fernbedienung Halten Sie die Taste 10 Sekunden lang gedrückt um den Kühlbetrieb zu starten Reinigungsbetrieb Diese Funktion wird verwendet um das Innere des Klimageräts zu trocknen und damit Schimmelbildung usw zu verhindern Wenn sich das Gerät nach mindestens 10 Minuten Kühl oder Entfeuchtungsbetrieb abschaltet wird der Reinigungsbetrieb automatisch gestartet und die ...

Страница 52: ...eraus 3 Entfernen Sie den Staub mit einem Staubsauger aus den Filtern oder waschen Sie die Filter mit Wasser Lassen Sie die Luftfilter nach dem Waschen im Schatten trocken REGELMÄSSIGE WARTUNG WARNUNG Bevor Sie das Klimagerät reinigen schalten sie unbedingt den Schutzschalter oder Netzschalter aus VORSICHT Verwenden Sie zum Abwischen des Innenraumgeräts und der Fernbedienung ein trockenes Tuch Wen...

Страница 53: ...ie Verwendung von derart harten Gegenständen entstehen Kratzer auf der Oberfläche des Gitters und die Metallbeschichtung löst sich ab Wenn das Lufteinlassgitter stark verschmutzt ist reinigen Sie es mit einem neutralen Haushaltsreiniger und spülen Sie es mit Wasser ab 3 Wischen Sie das Wasser vom Lufteinlassgitter ab und trocknen Sie das Gitter 4 Setzen Sie den rechten und linken Riegel des Luftei...

Страница 54: ...nem Staubsauger bevor Sie der Filter mit Wasser reinigen Achten Sie darauf dass Sie nur sauberes Wasser zum Reinigen verwenden Wenn Sie verschmutztes Wasser verwenden können sich Schmutzrückstände am Filter absetzen Scheuern Sie nicht die Filteroberfläche Achten Sie darauf dass Sie den Filter abschließend immer mit sauberem Wasser ausspülen Wenn der Filter stark verschmutzt ist reinigen Sie ihn mi...

Страница 55: ... Wenn die Anzeige nachts aufleuchtet kann das Klimagerät noch problemlos bis zum Morgen laufen Dann sollten sie allerdings sobald wie möglich reinigen Vorbereitung 1 Schalten Sie die Stromzufuhr ab 1 Öffnen Sie das Lufteinlassgitter Heben Sie das Lufteinlassgitter an bis er einrastet 2 Fassen Sie den Luftfilter rechts und links an den Griffen und heben Sie ihn leicht an Ziehen Sie ihn dann nach un...

Страница 56: ... schieben Sie sie in Richtung b vollständig ein Drücken Sie beide Enden des Plasmafilters in Richtung c bis die Nippel an beiden Seiten des Plasmafilters vollständig in die Halterungen eingesetzt sind Drücken Sie den Plasmafilter hinein bis die Nippel an beiden Seiten vollständig in die Halterungen eingesetzt sind Wenn der Plasmafilter nicht richtig eingebaut ist leuchtet ggf die FILTER Anzeige or...

Страница 57: ...rom des Außengeräts darf auf keinen Fall behindert werden da sich andernfalls die Heiz oder Kühlleistung verschlechtert Während des Heizbetriebs und bei Temperaturen unter dem Gefrierpunkt kann sich das beim automatischen Abtauen aus dem Außengerät ablaufende Wasser ansammeln und gefrieren Stellen Sie unbedingt sicher dass das Wasser ausreichend ablaufen oder versickern kann Stromausfall Bei einem...

Страница 58: ...Punkte Erneute Überprüfung Außer Betrieb Der Netzschalter ist ausgeschaltet Der Schutzschalter wurde ausgelöst und die Stromversorgung ist unterbrochen Die Hauptsicherung ist durchgebrannt Stromausfall im Gerät Die Batterien der Fernbedienung sind verbraucht Der ON Timer ist eingestellt Eine Schutzfunktion sorgt dafür dass das Klimagerät erst 3 Minuten nach einem Neustart oder Einschalten des Netz...

Страница 59: ...n Schutzschalter auf ON Das Außengerät vereist während des Heizbetriebs Modelle mit Wärmepumpe Wasser läuft aus dem Außengerät ab Im Heizbetrieb kann die Außeneinheit unter Umständen vereisen In diesem Fall schaltet sich die Abtauautomatik für 2 bis 10 Minuten ein um die Heizleistung zu optimieren Während des Abtauens schaltet sich der Luftstrom des Innenraum und Außengeräts aus Ein zischendes Ger...

Страница 60: ...r verschmutzt ist Wenn der Strom eingeschaltet oder das Klimagerät ausgeschaltet wird kann die Luftstromklappe für vertikale Luftverteilung ein rasselndes oder ratterndes Geräusch von sich geben Einige Teile dehnen oder ziehen sich möglicherweise aufgrund von Temperaturschwankungen zusammen wodurch ein Knacken verursacht werden kann Der Kältemittelumlauf kann der Grund für ein zischendes oder gluc...

Страница 61: ...0 520 30 890 Stromaufnahme im Heizbetrieb A AMP 0 15 3 25 2 96 0 15 4 52 4 13 Leistungsaufnahme im Heizbetrieb W WATT 30 680 30 1 060 Abmessungen Breite mm 790 780 790 780 Höhe mm 250 550 250 550 Tiefe mm 215 290 215 290 Nettogewicht kg 9 35 9 37 Typ Splitklimagerät 2 Wege Wärmepumpe Modell Innenraumgerät Außengerät RAS B16GKVP E RAS 16GAVP E Stromversorgung 220 240 V 50 Hz 220 V 60 Hz Kühlvermöge...

Страница 62: ...ATOR einstellen Das Display schaltet sich aus Art der Störung Aktion Beschreibung Die Anzeigen auf dem Display werden nach kurzer Zeit ausgeblendet Überprüfen Sie ob der Timerbetrieb beendet ist und OFF TIMER auf dem Display angezeigt wird Das Klimagerät schaltet sich aus weil die eingestellte Zeit abgelaufen ist Die TIMER Anzeige erlischt nach einer gewissen Zeit Überprüfen Sie ob der Timerbetrie...

Страница 63: ...E075003445 a ...
Отзывы: