DISASSEMBLY INSTRUCTIONS
B2-3
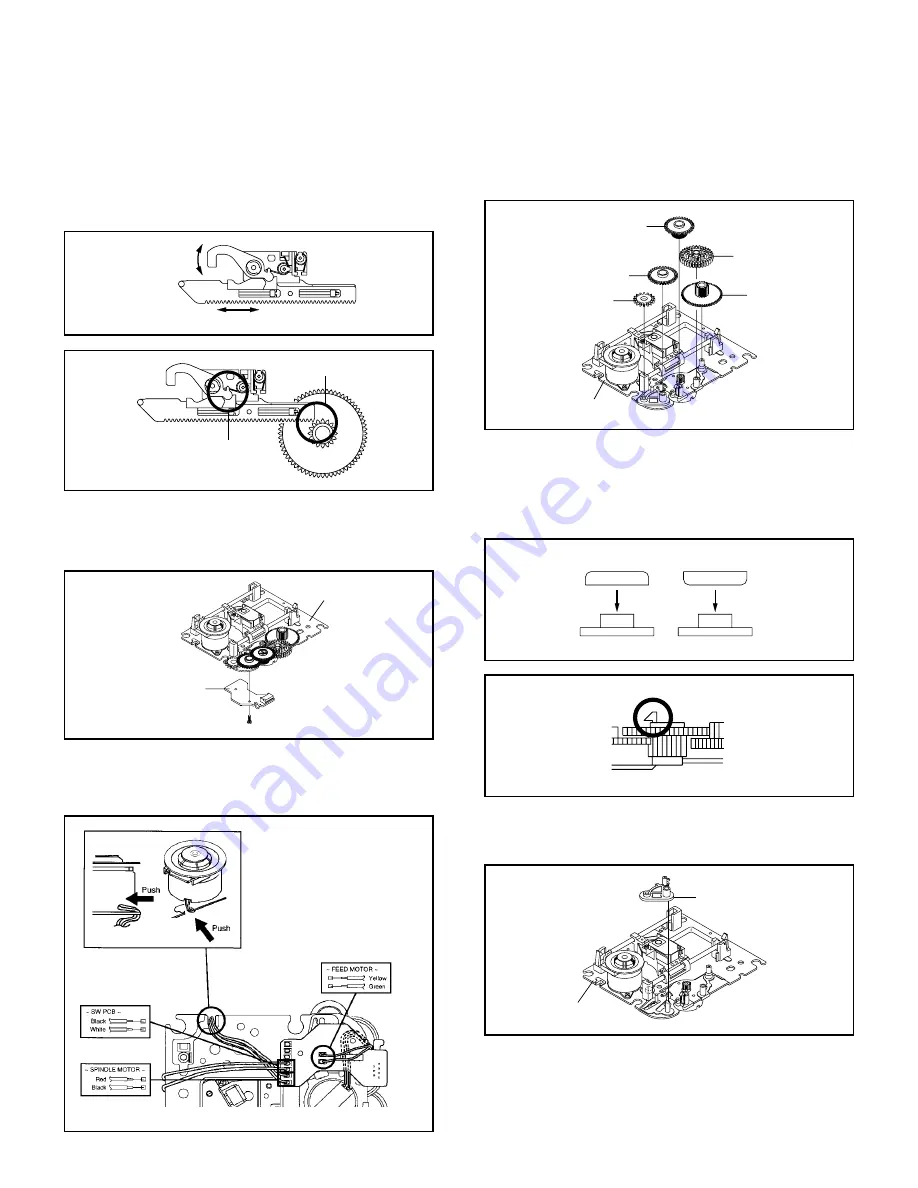
2-9: GEAR (Refer to Fig. 2-9-A)
1.
2.
Unlock the support
1
.
Remove the Middle Gear 1/2/3, Idler Gear and Feed Gear.
Middle Gear 2
Middle Gear 1
Middle Gear 3
Feed Gear
Idler Gear
Main Chassis Ass’y
Fig. 2-9-A
NOTE
1.
2.
In case of the Idler Gear installation, install correctly as
Fig. 2-9-B.
When installing the Middle Gear 2, check if the Middle
Gear 2 is locked correctly as Fig. 2-9-C.
Fig. 2-9-B
Fig. 2-9-C
NOTE
1.
2.
After the assembly of the Rack Feed, check if the Rack
Feed 1/2 is moving smoothly. (Refer to Fig. 2-7-B)
In case of the Rack Feed Ass’y installation, install cor-
rectly as Fig. 2-7-C.
Moving smoothly
Moving smoothly
Fig. 2-7-B
Should not be engaged.
Check the position of
the Rack Feed Lever.
Fig. 2-7-C
2-8: RELAY PCB ASS’Y (Refer to Fig. 2-8-A)
1.
2.
Remove the screw
1
.
Remove the Relay PCB Ass’y.
Main Chassis Ass’y
Relay PCB Ass’y
• Screw Torque: 4
±
0.5kgf•cm
1
Fig. 2-8-A
[OK]
Idler Gear
Idler Arm
[NG]
Idler Gear
Idler Arm
Check Lock
Middle Gear 2
NOTE
1. When installing the wire of the Relay PCB, install it
correctly as Fig. 2-8-B.
Fig. 2-8-B
2-10: IDLER ARM (Refer to Fig. 2-10)
Remove the Idler Arm.
1.
Fig. 2-10
Idler Arm
Main Chassis Ass'y
Содержание MD13P1C
Страница 1: ...SERVICE MANUAL COLOR TELEVISION DVD VIDEO PLAYER MD13P1C FILE NO 140 200419 ...
Страница 61: ...MECHANICAL EXPLODED VIEW PACKING DIAGRAM I1 3 125 122 124 124 124 124 123 127 128 BL001 TM101 123 123 123 130 ...
Страница 70: ...TOSHIBA CORPORATION 1 1 SHIBAURA 1 CHOME MINATO KU TOKYO 105 8001 JAPAN ...


