INSTALLATION
Page 11
Use two wrenches to
torque the connection to
prevent applying excessive
force to the terminal, which
can damage the frame.
GROUND CONNECTIONS
The contactor must be grounded in accordance
with the requirements of the National Electrical
Code, Article 250 or applicable local standards.
Proper grounding
connections must be made
to the contactor before
incoming power is applied.
It is very important that the contactor be
adequately grounded to protect the operator
from injury in the event of short circuits or other
abnormal occurrences and to ensure that the
metal parts of the equipment, other than live
parts, remain at ground potential.
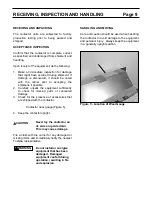
The ground terminal is located on the left side
of the contactor as shown in Figure 6. To make
the ground connection, first remove the
fastening M8 hex head bolt and crimp-on
terminal (provided with the contactor) and crimp
the terminal to the end of the ground wire.
Figure 6 - Ground Connection Location
The ground wire should be 8 AWG or larger.
Then reattach the terminal using the same bolt
previously removed and torque to 9-11 ft-lb
(120-150 kgf-cm).
CONTROL CIRCUIT CONNECTIONS
Hazardous Voltage. Turn off
and lock out all primary and
control circuit power
sources prior to performing
this pre-energization check.
Applying the specified
power to the drive unit will
immediately activate the
coils and close the
contactor.
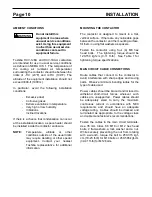
Control circuit wiring is connected to the
contactor by means of a drive unit (black plastic
box) located on the right side frame (Figure 7).
Either AC or DC supply voltage may be
connected to the drive unit.
The standard operating voltage for the control
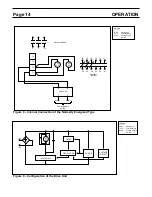
circuit is 100-240V AC/DC. Figure 8 in the
OPERATION section of this manual show the
internal connections of the drive unit, closing
coils, and auxiliary switch.
Figure 7 - Drive Unit
WARNING
CAUTION
WARNING


