1.PREPARATION
Components 11
1 PREPARATION
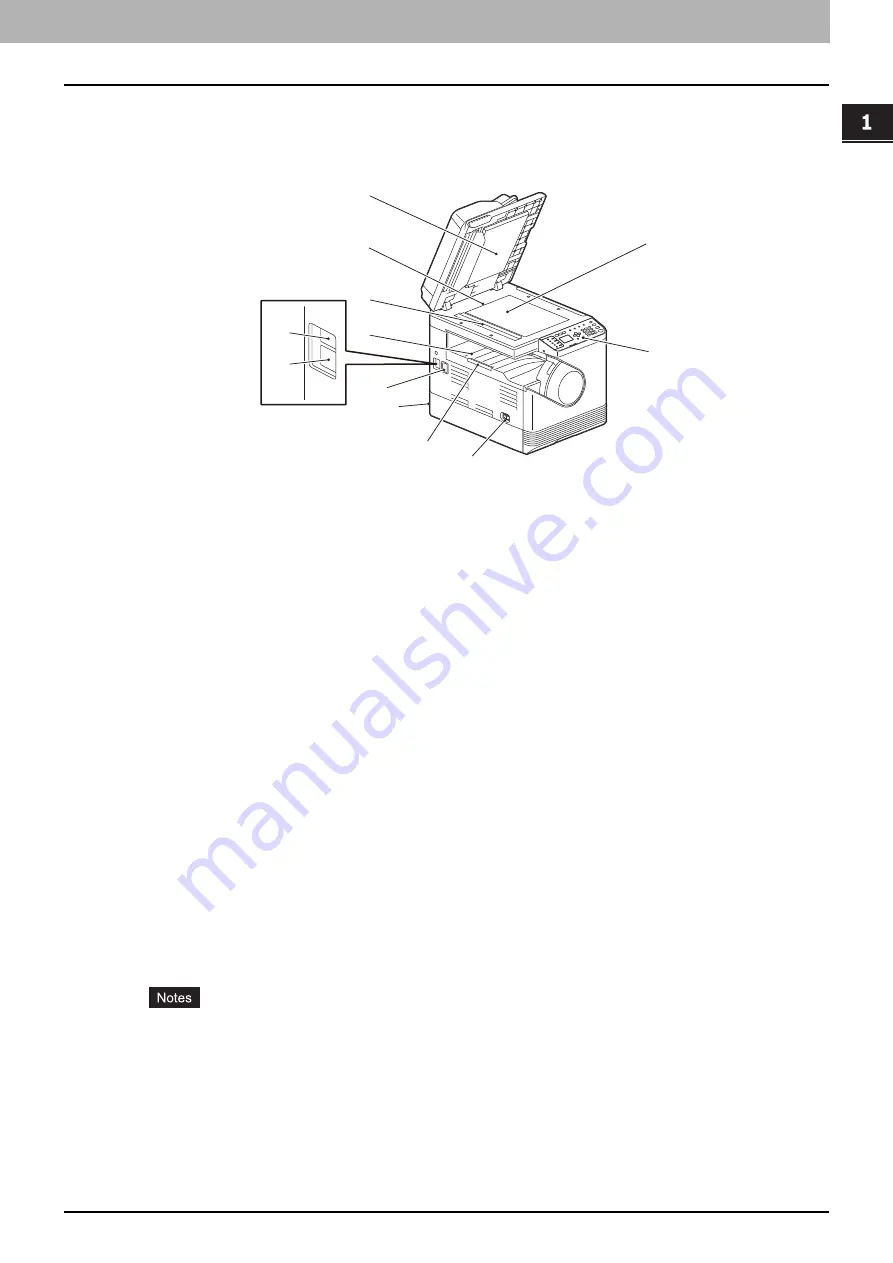
Left side
1. Original glass
Place the book-type originals and special paper such as overhead transparencies or tracing paper, as well as plain
paper.
2. Control panel
Make settings to use the various functions on this equipment.
3. Power switch
Turns the power ON or OFF.
P.16 “Preparation 1 - Turning Power ON”
4. Paper exit stopper
Stops large paper from sliding out of the receiving tray.
When you use the stopper, pull out it until you hear a click sound.
5. AC-IN terminal (rear)
Connect the power cable supplied with the equipment.
6. FAX port (Only for e-STUDIO2505F)
Connect to a phone line to use the FAX functions.
For details on how to use the Fax functions, see the following manual.
Fax Guide
7. Network interface connector
Use this connector when connecting this equipment to a network.
8. USB terminal (4-pin)
Connect to your PC using a commercially available USB cable.
Use a USB2.0 Hi-Speed certified cable: USB cable supporting the USB2.0 Hi-Speed mode (480 Mbps of
transfer speed) certified by the USB Implementers Forum.
Connect the equipment with a PC directly by the USB cable. When it is connected with a PC via a USB hub, the
equipment may not be recognized.
9. Receiving tray
7
8
6
9
10
12
5
3
1
2
4
11
Содержание e-Studio 2505F
Страница 1: ...MULTIFUNCTIONAL DIGITAL SYSTEMS User s Guide ...
Страница 6: ......
Страница 10: ...8 CONTENTS ...
Страница 30: ......
Страница 147: ...7 MAINTENANCE AND INSPECTION Regular Cleaning 146 Cleaning charger 147 ...
Страница 150: ......
Страница 160: ...158 INDEX ...
Страница 161: ...DP 2505H DP 2505F OME120208B0 ...


