background image

2. PRINTER SETUP 

ENGLISH VERSION EO1-33097 

2.7 Loading the Media


E2-11 

2.7 Loading the Media 

(Cont.)


5.

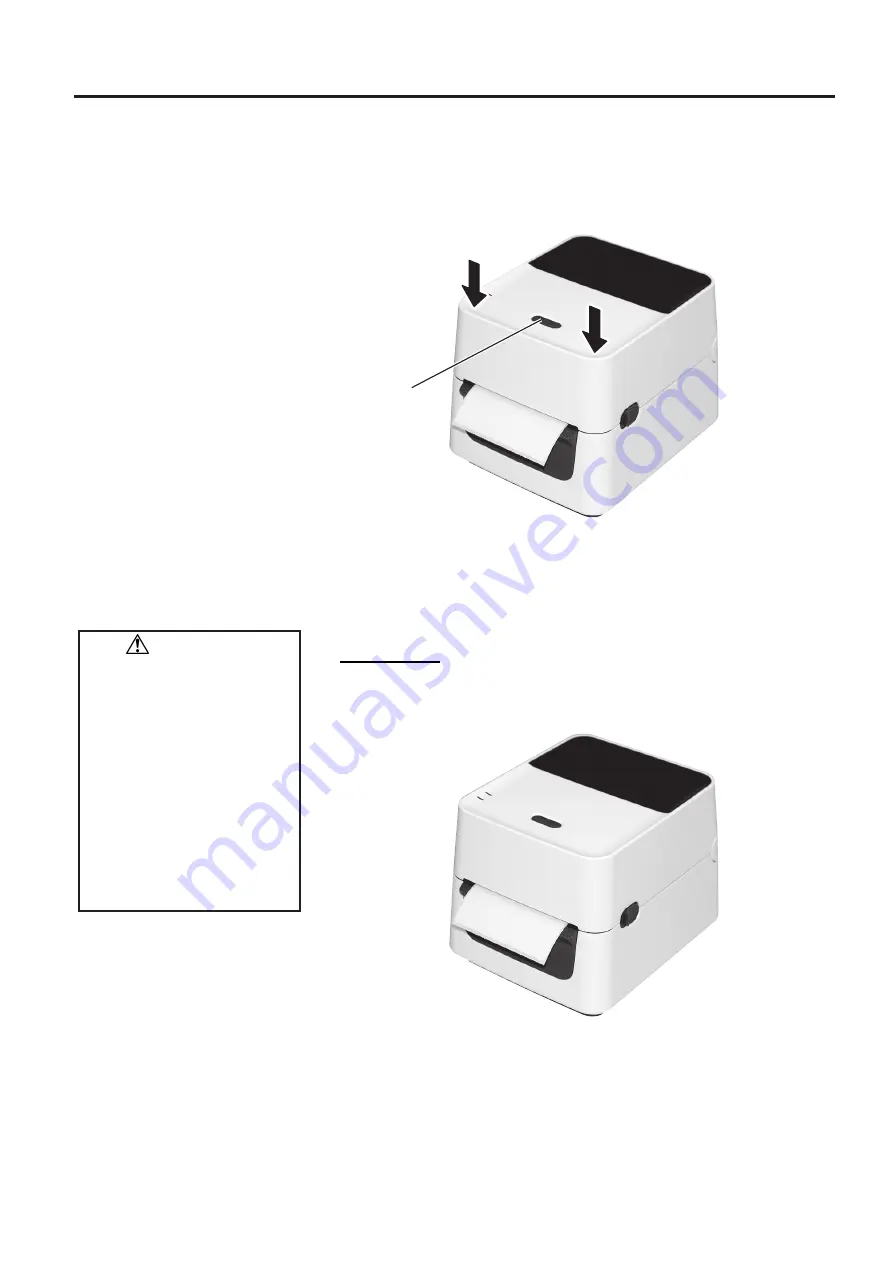
 Close the Top Cover, then press the [FEED] button to check the media 

feeds correctly. 


There are three issue modes available for this printer.   


Batch mode: 

In the batch mode, the media is continuously printed and fed until the 

number of prints specified in the issue command has been printed. 


CAUTION! 

To separate the printed 
media from the printer in 
batch mode, be sure to tear 
the media off at the Media 
Outlet or cut the media past 
the Strip Plate. If you tear 
the media off at the Print 
Head by mistake, be sure to 
feed one label (10 mm or 
more) with the FEED Button 
prior to the next issue. 
Failure to do this may cause 
a paper jam. 

FEED Button 

Содержание B-FV204D-F-QM-R

Страница 1: ...TOSHIBA Barcode Printer B FV4D SERIES Owner s Manual ...

Страница 2: ...duct In a domestic environment this product may cause radio interference in which case the user may be required to take adequate measures Following information is only for India The use of the symbol indicates that this product may not be treated as household waste By ensuring this product is disposed of correctly you will help prevent potential negative consequences for the environment and human ...

Страница 3: ...following two conditions 1 this device may not cause harmful interference and 2 this device must accept any interference received including interference that may cause undesired operation Any changes or modifications not expressly approved by the grantee of this device could void the user s authority to operate the equipment RF EXPOSURE WARNING This equipment must be installed and operated in acco...

Страница 4: ...ion for Use This product communicates with other devices by radio Depending on the installation location orientation environment etc its communication performance may deteriorate or devices installed near by may be affected Bluetooth and Wireless LAN devices operate within the same radio frequency range and may interfere with one another If you use Bluetooth and Wireless LAN devices simultaneously...

Страница 5: ... the AC voltage specified on the rating plate as this may cause fire or electric shock Do not plug in or unplug the power cord with wet hands as this may cause electric shock If the machine share the same electrical outlet with any other appliance that consumes a large amount of power the voltage will fluctuate widely each time these appliances operate Be sure to provide an exclusive outlet for th...

Страница 6: ... STORE the paper or ribbons where they might be exposed to direct sunlight high temperatures high humidity dust or gas Ensure the printer is operated on a level surface Any data stored in the memory of the printer could be lost during a printer fault Try to avoid using this equipment on the same power supply as high voltage equipment or equipment likely to cause mains interference Unplug the machi...

Страница 7: ... Closing the Top Cover E2 6 2 7 Loading the Media E2 7 2 8 Media Sensor Calibration Self Print Test and Dump Mode Utilities E2 15 2 8 1 Media Sensor Calibration E2 15 2 8 2 Self Print Test and Dump Mode E2 16 3 MAINTENANCE E3 1 3 1 Cleaning E3 1 3 1 1 Print Head E3 1 3 1 2 Sensors E3 2 3 1 3 Platen Roller E3 2 3 1 4 Media Housing E3 3 3 2 Care Handling of the Media E3 4 4 TROUBLESHOOTING E4 1 4 1 ...

Страница 8: ...A TEC CORPORATION The contents of this manual may be changed without notification Please refer to your local Authorized Service representative with regard to any queries you may have in this manual Centronics is a registered trademark of Centronics Data Computer Corp Windows is a registered trademark of Microsoft Corporation ...

Страница 9: ...ce provided for this printer does not support bi directional communications Easy to use The printer mechanism is designed to allow very easy operation and easy access for maintenance Flexible hardware Sharp clear print can be produced by an 8 dots mm 203 dpi in the B FV4D GS print head at speeds up to 152 4 mm sec 6 inches sec or an 11 8 dots mm 300 dpi in the B FV4D TS print head at speeds up to ...

Страница 10: ...HAR France UTE Spain AEE China CCC Power Cord Instruction 1 For use with 100 125 Vac mains power supply please select a power cord rated Min 125V 10A 2 For use with 200 240 Vac mains power supply please select a power cord rated Min 250V 3 Please select a power cord with the length of 2m or less 4 The power cord plug connected to the AC adapter must be able to be inserted into an ICE 320 C14 inlet...

Страница 11: ...5 Appearance 1 5 1 Dimensions 1 5 2 Front View The parts and units shown and named in this section are used for descriptions in the following chapters W 183 8 7 2 x D 226 2 8 9 x H 166 0 6 5 Dimensions in mm inches FEED Button Media Outlet LED 1 LED 2 Media View Window ...

Страница 12: ...ter WARNING The print head becomes very hot during printing Do not touch the print head or touch around it directly after printing By doing so you may get burnt Lock Release Portions Paper Slot CAUTION To avoid injury be careful not to trap your fingers in the Paper Slot while opening or closing the Top Cover Media Roll Holders Print Head Platen Roller Media Guides Media Sensor ...

Страница 13: ...lock is open if the printer power is on Green Unlit Stand by Green S Unlit Printing is temporarily stopped paused Green F Unlit Communicating with a host Green Green Writing data to the flash or USB memory Green Green M The Flash ROM on the CPU board or USB memory is being initialized Orange Green A paper jam occurred Orange Red The media has ended Orange Red F The media has ended while the print ...

Страница 14: ...g on the inside of the printer or when cleaning the printer For best results and longer printer life use only TOSHIBA TEC CORPORATION recommended media Refer to the Supply Manual Store the media in accordance with the specifications This printer mechanism contains high voltage components therefore you should never remove any of the covers of the machine as you may receive an electrical shock Addit...

Страница 15: ...N Refer to Section 2 3 When the printer is connected to a host computer it is good practice to turn the printer ON before turning on the host computer and to turn OFF the host computer before turning off the printer 1 To turn ON the printer power press the power switch as shown in the diagram below Note that is the power ON side of the switch 2 As the printer powers on LED 1 and 2 will lite first ...

Страница 16: ...2 is extinguished 2 To turn OFF the printer power press the power switch as shown in the diagram below Note that is the power OFF side of the switch CAUTION 1 Do not turn off the printer power while the printer is printing as this may cause a paper jam or damage to the printer 2 Do not turn off the printer power while LED 1 is flashing as this may lead to loss or corruption of the data being downl...

Страница 17: ...ely remove hardware procedure on the host computer Use a USB cable conforming to V2 0 or greater and with a Type B plug on one end A serial cable connection between the printer s RS 232C serial port and one of your host computer s COM ports A parallel cable connection between the printer s standard parallel port and your host computer s parallel port LPT The diagrams below show all the possible ca...

Страница 18: ...s printer please purchase the correct one referring to page 1 2 2 The EA1050B 240 AC adapter should be exclusively used for the B FV4D xxxx QM R Series printer The B FV4D xxxx QM R Series printer must be powered by the EA1050B 240 AC adapter 3 The EA10681P 240 AC adapter should be exclusively used for the B FV4D xxxx QQ R Series printer The B FV4D xxxx QQ R Series printer must be powered by the EA...

Страница 19: ...he Top Cover WARNING To avoid injury be careful not to trap your fingers while opening or closing the cover CAUTION 1 Be careful not to touch the Print Head Element when opening the Top Cover Failure to do this may cause missing dots by static electricity or other print quality problems 2 Do not cover the Cover Open Sensor with your finger hand etc Doing so may cause the sensor to wrongly detect a...

Страница 20: ...tory shipment the core holder size is set for 1 5 on the Media Roll Holders If you want to use 1 core media detach the core holders by loosening the thumb screws reverse the core holders then re attach them with the thumb screws to the Media Roll Holders as shown below 3 Media rolls can be wound inside or wound outside See the diagram below Both types of media roll should be loaded so that the pri...

Страница 21: ...ace the media roll between the holders ensuring that print side is facing up then using Holder Lock Lever slide the Media Roll Holders to clamp the media roll tightly NOTE Media path For the outside wound media For the inside wound media NOTES 1 Make sure that the print side faces up 2 Cut the leading edge of the media straight with scissors Platen Feed Gap Sensor Top Cover Lock Release Portion Bl...

Страница 22: ...R SETUP ENGLISH VERSION EO1 33097 2 7 Loading the Media E2 9 2 7 Loading the Media Cont 3 Pass the media through the Media Guides Pull the media until it reaches the front of the printer Media Guide Media Guide ...

Страница 23: ... Sensor align it with the centre of the black mark on the media Failure to do this will disable the detection of printed black marks resulting in an error NOTE Be careful not to squeeze the media with the Media Guides Doing so bends the media which can cause a paper jam or feed failure NOTES 1 The sensor type used in the last print job is selected by default To change the sensor type refer to Sect...

Страница 24: ...the media is continuously printed and fed until the number of prints specified in the issue command has been printed CAUTION To separate the printed media from the printer in batch mode be sure to tear the media off at the Media Outlet or cut the media past the Strip Plate If you tear the media off at the Print Head by mistake be sure to feed one label 10 mm or more with the FEED Button prior to t...

Страница 25: ...el is printed How to set the media When issuing labels in the strip mode set the label in the following procedure 1 Load the media as described on the previous pages 2 Open the Peel off Unit by pulling it out 3 Remove enough labels from the leading edge of the media to leave 20 cm of backing paper free and insert the top edge of the backing paper into the media slot in the Peel off Unit as shown b...

Страница 26: ...e media outlet CAUTION 1 Be sure to cut only the backing paper of the label Cutting labels will cause glue to stick to the cutter blades which may affect the cutter quality and shorten the cutter life 2 Use of tag paper which thickness exceeds the maximum specified value may affect the cutter life HAZARDOUS MOVING PARTS KEEP FINGERS AND OTHER BODY PARTS AWAY The cutter is sharp so care must be tak...

Страница 27: ... Pictures below is the thermal transfer printing model of the B FV4 series 1 Fit the feet on the bottom of the printer as shown below 2 Insert the Media Shaft into the core of the media roll 3 Place it into the slots on the External Media Stand 4 Pull the media forward and insert the leading edge into the Fanfold Paper Slot 5 Refer to the previous pages to complete the media loading External Media...

Страница 28: ...er Note Do not place a pre printed area above the media sensor as doing so disables correct sensor calibration 2 Press and hold the FEED Button while turning on the printer 3 Both status lights LED 1 and LED 2 will light up in the following order Orange Green Other colour sequences 4 Release the FEED button when LED 1 and LED 2 light to match the sensor you want to calibrate Feed Gap Transmissive ...

Страница 29: ... 1 Z2 2 only the AY command will B FV4D G PRINTER INFO PROGRAM VERSION 05MAY2014B FV4 V1 1J TPCL VERSION 28APR2014 V1 0K CG VERSION 27FEB2014 V1 0 CHINESE VERSION 27FEB2014 V1 0 CODEPAGE VERSION 27FEB2014 V1 0 BOOT VERSION V1 1C KERNEL FONT VERSION 1 0 03 WLAN MODULE Installed BLUETOOTH MODULE Installed PARAMETERS HW DETECT 0000000000000000 TONE ADJUST T TONE ADJUST D 00 FEED ADJUST 0 0mm CUT ADJU...

Страница 30: ...ST Cut position fine adjustment value LAN IP ADDRESS 192 168 010 020 SUBNET MASK 255 255 255 000 GATEWAY 000 000 000 000 MAC ADDRESS ab cd ef 01 23 45 DHCP OFF DHCP CLIENT ID FFFFFFFFFFFFFFFF FFFFFFFFFFFFFFFF DHCP HOST NAME SOCKET COMM ON SOCKET PORT 8000 WLAN WLAN IP ADDRESS 192 168 10 200 WLAN SUBNET MASK 255 255 255 000 WLAN GATEWAY 0 0 0 0 WLAN MAC ADRESS 00 80 92 4F 44 B WLAN DHCP OFF WLAN DH...

Страница 31: ...nterpreter setting Reserved item1 Reserved parameter Reserved item2 FLASH ROM Flash ROM Capacity SDRAM SDRAM Capacity USB SERIAL NUM USB serial number INFORMATION Printer model name and serial number TOTAL FEED1 Total feed distance condition1 TOTAL FEED2 Total feed distance condition2 TOTAL PRINT Total Print distance TOTAL CUT Total Cut Count RS 232C RS 232C setting value BAUD RATE BIT STOP BIT PA...

Страница 32: ...r soft cloth slightly moistened with ethyl alcohol WARNING 1 Be sure to turn OFF the power before performing any maintenance Failure to do this may cause an electric shock 2 To avoid injury be careful not to trap your fingers while opening or closing the cover 3 Be careful when handling the print head as it becomes very hot during printing Allow it to cool before performing any maintenance 4 Do no...

Страница 33: ...n Roller 1 Wipe the media sensors with a soft cloth or a cotton swab lightly moistened with absolute pure ethyl alcohol 2 To remove dust or paper particles wipe the media sensors with a dry soft cloth Wipe the platen roller with a soft cloth moistened with absolute pure ethyl alcohol ...

Страница 34: ...3 MAINTENANCE ENGLISH VERSION EO1 33097 3 1 Cleaning E3 3 3 1 4Media Housing Wipe the media housing with a dry soft cloth Wipe off dirt with a soft cloth slightly moistened with mild detergent solution ...

Страница 35: ...rature high humidity dust or gas The thermal paper used for direct thermal printing must not have specifications which exceed Na 800 ppm K 250 ppm and Cl 500 ppm Some ink used on pre printed media may contain ingredients which shorten the print head s product life Do not use labels pre printed with ink which contain hard substances such as carbonic calcium CaCO3 and kaolin Al2O3 2SiO2 2H2O For fur...

Страница 36: ...ect the power cord to the AC outlet Section 2 5 Media is not issued The media is not loaded correctly Reload the media correctly Section 2 7 The interface cable is not connected correctly Connect the interface cable again Section 2 4 The media sensor is dirty Clean the media sensor Section 3 1 2 Nothing is printed The media loaded is not direct thermal media though direct thermal mode is selected ...

Страница 37: ...nting and allow the print head to cool until LED 1 lights in green If LED 1 does not light in green or this problem occurs frequently contact the nearest TOSHIBA TEC CORPORATION representative Red Green A communication error occurred Only when the RS 232C is used Press the FEED Button to restart the printer or Turn off the power and then back on If this problem frequently occurs turn off the print...

Страница 38: ...these could damage the printer If a paper jam has occurred inside the Cutter Unit follow the steps below to remove the paper 1 Turn the power off 2 Tilt the printer to the left 3 Remove the jammed paper by forcibly rotating the cutter motor using a cross philips screwdriver Remark The picture above is the thermal transfer printing model of the B FV4 series 5 Clean the Print Head and Platen then re...

Страница 39: ...rect thermal Batch Strip option Cut option 50 8 mm sec 2 sec 76 2 mm sec 3 sec 101 6 mm sec 4 sec 127 mm sec 5 sec 152 4 mm sec 6 sec 50 8 mm sec 2 sec 76 2 mm sec 3 sec 25 4 mm 1 0 to 118 mm 4 6 108 0 mm 4 25 Average 15 183 8 mm x 226 2 mm x 166 0 mm 7 2 x 8 9 x 6 5 1 76 kg 3 8 lb Excluding media EAN8 13 EAN8 13 add on 2 5 UPC A UPC E UPC A add on 2 5 UPC E add on 2 5 CODE39 CODE93 CODE128 GS1 12...

Страница 40: ... sec 3 sec 101 6 mm sec 4 sec 50 8 mm sec 2 sec 76 2 mm sec 3 sec 25 4 mm 1 0 to 118 mm 4 6 105 7 mm 4 16 Average 15 183 8 mm x 226 2 mm x 166 0 mm 7 2 x 8 9 x 6 5 1 76 kg 3 8 lb Excluding media EAN8 13 EAN8 13 add on 2 5 UPC A UPC E UPC A add on 2 5 UPC E add on 2 5 CODE39 CODE93 CODE128 GS1 128 UCC EAN128 NW7 MSI Industrial 2 of 5 ITF RM4SCC KIX Code POSTNET USPS Intelligent mail barcode GS1 Dat...

Страница 41: ...of 76 2mm 3 can be used Wireless LAN kit B FV700 WLAN QM R This interface kit enables wireless LAN WLAN communication Bluetooth interface kit B FV704D BLTH QM R This interface kit enables Bluetooth communication A1 3 Media Please make sure that the media to be used is approved by TOSHIBA TEC CORPORATION The warranties do not apply to problems caused by using media that is not approved by TOSHIBA T...

Страница 42: ... Thickness 0 06 to 0 19 0 0024 to 0 0075 Max outer roll diameter Ø127 5 0 Ø203 2 8 0 When the optional External Media Stand is used Roll direction Outside standard Inside See NOTE 3 Inner core diameter 25 4 38 1 or 76 2 1 0 1 5 or 3 0 See NOTE 2 3 NOTES 1 To ensure print quality and print head life use only TOSHIBA TEC CORPORATION approved media 2 When using a media roll of 76 2 mm 3 inner core di...

Страница 43: ...th the centre of the Black Mark A1 3 4 Effective Print Area The figure below illustrates the relation between the head effective print width and media width for GS Type for TS Type Min 2 mm Min 6 mm cut mode Min 8 mm Sensor position Area to be detected Label Gap Label Sensor position Media feed direction Print side 6 35mm Min 2 mm Min 8 mm Sensor should be positioned at the centre of the black mar...

Страница 44: ... positioned at the centre of the print head 3 Print quality is not guaranteed within 3 mm from the print head stop position including 1 mm slow up 4 Average print black rate should be 15 or less For barcode print area the print rate should be 30 or less 5 Line weight should be 3 to 12 dots Guaranteed print area 1mm 1mm 1 5mm from the right edge of media 1 5mm from the left edge of media Media feed...

Страница 45: ...ightly with power cords Should not be tied to power line conduits RS 232C Cable description only for printers having a serial interface The serial data cable used to connect the printer to a host computer should be one of the following two types 9 pin or 25 pin connector NOTE Use an RS 232C cable with a connector with inch type securing screws Connector to the Host Computer Function 9 pin 25 pin R...

Страница 46: ...between the gap between labels and the label itself to find the print start position of the label Font A complete set of alphanumeric characters in one style of type E g Helvetica Courier Times Gap Distance from the bottom of one label to the top of the next label IPS Inch per second A unit used to express print speed Label A type of media with adhesive backing supplied on a backing paper Media Ma...

Страница 47: ... the print area Usually tags are made of cardboard or other durable material Thermal print head A print head using thermal transfer or thermal direct printing method Thermal transfer printing A printing method that the thermal print head heats an ink or resin coating on the ribbon against the media causing the ink resin to transfer onto the media ...

Страница 48: ...E EO1 33097D R141020P4804 TTEC Ver04 F 2016 03 2015 2016 TOSHIBA TEC CORPORATION All Rights Reserved 1 11 1 Osaki Shinagawa ku Tokyo 141 8562 JAPAN ...

Отзывы: