background image

Intr

oduction

Connecting

y

our

T

V

Using

the

Remote

Contr

ol

Setting

up

y

our

T

V

Using

the

T

V

’s

F

eatur

es

Appendix

Index

27

53AX61(E)

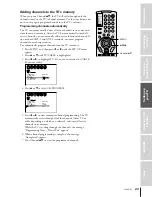
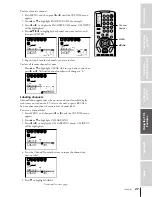
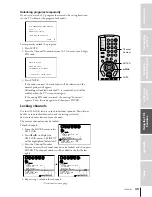
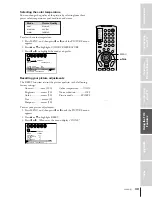
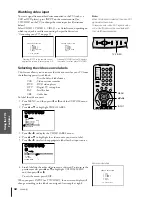
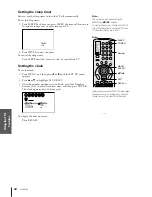
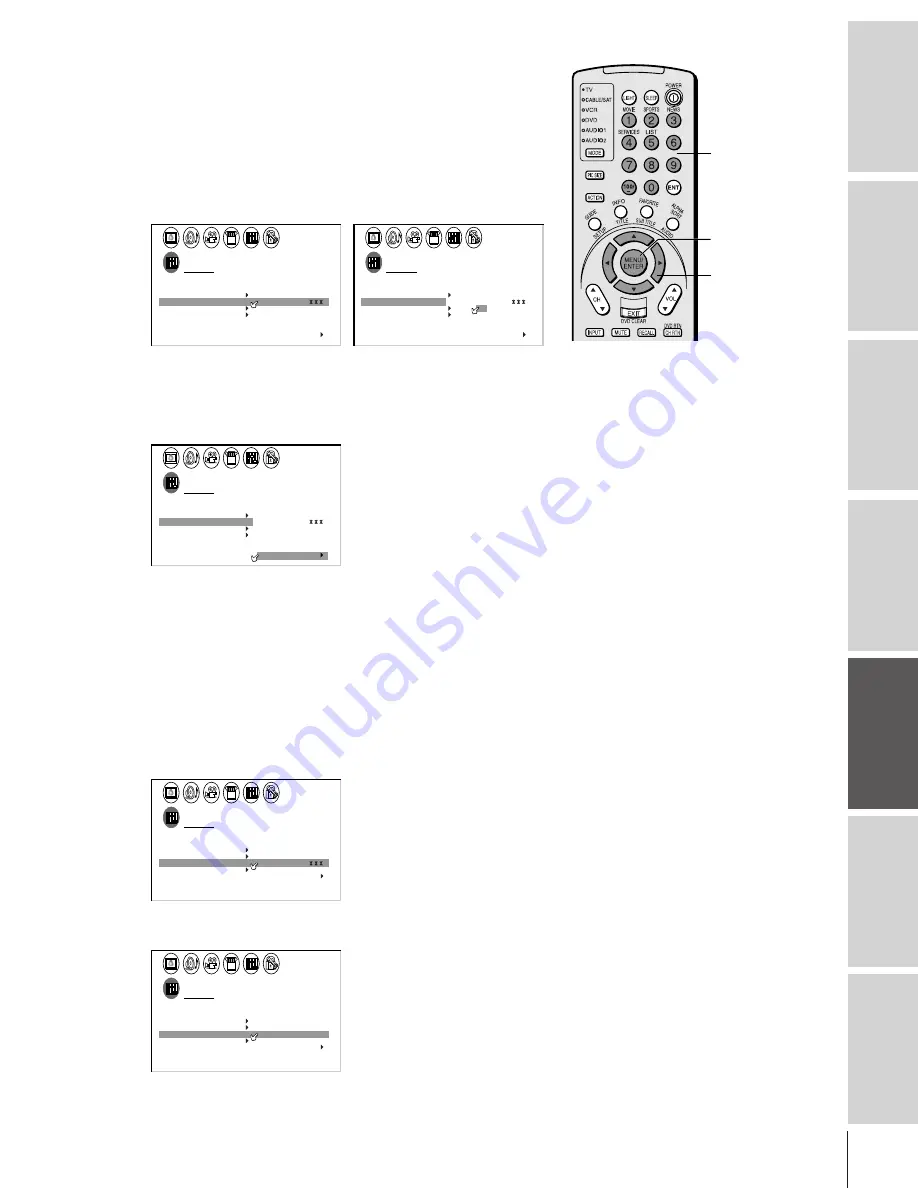
To clear a favorite channel:

1. Press MENU, and then press

x

or

until the CUSTOM menu

appears.

2. Press

y

or

z

to highlight FAVORITE CH2, for example.

3. Press

x

or

to display the FAVORITE CH2 menu. CH INPUT

will be highlighted.

4. Press

yz •x

to highlight the channel you want to clear, and

then press ENTER.

1

1

2

3

4

5

6

7

8

9

10

11

12

13

14

15

16

17

18

1

2

3

4

5

6

7

8

9

10

11

12

13

14

15

16

17

18

2

3

4

5

6

7

8

9 10 11 12 13 14 15 16 17 18 19 20 21 22 23 24 25 26 27 28 29 30 31 32 33 34 35

1

2

3

4

5

6

7

8

9 10 11 12 13 14 15 16 17 18 19 20 21 22 23 24 25 26 27 28 29 30 31 32 33 34 35

CUSTOM

T I MER
CC
FAVOR I

CH

CH I NPUT

TV

CABLE

CLEAR  ALL

5

1

0

8

1

0

0

2

6

8

2

0

OFF

1

TE

FAVOR I

CH2

TE

V
BACKGROUND

I DEO

CH L A B E L

L A B E L

I NG

1

1

2

3

4

5

6

7

8

9

10

11

12

13

14

15

16

17

18

2

3

4

5

6

7

8

9 10 11 12 13 14 15 16 17 18 19 20 21 22 23 24 25 26 27 28 29 30 31 32 33 34 35

1

2

3

4

5

6

7

8

9 10 11 12 13 14 15 16 17 18 19 20 21 22 23 24 25 26 27 28 29 30 31 32 33 34 35

CUSTOM

T I MER
CC
FAVOR I

CH

CH I NPUT

TV

CABLE

CLEAR  ALL

5

1

0

8

1

0

0

2

6

8

2

0

OFF

1

TE

FAVOR I

CH2

TE

V
BACKGROUND

I DEO

CH L A B E L

L A B E L

I NG

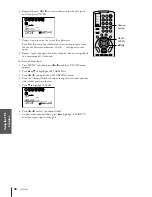
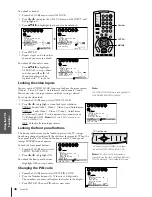
5. Repeat step 4 for other channels you want to clear.

To clear all favorite channels at once:

Press

y

or

z

to highlight CLEAR ALL in step 4 above, and then

press

or

x

. All listed channel numbers will change to “0.”

1

1

2

3

4

5

6

7

8

9

10

11

12

13

14

15

16

17

18

1

2

3

4

5

6

7

8

9

10

11

12

13

14

15

16

17

18

2

3

4

5

6

7

8

9 10 11 12 13 14 15 16 17 18 19 20 21 22 23 24 25 26 27 28 29 30 31 32 33 34 35

1

2

3

4

5

6

7

8

9 10 11 12 13 14 15 16 17 18 19 20 21 22 23 24 25 26 27 28 29 30 31 32 33 34 35

CUSTOM

T I MER
CC
FAVOR I

CH

CH I NPUT

TV

CABLE

CLEAR  ALL

0
0
0

0
0
0

0
0
0

OFF

1

TE

FAVOR I

CH2

TE

V
BACKGROUND

I DEO

CH L A B E L

L A B E L

I NG

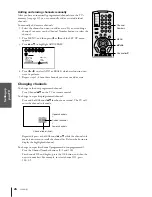
Labeling channels

Channel labels appear above the on-screen channel number display
each time you turn on the TV, select a channel, or press RECALL.
You can choose any four characters for a channel label.
To create a channel label:

1. Press MENU, and then press

x

or

until the CUSTOM menu

appears.

2. Press

y

or

z

to highlight CH LABELING.

3. Press

x

or

to display the CH LABELING menu. CH INPUT

will be highlighted.

1

1

2

3

4

5

6

7

8

9

10

11

12

13

14

15

16

17

18

1

2

3

4

5

6

7

8

9

10

11

12

13

14

15

16

17

18

2

3

4

5

6

7

8

9 10 11 12 13 14 15 16 17 18 19 20 21 22 23 24 25 26 27 28 29 30 31 32 33 34 35

1

2

3

4

5

6

7

8

9 10 11 12 13 14 15 16 17 18 19 20 21 22 23 24 25 26 27 28 29 30 31 32 33 34 35

CUSTOM

T I MER
CC
FAVOR I

CH

OFF

1

TE

FAVOR I

CH2

TE

V
BACKGROUND

I DEO

CH L A B E L

L A B E L

I NG

CH

LABEL

CLEAR

– – – –

I NPUT

4. Press the Channel Number buttons to input the channel you

want to label.

1

1

2

3

4

5

6

7

8

9

10

11

12

13

14

15

16

17

18

1

2

3

4

5

6

7

8

9

10

11

12

13

14

15

16

17

18

2

3

4

5

6

7

8

9 10 11 12 13 14 15 16 17 18 19 20 21 22 23 24 25 26 27 28 29 30 31 32 33 34 35

1

2

3

4

5

6

7

8

9 10 11 12 13 14 15 16 17 18 19 20 21 22 23 24 25 26 27 28 29 30 31 32 33 34 35

CUSTOM

T I MER
CC
FAVOR I

CH

OFF

1

TE

FAVOR I

CH2

TE

V
BACKGROUND

I DEO

CH L A B E L

L A B E L

I NG

CH

LABEL

6

CLEAR

– – – –

I NPUT

5. Press

z

to highlight LABEL.

(Continued on next page)

Channel
Number

yzx •

MENU

Содержание 53AX61

Страница 1: ... and serial number are on the back of your TV Record these numbers in the spaces below Refer to these numbers whenever you communicate with your Toshiba dealer about this TV Model number Serial number 53AX61 Introduction Connecting your TV Using the Remote Control Setting up your TV Using the TV s Features Appendix Index ...

Страница 2: ... high temperatures or humidity and temperatures of 41 F 5 C or lower Using your TV Do not stand or climb on the TV Do not put any heavy object on top of the TV Do not place containers with liquids such as drinks or cosmetics on the TV If any foreign material or water leaks into the TV unplug the AC cord and contact your dealer If the room temperature suddenly rises condensation may occur on the le...

Страница 3: ...n of the PIP window 30 Freezing the PIP picture 30 Using the multi window feature 30 Using the multi window channel preview function 31 Using the multi window favorite channel scan function 31 Using the multi window strobe function 31 Using the LOCKS menu 32 Entering the PIN code 32 Using the V CHIP menu 33 ENABLE BLOCKING 33 TV RATING Independent rating system for broadcasters 33 MPAA RATING Inde...

Страница 4: ... instructions carefully and keep the manual for future reference Exploring your new TV You can operate the TV using the buttons on the front panel or remote control The back panel and front panel behind the door provide all the terminal connections you will need to connect other equipment to the TV see Connecting your TV on page 5 Video 3 video audio inputs MENU Volume x Channel yz EXIT TV VIDEO y...

Страница 5: ... component video compatible components A component video connection provides the best picture performance Connecting a VCR This connection allows you to watch local channels and video programs play or record on the VCR while watching TV and record from one channel while watching another channel You will need one coaxial cable one pair of audio cables one single audio cable for a mono VCR one video...

Страница 6: ...he converter box to change channels You will need one cable splitter two coaxial cables one pair of audio cables one single audio cable for a mono VCR one video cable cable converter box IN OUT IN from ANT VIDEO AUDIO OUT to TV CH 3 L R L R CH 4 IN OUT ANT 75 ANT 1 CHANNEL IN ON OFF OUT R L OUT VIDEO VAR AUDIO L MONO IN DVD IN L R PR PB Y L MONO AUDIO R S VIDEO VIDEO OUT ANT 2 AUDIO CENTER VIDEO 1...

Страница 7: ...AUDIO CENTER VIDEO 1 VIDEO 2 COLOR STREAM INPUT AUDIO R AUDIO IN from ANT VIDEO AUDIO OUT to TV CH 3 L R CH 4 IN OUT IN from ANT VIDEO OUT OUT S VIDEO AUDIO OUT L R Note You can use a regular video cable instead of an S video cable but the picture quality will decrease If you use an S video cable between the TV and DVD player satellite receiver make the audio connections only and remove the regula...

Страница 8: ...ill need one coaxial cable two pairs of audio cables two single audio cables for mono VCRs two video cables Note Do not connect the same VCR to the output and input jacks on the TV at the same time If you are using an S VHS VCR use an S video cable instead of a regular video cable for better picture performance Do not connect a regular video cable and an S video cable to Video 1 or Video 2 at the ...

Страница 9: ...fier and then turn off the built in speakers see Turning off the built in speakers on page 46 You will need one pair of audio cables ANT 75 ANT 1 CHANNEL IN ON OFF OUT R L OUT VIDEO VAR AUDIO L MONO IN DVD IN L R PR PB Y L MONO AUDIO R S VIDEO VIDEO OUT ANT 2 AUDIO CENTER VIDEO 1 VIDEO 2 COLOR STREAM INPUT AUDIO R AUDIO LINE IN L R Note If you have an S VHS camcorder use an S video cable instead o...

Страница 10: ...V Right speaker Left speaker Surround speaker L Surround speaker R VCR A V receiver Audio Video Video Audio Video Audio center channel Audio LDP DVD Caution To avoid damaging the TV speakers turn off the TV before connecting or disconnecting the Audio Center Channel cable Note For surround sound system setup details refer to the instructions furnished with your A V receiver When the Audio Center C...

Страница 11: ...ontrol see Programming the remote control for use with audio video devices on page 14 Installing the remote control batteries To install the batteries 1 Slide the battery cover off the back of the remote control 2 Install two AA size alkaline batteries Match the and signs on the batteries to the signs on the battery compartment 3 Slide the battery cover back on to the remote control until the lock...

Страница 12: ...igit 0 Digit 0 Digit 0 Digit 0 Digit 0 Digit 0 ENT CH Enter CH Enter CH Enter GUIDE SETUP Guide Guide Program DVD setup Program Program INFO TITLE TV preview TV INFO TV TITLE TV TV TV Top menu FAVORITE Favorite CH Favorite CH Subtitle SUBTITLE ALPHASORT Alphasort Audio AUDIO MENU Menu open Select Select Enter Enter ENTER Enter yz Menu select Menu select Menu select Menu select Menu select x FAV x ...

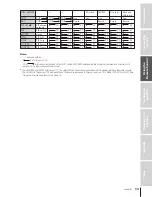
Страница 13: ...till TV TV TV TV TV TV TV SWAP PIP Swap TV TV TV TV TV TV TV LOCATE PIP Locate TV TV TV TV TV TV TV SOURCE PIP Source TV TV TV TV TV TV TV Notes will send nothing TV will jump to TV VCR will jump to last active VCR or DVD Active VCR DVD is defined as the mode that remains for a minimum of 5 seconds or if a key is pressed in that mode The VOLUME and MUTE will jump to TV by default When the volume i...

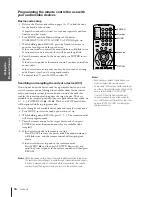
Страница 14: ...The keys available to be sampled provided they are applicable to that mode are 0 1 2 3 POWER VOL y CH y PLAY and STOP Invalid keys will be ignored while in program mode To cycle through each available device code and sample its functions 1 Press MODE to select the mode you want to set up 2 While holding down RECALL press 9 9 1 The remote control will enter program mode 3 Point the remote control a...

Страница 15: ...modes For example to lock the volume controls to the CABLE SAT mode 1 Repeatedly press MODE until the CABLE SAT mode is selected 2 While holding down RECALL press 9 9 3 3 Press VOL y When locked the mode indicator will blink two times The following table describes in more detail the Volume Lock implementation Volume TV CBL SAT VCR DVD AUD1 AUD2 locked to TV default TV TV TV TV AUD1 AUD2 CBL SAT CB...

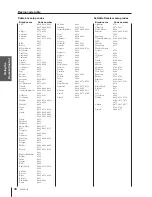
Страница 16: ...lsar 0019 Quasar 0019 RCA 0040 Radio Shack 0034 0334 0816 0902 Realistic 0226 Recoton 0419 Regal 0039 0278 0292 Regency 0021 Rembrandt 0030 0089 Runco 0019 SL Marx 0059 Samsung 0059 0163 Scientific Atlanta 0027 0036 0496 0896 Seam 0529 Signal 0034 0059 Signature 0030 Sprucer 0040 StarSight 0441 0561 Starcom 0022 0034 Stargate 0034 0059 0789 0816 Starquest 0034 Sylvania 0020 TFC 0329 TV86 0082 Tand...

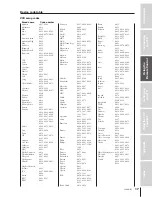
Страница 17: ... 0473 1056 1181 1281 Minolta 0061 0124 Mitsubishi 0062 0067 0080 0086 Motorola 0054 0067 Multitech 0019 0091 NAD 0077 NEC 0057 0059 0060 0086 0123 Nikko 0056 Nikon 0053 0272 Noblex 0259 Olympus 0054 Optimus 0056 0067 0077 0123 0181 0451 0473 1067 1081 1181 1281 Optonica 0081 Orion 0021 0203 0228 0314 0498 Panasonic 0054 0096 0181 0244 0473 0635 1081 1181 1281 Penney 0054 0056 0057 0059 0061 0073 0...

Страница 18: ...hnica 0189 BSR 0213 0264 Burmester 0439 California Audio Labs 0048 0322 Carrera 0213 Carver 0176 0198 0318 0456 DAK 0264 DKK 0019 Denon 0022 0892 Emerson 0174 0183 0324 0488 Fisher 0107 0193 0198 0361 GE 0028 Garrard 0264 0299 0412 0439 Genexxa 0051 0183 0324 Harman Kardon 0176 0192 0445 Hitachi 0051 0174 JVC 0091 Kenwood 0047 0056 0209 0645 0700 0845 Kodak 0306 Krell 0176 Kyocera 0037 LXI 0324 Li...

Страница 19: ... 0336 Schneider 0395 Scientific Atlanta 0479 Sony 0029 0178 0595 Soundesign 0395 Starcom 0478 Yorx 0395 Receiver setup codes Brand name Code number ADC 0550 Adcom 0635 Aiwa 0140 0177 0208 0424 1108 1424 Akai 0095 0243 Capetronic 0550 Carver 0027 0061 0208 0379 1108 1208 Casio 0214 Clarinette 0214 Curtis Mathes 0099 Denon 0023 0292 0790 1123 1179 Emerson 0443 Fisher 0061 0238 0379 Garrard 0443 0482...

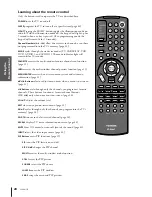
Страница 20: ... page 31 INFO accesses the multi window channel preview function page 31 MENU ENTER accesses the on screen menu system and sets menu information page 21 yz x Buttons select or adjust menu items when a menu is on screen page 21 x Buttons cycle through only the channels you program as favorite channels These buttons function as favorite channel buttons FAV x only when no menu is on screen page 26 VO...

Страница 21: ...S BASS STEREO 5 0 5 0 0 TREBLE BALANCE RESET END EXIT MOVE SELECT AUD O I SBS SBS LEVEL ON ON ON MA N I 5 0 OFF SPEAKERS AUD O OUT I STABLE SOUND SELECT THEATER SURROUND MATR I X END EXIT SELECT SET UP LANGUAGE CLOCK ANT ADD ADD ERASE TV CH PROGRAM CABLE CABLE 1 ANT1 ANT2 2 SET ENGL SH I END EXIT SELECT CUSTOM T I MER CC FAVOR I CH OFF 1 TE FAVOR I CH2 TE V BACKGROUND I DEO CH LABEL LABEL I NG END...

Страница 22: ...ee below right to select either ANT 1 or ANT 2 1 1 2 3 4 5 6 7 8 9 0 1 2 3 4 5 6 7 8 1 2 3 4 5 6 7 8 9 10 11 12 13 14 15 16 17 18 2 3 4 5 6 7 8 9 10 11 12 13 14 15 16 17 18 19 20 21 22 23 24 25 26 27 28 29 30 31 32 33 34 35 1 2 3 4 5 6 7 8 9 10 11 12 13 14 15 16 17 18 19 20 21 22 23 24 25 26 27 28 29 30 31 32 33 34 35 SOURCE 0 1 2 3 4 ANT 1 V I DEO 1 V I DEO 2 V C 5 ANT 2 S o o l t ream r I DEO 3 ...

Страница 23: ... 3 4 5 6 7 8 9 10 11 12 13 14 15 16 17 18 2 3 4 5 6 7 8 9 10 11 12 13 14 15 16 17 18 19 20 21 22 23 24 25 26 27 28 29 30 31 32 33 34 35 1 2 3 4 5 6 7 8 9 10 11 12 13 14 15 16 17 18 19 20 21 22 23 24 25 26 27 28 29 30 31 32 33 34 35 SET UP LANGUAGE CLOCK ANT ADD ADD ERASE TV CH PROGRAM TV CABLE CABLE 1 ANT1 2 SET ENGL SH I 4 Press y or z to select CH PROGRAM 1 1 2 3 4 5 6 7 8 9 10 11 12 13 14 15 16...

Страница 24: ...ect ADD or ERASE whichever function you want to perform 5 Repeat steps 1 4 for other channels you want to add or erase Changing channels To change to the next programmed channel Press Channel yz on the TV or remote control To change to a specific programmed channel Press and hold Channel yz for about one second The TV will enter the channel surf mode 1 1 2 3 4 5 6 7 8 9 10 11 12 13 14 15 16 17 18 ...

Страница 25: ...16 17 18 19 20 21 22 23 24 25 26 27 28 29 30 31 32 33 34 3 EX I T TO SELECT POSI I ON T ENTER RED BLUE TO SELECT COLOR 4 Press ENTER to highlight RED or BLUE depending on which color needs adjusting If both red and blue need adjusting you must perform steps 4 and 5 twice 5 Press y up z down x left or right on the remote control to converge the red or blue line into the green line When correctly ad...

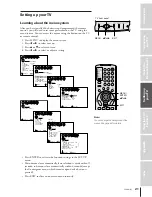
Страница 26: ... 27 28 29 30 31 32 33 34 35 CUSTOM T I MER CC FAVOR I CH OFF 1 TE FAVOR I CH2 TE V BACKGROUND I DEO CH LABEL LABEL I NG 3 Press x or to display the FAVORITE CH1 or FAVORITE CH2 menu CH INPUT will be highlighted 1 1 2 3 4 5 6 7 8 9 10 11 12 13 14 15 16 17 18 1 2 3 4 5 6 7 8 9 10 11 12 13 14 15 16 17 18 2 3 4 5 6 7 8 9 10 11 12 13 14 15 16 17 18 19 20 21 22 23 24 25 26 27 28 29 30 31 32 33 34 35 1 2...

Страница 27: ...9 10 11 12 13 14 15 16 17 18 2 3 4 5 6 7 8 9 10 11 12 13 14 15 16 17 18 19 20 21 22 23 24 25 26 27 28 29 30 31 32 33 34 35 1 2 3 4 5 6 7 8 9 10 11 12 13 14 15 16 17 18 19 20 21 22 23 24 25 26 27 28 29 30 31 32 33 34 35 CUSTOM T I MER CC FAVOR I CH CH I NPUT TV CABLE CLEAR ALL 0 0 0 0 0 0 0 0 0 OFF 1 TE FAVOR I CH2 TE V BACKGROUND I DEO CH LABEL LABEL I NG Labeling channels Channel labels appear ab...

Страница 28: ...pear in that space 8 Repeat steps 4 through 6 for other channels You can assign labels to a maximum of 32 channels To clear a channel label 1 Press MENU and then press x or until the CUSTOM menu appears 2 Press y or z to highlight CH LABELING 3 Press x or to display the CH LABELING menu 4 Press the Channel Number buttons to input the channel number whose label you want to clear 5 Press z to highli...

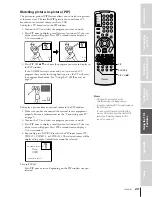
Страница 29: ...V CHIP menu on page 33 P I P BLOCKED 24 To display a picture from an external source in the PIP window 1 Make sure you have connected the external source equipment properly For more information see the Connecting your TV on page 5 2 Turn on the TV and select the program you want to watch 3 Press PIP once to display a small picture A window 1 9 the size of the screen will appear Press PIP a second ...

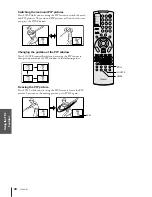
Страница 30: ...n and PIP pictures The main and PIP pictures will switch each time you press the SWAP button Changing the position of the PIP window Press LOCATE repeatedly while you are using the PIP feature to change the position of the PIP window in the following order Freezing the PIP picture Press STILL while you are using the PIP feature to freeze the PIP picture To return to the moving picture press STILL ...

Страница 31: ...programmed as favorite channels page 26 in a 9 picture multi window Note If you press FAVORITE when no channels are programmed as favorite channels the message Not Available will display on screen To start the favorite channel scan function 1 Press FAVORITE to display the channels you programmed into FAVORITE CH1 Press FAVORITE a second time to display the channels you programmed into FAVORITE CH2...

Страница 32: ...ocking reset status Press the Number buttons 0 9 to enter a new 4 digit PIN code and then press ENTER When the PIN code is already stored Press the Number buttons 0 9 to enter your existing PIN code and then press ENTER 1 1 2 3 4 5 6 7 8 9 1 1 1 1 1 1 1 1 1 2 3 4 5 6 7 8 9 10 11 12 13 14 15 16 17 18 19 20 21 22 23 24 25 26 27 28 29 30 31 32 33 34 35 1 2 3 4 5 6 7 8 9 10 11 12 13 14 15 16 17 18 19 ...

Страница 33: ...lays 5 Repeat steps 3 and 4 to set the next item The TV age based ratings and content themes you can lock are listed in the following table Ratings Description and content themes MA Mature Audience Only This program is specifically designed to be viewed by adults and therefore may be unsuitable for children under 17 L Crude or indecent language S Explicit sexual activity V Graphic violence 14 Pare...

Страница 34: ...children G General Audience Appropriate for all ages BLOCKING OPTION 1 From the LOCKS menu select BLOCKING OPTION 2 Press x or to display the BLOCKING OPTION menu and then press y or z to select the item MPAA UNRATED Press x or to select ON locked or OFF unlocked for unrated programs in the MPAA rating system TV NONE RATING Press x or to select ON Lock or OFF Unlock for programs rated NONE in the ...

Страница 35: ...number to be locked and then press ENTER The channel number will be added to the list below right 1 1 2 3 4 5 6 7 8 9 10 11 12 13 14 15 16 17 18 1 2 3 4 5 6 7 8 9 10 11 12 13 14 15 16 17 18 2 3 4 5 6 7 8 9 10 11 12 13 14 15 16 17 18 19 20 21 22 23 24 25 26 27 28 29 30 31 32 33 34 35 1 2 3 4 5 6 7 8 9 10 11 12 13 14 15 16 17 18 19 20 21 22 23 24 25 26 27 28 29 30 31 32 33 34 35 LOCKS V CH I P V FRO...

Страница 36: ...xample When the front panel lock is ON all control buttons on the TV front panel except POWER do not operate To lock the front panel buttons 1 From the LOCKS menu select FRONT PANEL LOCK 2 Press x or to highlight ON To unlock the front panel buttons Highlight OFF in step 2 above Changing the PIN code 1 From the LOCKS menu select NEW PIN CODE 2 Press the Number buttons 0 9 to enter a 4 digit code T...

Страница 37: ...nd then press x or until the PICTURE menu appears 2 Press z or y to highlight the quality you want to adjust 3 Press x or to adjust the level 1 1 2 3 4 5 6 7 8 9 10 11 12 13 14 15 16 17 18 1 2 3 4 5 6 7 8 9 10 11 12 13 14 15 16 17 18 2 3 4 5 6 7 8 9 10 11 12 13 14 15 16 17 18 19 20 21 22 23 24 25 26 27 28 29 30 31 32 33 34 35 1 2 3 4 5 6 7 8 9 10 11 12 13 14 15 16 17 18 19 20 21 22 23 24 25 26 27 ...

Страница 38: ...r z to highlight FLESH TONE 3 Press x or to highlight ON 1 1 2 3 4 5 6 7 8 9 10 11 12 13 14 15 16 17 18 1 2 3 4 5 6 7 8 9 10 11 12 13 14 15 16 17 18 2 3 4 5 6 7 8 9 10 11 12 13 14 15 16 17 18 19 20 21 22 23 24 25 26 27 28 29 30 31 32 33 34 35 1 2 3 4 5 6 7 8 9 10 11 12 13 14 15 16 17 18 19 20 21 22 23 24 25 26 27 28 29 30 31 32 33 34 35 P CTURE ANTENNA I MODE PREFERENCE PREFERENCE FLESH TONE ON OF...

Страница 39: ...FF COOL MED UM WARM I NOI REDUCTION SE CONVERGENCE SAVE NEW COLOR TEMPERATURE Resetting your picture adjustments The RESET function returns the picture qualities to the following factory settings MENU yzx Mode Picture Quality cool blueish medium neutral warm reddish Contrast max 100 Brightness center 50 Color center 50 Tint center 0 Sharpness center 50 Color temperature COOL Noise reduction OFF Pi...

Страница 40: ...igital TV set top box SAT Satellite box CBL Cable box To label the video sources 1 Press MENU and then press x or until the CUSTOM menu appears 2 Press y or z to highlight VIDEO LABEL 1 1 2 3 4 5 6 7 8 9 10 11 12 13 14 15 16 17 18 1 2 3 4 5 6 7 8 9 10 11 12 13 14 15 16 17 18 2 3 4 5 6 7 8 9 10 11 12 13 14 15 16 17 18 19 20 21 22 23 24 25 26 27 28 29 30 31 32 33 34 35 1 2 3 4 5 6 7 8 9 10 11 12 13 ...

Страница 41: ... 1 2 3 4 5 6 7 8 9 10 11 12 13 14 15 16 17 18 19 20 21 22 23 24 25 26 27 28 29 30 31 32 33 34 35 CUSTOM T I MER CC C1 C2 C3 C4 T1 T2 T3 T4 FAVOR I CH OFF 1 TE FAVOR I CH2 TE V BACKGROUND I DEO CH LABEL LABEL I NG 4 Press x or to highlight the desired closed caption mode as follows To view captions highlight C1 C2 C3 or C4 C1 displays the primary language in your area Note If the program or video y...

Страница 42: ...ttons 0 9 to enter the correct time and then press ENTER The clock operates on a 12 hour cycle 1 1 2 3 4 5 6 7 8 9 10 11 12 13 14 15 16 17 18 1 2 3 4 5 6 7 8 9 10 11 12 13 14 15 16 17 18 2 3 4 5 6 7 8 9 10 11 12 13 14 15 16 17 18 19 20 21 22 23 24 25 26 27 28 29 30 31 32 33 34 35 1 2 3 4 5 6 7 8 9 10 11 12 13 14 15 16 17 18 19 20 21 22 23 24 25 26 27 28 29 30 31 32 33 34 35 SET UP LANGUAGE CLOCK A...

Страница 43: ... 13 14 15 16 17 18 19 20 21 22 23 24 25 26 27 28 29 30 31 32 33 34 35 1 2 3 4 5 6 7 8 9 10 11 12 13 14 15 16 17 18 19 20 21 22 23 24 25 26 27 28 29 30 31 32 33 34 35 AUD O I MTS BASS MONO 50 50 0 TREBLE BALANCE RESET 2 Press y or z to highlight MTS 3 Press x or to highlight STEREO 1 1 2 3 4 5 6 7 8 9 10 11 12 13 14 15 16 17 18 1 2 3 4 5 6 7 8 9 10 11 12 13 14 15 16 17 18 2 3 4 5 6 7 8 9 10 11 12 1...

Страница 44: ...til the THEATER menu appears 3 Press y or z to highlight SURROUND 4 Press x or to highlight MATRIX 1 1 2 3 4 5 6 7 8 9 10 11 12 13 14 15 16 17 18 1 2 3 4 5 6 7 8 9 10 11 12 13 14 15 16 17 18 2 3 4 5 6 7 8 9 10 11 12 13 14 15 16 17 18 19 20 21 22 23 24 25 26 27 28 29 30 31 32 33 34 35 1 2 3 4 5 6 7 8 9 10 11 12 13 14 15 16 17 18 19 20 21 22 23 24 25 26 27 28 29 30 31 32 33 34 35 THEATER SURROUND MA...

Страница 45: ...x or to adjust the level x makes the sound quality weaker or decreases the balance in the right channel depending on the item selected makes the sound quality stronger or decreases the balance in the left channel depending on the item selected Resetting your audio adjustments The RESET function resets your audio adjustments to the following factory settings Bass center 50 Treble center 50 Balance ...

Страница 46: ... 35 1 2 3 4 5 6 7 8 9 10 11 12 13 14 15 16 17 18 19 20 21 22 23 24 25 26 27 28 29 30 31 32 33 34 35 AUD O I SBS SBS LEVEL ON ON OFF 8 0 SPEAKERS AUD O OUT I STABLE SOUND MA I N To turn off the SBS Highlight OFF in step 3 above Turning off the built in speakers Use this feature to turn the TV speakers off when you connect an audio system see Connecting an audio system on page 9 Note Make sure the v...

Страница 47: ... 26 27 28 29 30 31 32 33 34 35 AUD O I SBS SBS LEVEL ON OFF MAIN P P I 1 0 0 ON SPEAKERS AUD O OUT I STABLE SOUND MAIN Main picture sound PIP Selected PIP sound Using the StableSound feature The StableSound feature limits the highest volume level to prevent extreme changes in volume when the signal source is changed To turn on the StableSound feature 1 Press MENU and then press x or until the AUDI...

Страница 48: ... 8 9 10 11 12 13 14 15 16 17 18 19 20 21 22 23 24 25 26 27 28 29 30 31 32 33 34 35 CUSTOM T I MER CC C 1 FAVOR I CH1 TE FAVOR I CH2 TE V BACKGROUND SHADED SOL I D I DEO CH LABEL LABEL I NG Displaying on screen information Press RECALL to display the following information on screen Antenna mode when in TV mode Channel number or VIDEO mode selected Time if set Channel label if set Stereo or SAP seco...

Страница 49: ... vacant channel or a station that completes its broadcast for the day This feature does not work in VIDEO mode Understanding the last mode memory feature If the power is cut off while you are viewing the TV the Last Mode Memory feature turns the TV on automatically when the power is resupplied If the power is going to be off for a long time and you are going to be away from the TV unplug the power...

Страница 50: ...V p p burst signal 75 ohm VIDEO AUDIO INPUT VIDEO 1 V p p 75 ohm negative sync AUDIO 150 mV rms 30 modulation equivalent 47 kohm ColorStream component video INPUT Y 1V p p 75 ohm PR CR 0 7 V p p 75 ohm PB CB 0 7 V p p 75 ohm AUDIO 150 mV rms 47 kohm VIDEO AUDIO OUTPUT VIDEO 1 V p p 75 ohm negative sync AUDIO 150 mV rms 30 modulation equivalent 4 7 kohm VARIABLE AUDIO OUTPUT 0 300 mV rms 30 modulat...

Страница 51: ...t correctly Cannot receive above channel 13 Make sure the TV CABLE switch is set to the mode that corresponds with the signal source cable company or antenna A black box appears on screen The closed caption feature may be set to one of the Text modes T1 T2 T3 or T4 Set closed captioning to OFF Cannot select a certain channel The channel may be locked out with the CH LOCK feature or erased with the...

Страница 52: ...or repair of antenna systems are not covered by this warranty Reception problems caused by inadequate antenna systems are your responsibility 5 Warranties extend only to defects in materials or workmanship as limited above and do not extend to any product or parts that have been lost or discarded by you or to damage to products or parts caused by misuse or accident damage caused by Acts of God suc...

Страница 53: ...I button 31 Multi window feature Channel preview function 31 Favorite channel scan function 31 Strobe function 31 MUTE button 43 P Picture adjustments COLOR TEMPERATURE 39 FLESH TONE 38 NOISE REDUCTION 38 Picture mode 37 Picture quality 37 Picture in Picture PIP LOCATE button 30 PIP button 29 PIP CH y z buttons 29 SOURCE button 29 STILL button 30 SWAP button 30 R RECALL button 48 Remote control Ba...

Страница 54: ...BEC H9P 1J1 CANADA TEL 514 856 4100 VANCOUVER 22171 FRASERWOOD WAY RICHMOND B C V6W 1J5 CANADA TEL 604 303 2500 HEAD OFFICE 327 KAMAKEE STREET HONOLULU HAWAII 96814 U S A TEL 808 591 9281 MANUFACTURED BY PRINTED IN USA HEAD OFFICE 82 TOTOWA ROAD WAYNE NEW JERSEY 07470 NATIONAL SERVICE DIVISION 1420B TOSHIBA DRIVE LEBANON TN 37087 ColorStream is a registered trademark and StableSound is a trademark...

Отзывы: