– 14 –
GENERAL ADJUSTMENTS
SPECIFIC INFORMATIONS
RCUT
40H
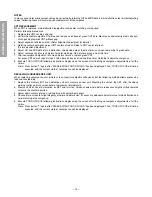
Adjust convergence from center to circumference in order.
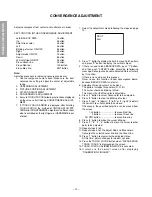
KEY FUNCTION IN THE CONVERGENCE ADJUSTMENT:
Lord BACK UP DATA:
1 button
Up :
2 button
Selet Green color:
3 button
Left :
4 button
Blinking of cursor ON/OFF:
5 button
Right:
6 button
Adjust mode ON/OFF:
7 button
Down:
8 button
Vertical stripe ON/OFF
9 button
Erase Green line:
0 button
Erase Red line:
100 button
Erase Blue line:
ENT button
Note:
Adjusting procedure in replacing convergence board.
1. User convergence center check. Make sure the best
convergence setting is about the center of adjustable
range.
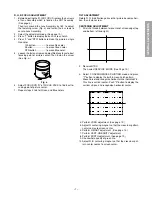
2. CENTERING ADJUSTMENT
3. PICTURE POSITION ADJUSTMENT
4. HIT, WID ADJUSTMENT
5. CONVERGENCE ADJUSTMENT
6. Execute TOUCH FOCUS following instructions displayed
on the screen after finishing CONVERGENCE ADJUST-
MENT.
7. If TOUCH FOCUS ERROR is displayed after finishing
TOUCH FOCUS, the method of CROSS-HATCH PAT-
TERN after CONVERGENCE adjustment is different from
what is exhibited on the right figure, or HARDWARE is out
of order.
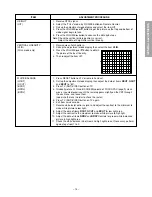
2. Press “7” button to display the built-in cross-hatch pattern
and press "9" button to display the vertical stripes.
3. If there is need to load BACKUP DATA, push "1" button,
and then push "ENTER" button according to following
message. Convergence become adjusted state at factory
by this action.
If there is no need, pass this process.
Never to use this function to new convergence board,
because BACKUP DATA is not exist.
4. Adjustment around cursor can be done.
The pattern includes three colors (R, G, B).
The cursor should be blinking in Red.
This means that the Red color is adjustable.
5. Press “3” button to select Green color to be adjusted.
6. Press “5” button to stop the blinking of cursor.
7. Press “2 (up)”, “8 (down)”, “4 (left)” or “6 (right)” to obtain
the correct cross-hatch pattern as above.
If necessary, the specified color line can be erased from
the screen.
100 button ...................... to erase Red line
0 button ...................... to erase Green line
CH RTN button ...................... to erase Blue line
8. Press “5” button to make the cursor blinking.
9. Press “2”, “8”, “4”, “6” buttons to move the cursor to other
point to be adjusted.
10. Repeat steps 6 to 9.
11. Repeat steps 5 to 10 to adjust Red and Blue colors.
Converge the selected color line into the Green line.
12. Press “7” button to memorize the adjusted states.
At this time, picture changes for about 1 second.
13. Press the TOUCH FOCUS button when "PLEASE PUSH
TOUCH FOCUS" is displayed on the screen.
14. TOUCH FOCUS CALIBRATION MODE is executed.
15. It retur ns to the normal screen after displaying
"CALIBRATION FINISHED".
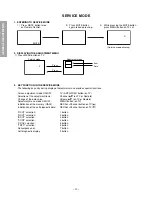
1. Select the adjustment mode following the steps on page
10.
CONVERGENCE ADJUSTMENT
Содержание 50H82
Страница 24: ... 25 26 THIS PAGE IS INTENTIONALLY LEFT BLANK ...
Страница 45: ... 47 48 SIGNAL BOARD PD0639A BOTTOM FOIL SIDE ...
Страница 46: ...DEF POWER BOARD PD0640A BOTTOM FOIL SIDE 49 50 ...
Страница 47: ... 51 A V BOARD PD0075C BOTTOM FOIL SIDE ...
Страница 48: ... 52 SRS 3D BOARD PD0644A BOTTOM FOIL SIDE ...
Страница 50: ... 54 DIGI CONV BOARD PD0638C BOTTOM FOIL SIDE ...
Страница 57: ...CIRCUIT BLOCK DIAGRAM 61 62 ...


