Toshiba 46BL702B DIGITAL Series Скачать руководство пользователя страница 20

- 19 -

English

Stereo and Bilingual Transmissions

If stereo or dual language broadcasts are transmitted, the 

word Stereo or Dual will appear on the screen each time posi-

tions are changed, disappearing after a few seconds. If the 

broadcast is not in stereo, the word Mono will appear.

Stereo…

 Press

 LANG

 to select Stereo or Mono.

Bilingual… 

Bilingual transmissions are rare. If they are 

transmitted, the word Dual will be displayed. Choose the 

required programme number, and if the word Dual appears, 

press 

LANG 

to select Dual 1, Dual 2 or Mono.

Displaying Subtitles

In digital broadcasts, this feature will show subtitles 

on the screen in the selected language provided they 

are being broadcast.
• Press 

SUBTTL

 button to activate available subtitles. 

Press 

SUBTTL

 button again to turn off subtitles.

Viewing Main Menu

• Press “

”/ “

” buttons on the TV at the same 

time to view main menu.  

• Press 

MENU

 button on the remote control to view main 

menu.

Controlling Volume and Muting Sound

Volume

Press 

V+ 

or 

V-

 to adjust the volume.

Sound Mute

Press “ ” once to turn the sound off and again to 

cancel.

Selecting Programme Positions

To select a programme position use the numbered 

buttons on the remote control. Programme positions 

can also be selected using 

P+

 and 

P-

 .

Press 

INFO

 to display the on-screen information i.e. 

programme position, stereo/mono signal and picture 

format. To revert to the previous programme position 

press   (

SWAP)

.


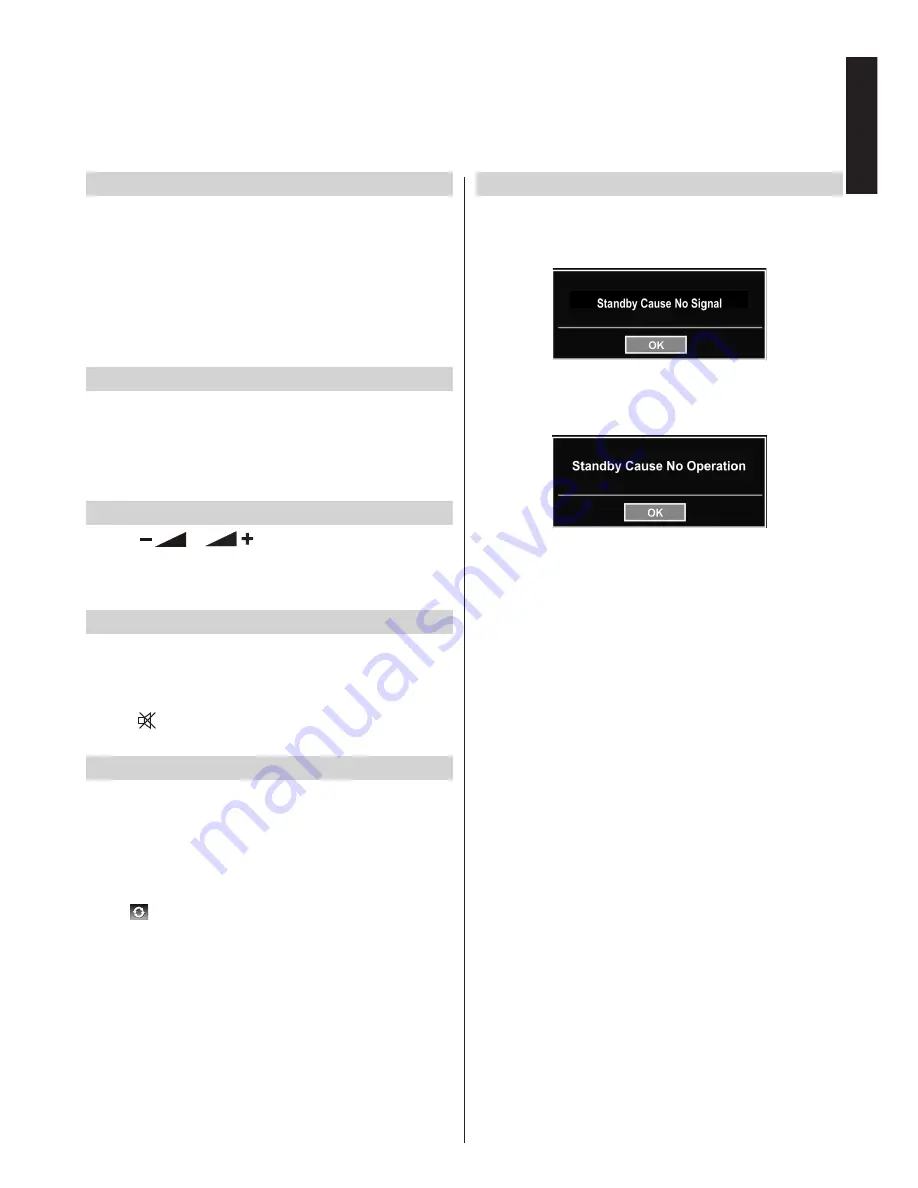
Standby Notifications

If the TV switches off while in No Signal mode, the 

following on-screen message will be displayed on the 

next switch-on:

If the TV switches off owing to the auto power down 

feature, the following on-screen message will be 

displayed on the next switch-on:

General Operation

Содержание 46BL702B DIGITAL Series

Страница 1: ...OWNER S MANUAL 46BL702B DIGITAL Series Register your TV online at www toshiba co uk registration ...

Страница 2: ...s are launched on Freeview from time to time along with other updates to the service So it pays to retune your digital TV periodically to make sure your Digital TV Radio channels are up to date To retune your Toshiba Digital TV please refer to the Re tune section for guidance Alternatively find out more on the dedicated Freeview website www freeview co uk retune Freeview service is subject to avai...

Страница 3: ...y Notifications 19 Channel List Sorting Programmes Programme Locking 20 Viewing Channel List 20 Moving a Channel 20 Deleting a Channel 20 Renaming a Channel 20 Locking a Channel 20 Viewing Info Banner Electronic Programme Guide 21 Viewing Info Banner 21 Electronic Programme Guide 21 Re tune Section 22 Re tuning TOSHIBA Freeview Products 22 Language Selection 23 Language Settings 23 Preferred 23 Cu...

Страница 4: ...aring 33 Audio Description 33 Auto TV Off 33 Broadcast Type 33 Standby Search 33 Full Mode optional 34 TXT Language 34 USB Media Browser 35 Manual Start 35 Auto Start 35 Playing MP3 Files 35 Viewing JPG Files 36 Slideshow Feature 36 Video Playback 37 Media Browser Settings 37 To Close the Media Player 37 Analogue Text Services 38 Analogue Text Services 38 Using Text Button 38 Acessing Sub Pages 38...

Страница 5: ...the manufacturers instructions Switch off and withdraw the mains plug before making or changing connections DO consult your dealer if you are ever in doubt about the installation operation or safety of your equipment DO be careful with glass panels or doors on equipment and stands Do not DON T remove any fixed cover as this may expose danger ous voltages DON T obstruct the ventilation openings of ...

Страница 6: ...damage including but not limited to the following loss of profit interruption of business the loss of recorded data whether caused during normal opera tion or misuse of the product Note A suitable wall bracket for the size and weight must be used Installation and Important Information Where to install Locate the television away from direct sunlight and strong lights Soft indirect lighting is recom...

Страница 7: ...terns TV station logos and websites IMPORTANT INFORMATION TV Installation If a television is not positioned in a sufficiently stable location it can be potentially hazardous due to falling Many injuries particularly to children can be avoided by taking simple precautions such as Using stands that are suitable for the size and weight for the TV Only using furniture that can safely support the telev...

Страница 8: ... and placed in the centre Avoid placing the unit on any surfaces that may be subject to vibrations or shocks To protect the unit during a thunder storm unplug the AC power cord and disconnect the aerial cable and satellite decoder systems etc Caution Do not touch the aerial connector When you leave your home for a long period of time unplug the AC power cord for safety The unit becomes warm when i...

Страница 9: ...acket s are attached to the wall and the back of the TV as described in the instructions provided with the wall bracket 4 Always use the screws supplied or recommended by the wall mount manufacturer Note The bracket shown above is a sample image The bracket and fixings are not supplied with the TV Removing the pedestal stand 1 Carefully lay the front of the unit face down on a flat cushioned surfa...

Страница 10: ...le the displaying of subtitles To mute the sound Press once to mute sound Press again to disable mute mode To change channels To move up down between the channels Info Return Mono Stereo Dual I II Stereo Bilingual Transmissions Navigation Buttons To move up down left or right in the on screen menu To return to the previous level of the on screen menu IN TV Mode To display on screen information IN ...

Страница 11: ...layed NOTE Although this television is able to connect to HDMI equipment it is possible that some equipment may not operate correctly You can use Subwoofer Out for connecting an external active subwoofer to the set to give a much deeper bass effect A wide variety of external equipment can be connected to the television therefore the relevant owner s manuals for all addi tional equipment must be re...

Страница 12: ...DMI DVI cable may not work properly with this mode HDMI cable transfers both video and audio Separate analogue audio cables are not required see illustration To view the HDMI device video press the SOURCE button to select HDMI1 HDMI2 HDMI3 or HDMI4 HDMI Input Sockets Back HDMI device Side HDMI Input or To Connect a DVI Device PC DVD Player etc Connect an HDMI to DVI cable HDMI typeAconnector to th...

Страница 13: ...ing on the DVD s title and the specifications of the PC on which you are playing the DVD Video some scenes may be skipped or you may not be able to pause during multiangle scenes To Connect a USB Flash Drive You can connect a USB Flash Drive to your TV by using the USB input of the TV This feature allows you to display play music photo or video files stored in a USB stick It is possible that certa...

Страница 14: ... using the TV set in Power Save Mode has more power efficiency than disconnecting the TV from the mains socket instead of keeping stand by mode Therefore it is highly recommended to activate Power Save Mode setting to reduce your annual power consumption And also it is recommended to disconnect the TV from the mains socket to save energy more when you do not use Please helps us to help the environ...

Страница 15: ... televisions This is recommended when the television is not being used for a long time e g when on holiday Reducing the brightness of the screen will reduce energy use NOTE Putting the television into standby mode will reduce energy consumption but will still draw some power Using the Remote Control Press the MENU button on the remote control to see the menus The main menu appears as a group of ic...

Страница 16: ...e search types are digital only analog TV only and full 4 When set Down buton to select Teletext Language Use Left or Right button to select desired Teletext Language 5 Press OK button on the remote control to continue and the following message will be displayed on the screen 6 Select Yes by using Left or Right buttons and press OK to continue Afterwards the following OSD will be displayed on the ...

Страница 17: ...on will search for digital TV broadcasts Note You can press MENU button to cancel After all the available stations are stored Channel List will be displayed on the screen If you like the sort channels according to the LCN please select Yes and then press OK if available Note LCN Local Channel Number used for channel sorting Press OK button to quit channel list and watch TV Note Do not turn off the...

Страница 18: ... OK buttons Auto Channel Scan Menu Operation Digital Aerial Searches and stores aerial DVB stations Digital Cable Searches and stores cable DVB stations Analogue Searches and stores analogue stations Digital Aerial Analogue Searches and stores both analogue and aerial DVB stations Digital Cable Analogue Searches and stores both analogue and cable DVB stations Whenever you select an automatic searc...

Страница 19: ...ually For example if the television cannot be connected to a media recorder decoder with a SCART lead or to tune in a station on another System To allocate a programme position on the television for a decoder and media recorder turn the decoder on insert a pre recorded film into the media recorder and press PLAY then manually tune After selecting search type as Manual Channel scan you can use Up o...

Страница 20: ...SUBTTL button again to turn off subtitles Viewing Main Menu Press buttons on the TV at the same time to view main menu Press MENU button on the remote control to view main menu Controlling Volume and Muting Sound Volume Press V or V to adjust the volume Sound Mute Press once to turn the sound off and again to cancel Selecting Programme Positions To select a programme position use the numbered butt...

Страница 21: ...the channel and press OK Selected channel is now moved Deleting a Channel You can press GREEN button to tag untag all channels YELLOW button to tag untag channel Select the channel that you want to delete and select Delete option Press OK button to continue A warning screen will appear Select Yes to delete select No to cancel Press OK button to continue Renaming a Channel Select the channel that y...

Страница 22: ...e guide screen will appear highlighting details of the channel and programme currently being viewed This may take a few moments to appear For information on a highlighted programme press INFO button For details of other programmes currently available press cursor buttons to scroll up and down or scroll left right through the list As channels are selected details of the programme currently being br...

Страница 23: ... will appear on the screen To start installation process select Yes by using or and OK button OK OK 4 After auto channel scan type is set and selected and confirmed installation process will start and progress bar will move along The television will start to search for all available stations You must allow the television to complete the search This process may affect any saved information stored o...

Страница 24: ...eft or Right keys change the audio language Subtitle alter the subtitle language with Left or Right keys The chosen language will be seen in subtitles Teletext changes the preferred teletext language Guide By pressing Left or Right buttons change the guide language Current Audio if audio language is supported change the audio language by pressing Left or Right buttons Subtitle if subtitle is backe...

Страница 25: ... the correct lock key So the user cannot add delete rename channels cannot set timers INSTALLATION MENU Installation menu is locked So the user can t add channels Changes will be updated after exiting Configuration Menu Child Lock Press MENU button and select settings by using Left or Right button Press OK to continue Use Up or Down to select parental and then press OK to continue Enter the pin nu...

Страница 26: ...utton and select picture by using Left or Right button Press Up or Down to select brightness Sets the brightness value for the screen Sharpness Press MENU button and select picture by using Left or Right button Press Up or Down to select sharpness Sets the sharpness value for the objects displayed on the screen Colour Press MENU button and select picture by using Left or Right button Press Up or D...

Страница 27: ...e visible and the option Full will appear in the Picture Format screen selection menu HDMI True Black optional While watching from HDMI source this feature will be visible in the Picture Settings menu You can use this feature to enhance blackness in the picture You can set this feature as On for activating HDMI True Black mode Note HDMI True Black On Off feature functions only when the HDMI device...

Страница 28: ...rovided by the selected source if available The format being displayed in AUTO mode is completely independent of WSS information which could be included in the broadcast signal or the signal from an external device Note Auto mode will only be available in HDMI YPbPr and DTV 16 9 Use this setting when watching a widescreen DVD widescreen video tape or a 16 9 broadcast when available Due to the rang...

Страница 29: ...shifts the image horizontally to right hand side or left hand side of the screen In the PC POSITION menu press the Down button until H Position is highlighted Press the Left or Right button to adjust the value V Position V Vertical Position shifts the image vertically towards the top or bottom of the screen In the PC POSITION menu press the Down button until V Position is highlighted Press the Lef...

Страница 30: ...tton to change the level of the balance Balance level can be adjusted between 31 and 31 Headphone This setting is used to set the sound output when headphones are connected Press Up or Down button to select Headphone Press Left or Right button to select Volume Press Right button to increase headphone volume level Press Left button to decrease headphone volume level Headphone volume level can be ad...

Страница 31: ...ight button Press OK button to continue Use Up or Down button to select Date Time and then press OK button to continue Sources Enables or disables selected source options Press MENU button and select Settings by using Left or Right button Press OK button to continue Use Up or Down button to select Sources and then press OK button to continue Other Settings Press MENU button and select settings by ...

Страница 32: ... particular programme or by setting the mode to daily or weekly can be used to view a series of programmes Press Down button to set timers on an event Programme timer function buttons will be displayed on the screen Adding a Timer Press YELLOW button on the remote control to add a timer The following menu appears on the screen Channel Changes channel by using Left or Right Timer Record Type This f...

Страница 33: ... control to exit To view general configuration preferences select Other Settings in the Settings menu and press OK button Operation Press Up or Down buttons to select an item Use Left or Right button to set an option Press OK button to view a sub menu Menu Timeout Press MENU button and select Settings by using Left or Right button Press OK button to continue Use Up or Down button to select Other S...

Страница 34: ...on using Up or Down buttons Audio description refers to an additional narration track for blind and visually impaired viewers of visual media including television and movies The description narrator talks through the presentation describing what is happening on the screen during the natural pauses in the audio and sometimes during dialogue if deemed necessary You can use this feature only if the b...

Страница 35: ...ull will appear in the Picture Format screen selection menu TXT Language Press MENU button and select settings by using Left or Right button Press OK to continue Use Up or Down to select others settings and then press OK Select TXT Language using Up or Down buttons and use Left or Right to set Use this setting to set a preferred TXT Language Other Controls continued ...

Страница 36: ...g the USB device in again Do not use a USB Hub You must obtain any required permission from copyright owners to use copyright content Toshiba cannot and does not grant such permission Depending on the file size and amount in your USB storage device it may take some time for loading to view Amessage will display on screen when loading files from the USB storage device Only limited types of USB devi...

Страница 37: ...eshow Press BLUE button to activate loop shuffle Press INFO button to display filtering options Press FAV button to sort files by date Press button to view thumbnails Slideshow Feature You can use this feature to display photos on your TV Press RED button to zoom picture Press GREEN button to continue with the slideshow Press YELLOW button to pause a playing file Press BLUE button to activate loop...

Страница 38: ...an set subtitles by using OK button before starting the playback or by using LANG button during the playback Selected subtitles may not be displayed correctly in some cases In order to display movie subtitles correctly you should set a Movie Subtitle language See the section Movie Subtitle in Language Settings for selecting Movie Subtitle language Press BACK button to switch back to previous menu ...

Страница 39: ... To access one of the four given subjects press the relevant coloured button on the remote control For further information on your particular text system s see the broadcast text index page or consult your local Toshiba dealer Below is a guide to the functions of the remote control text buttons Acessing Sub Pages If a text page has sub pages press and enter the sub page numbers 01 02 03 etc which ...

Страница 40: ...elow If you switch your PC to an unsupported mode a warning OSD will appear on the screen Index Resolution Frequency 1 640x400 70Hz 2 640x480 60Hz 3 640x480 72Hz 4 640x480 75Hz 5 800x600 56Hz 6 800x600 60Hz 7 800x600 70Hz 8 800x600 72Hz 9 800x600 75Hz 10 1024x768 60Hz 11 1024x768 70Hz 12 1024x768 72Hz 13 1024x768 75Hz 14 1152x864 75Hz 15 1280x768 60Hz 16 1360x768 60Hz 17 1280x768 75Hz 18 1280x960 ...

Страница 41: ... 1080i 60Hz 1080p 50Hz 1080p 60Hz HDMI1 HDMI2 HDMI3 HDMI4 480i 60Hz 480p 60Hz 576i 50Hz 576p 50Hz 720p 50Hz 720p 60Hz 1080i 50Hz 1080i 60Hz 1080p 50Hz 1080p 60Hz 1080p 24Hz Note In some cases a signal on the LCD TV may not be displayed properly The problem may be an inconsistency with standards from the source equipment DVD Set top box etc If you do experience such a problem please contact your de...

Страница 42: ... Bit rate 32kHz 48kHz Sampling rate Photo jpg jpeg Baseline JPEG max WxH 15360x8640 4147200bytes Progressive JPEG max WxH 1024x768 6291456bytes bmp max WxH 9600x6400 3840000bytes Subtitle sub srt Appendix D PIN Information Before connecting any external equipment turn off all main power switches If there is no equipment switch remove the mains plug from the wall socket Signal information for Mini ...

Страница 43: ...sing Supplied Accessories Remote Control 2 batteries AAA IEC R03 1 5V P Clip Side AV Connection Cable Stand Cover 8 screws VESA mounting bolts Stand Instructions 46BL702B Energy Efficiency Class A Visible Screen Size approx 117cm 46 On Mode Power Consumption approx 81 W Annual Power Consumption approx 118 kWh Standby Power Consumption approx 0 50 W Screen Resolution pixels 1920 x 1080 Display 16 9...

Страница 44: ...rated at the recycling centres The black bar indicates that the product was placed on the market after August 13 2005 By participating in separate collection of products and batteries you will help to assure the proper disposal of products and batteries and thus help to prevent potential negative consequences for the environment and human health For more detailed information about the collection a...

Страница 45: ...n index page of the analogue text service and look for the User Guide Q Why doesn t the video DVD being played show on screen Q What is DVB T A Make sure the VCR or DVD player is connected to the TV as illustrated in the beginning chapters then select the correct input by pressing SOURCE A Digital Video Broadcast via an aerial antenna Q Why is the VCR DVD picture in black and white Q How are radio...

Страница 46: ...ed digital channels unavailable Q Why does the active standby LED sometimes take longer to go out A Your subscription needs upgrading Contact your service provider A When put into standby the TV s active standby will automatically search all available channels for downloads provided Automatic Download is enabled The time taken to do this may vary EU Conformity Statement This product is marked with...

Страница 47: ...republika 323 204191 Danmark 80 88 93 38 Eesti Vabariik 69 97 800 Suomen tasavalta 0800 77 35 03 France 09 69 32 64 84 Deutschland 0431 24 89 45 50 Ortstarif abweichender Mobilfunktarif moglich Gibralter 200 76334 Ελληνική 210 9554298 Magyar Köztársaság 23 428 870 Ísland 00 45 80 88 93 38 Yisrā el 03 953 5900 Italia 039 609 9301 Latvijas 00 372 69 97 800 Lietuvos 00 372 69 97 800 Luxembourg 00 32 ...

Отзывы: