


13
Getting started
Tuning the TV for the first time
- digital only -
Before switching on the TV, put your decoder and media
recorder to
Standby
if they are connected and ensure the
antenna is connected. To setup the TV use the buttons on the
remote control as detailed on page 10.
1
Press ,
the
Welcome
screen will appear. This
screen will appear the first time that the TV is switched on
and each time the TV is reset.
2
Press
Q
to proceed.
3
The
Select Location
screen will appear. Press
u
or
U
to select the state in which you live.
4
Press
Q
to start tuning. The
Auto Scan
screen will
appear and the TV will automatically start to search for
available stations. The progress bar will move along the
line.
5
When the search is completed, the TV will automatically
turn to the lowest logical channel number. See the
following for more details on
Auto Scan
.
Note:
If you do not live in Australia, press
P
at the
Select Location
.
Press
M
, then press
I
or
i
to select
PROFILE
.
Press
u
or
U
to select
Time Zone
to set your time zone
(
-
page 24).
Then use
Manual Scan
to start tuning (
-
page 14).
Programming channels into the
TV’s channel memory
Auto scan
- digital only -
As new services are broadcast, it will be necessary to re-tune
the TV in order to view them.
Auto scan will completely re-tune the TV and can be used to
update the channel list. It is recommended that Auto scan is run
periodically to ensure that all new services are added. All
stored programs and settings, including Timer entries,
favorites and locked programs, will be lost.
1
Press
M
and
I
or
i
to select the
SCAN
menu.
2
Use
u
to select
Auto Scan
.
3
Press
Q
to display
Password
. Enter your password
(
-
page 29) using the
number
buttons or press 0000
(which is the default password).
4
The
Select Location
will appear. Current location will
be highlighted. Press
u
or
U
to select a state in which you
live.
5
Press
,
Q
a confirmation screen will appear indicating
that
All existing channels will be deleted.
Continue?
select
Yes
.
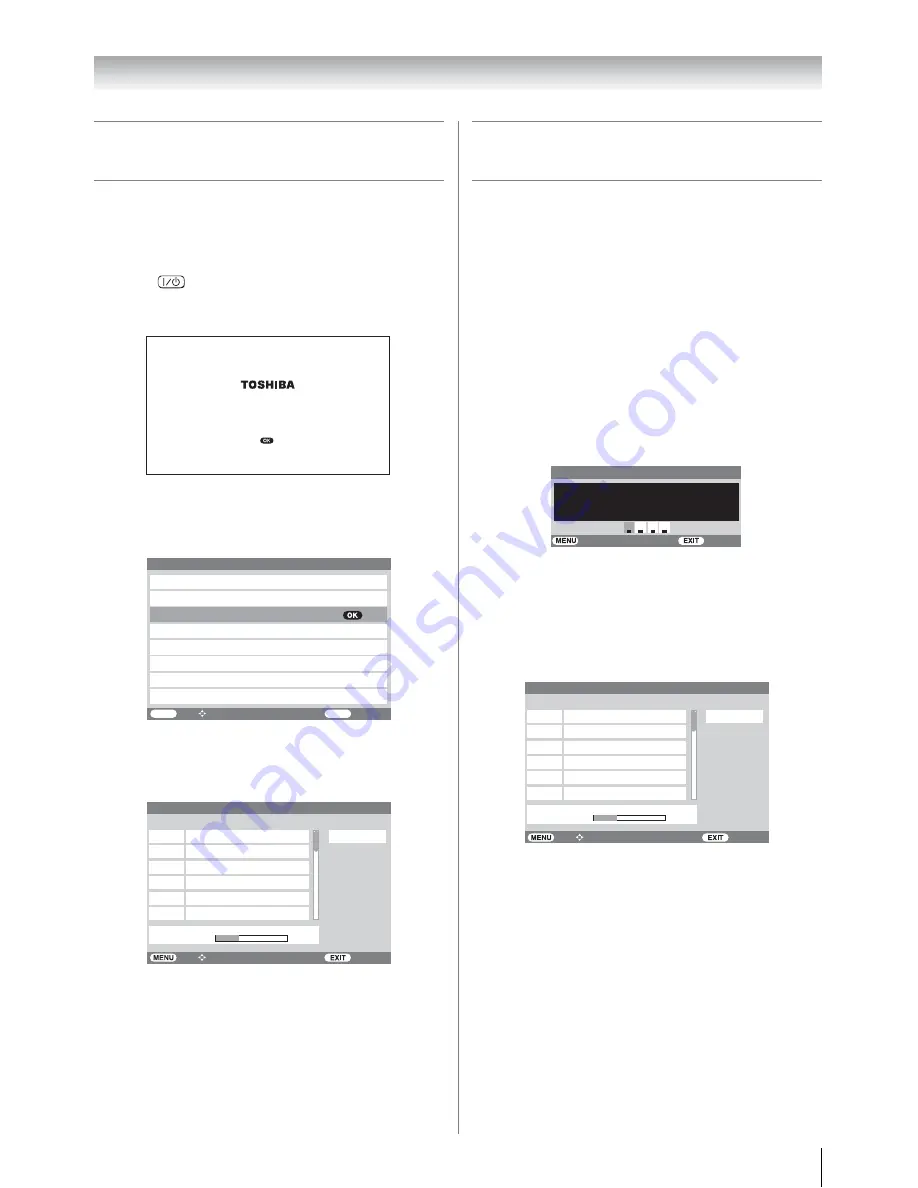
6
Press
Q
to start Auto tuning.
The above sample display shows
Auto Scan
in progress.
The channel number is shown as “06-0007” etc., where
“06” is the physical channel number and “0007” is the
logical channel number (which is the 4-digit number you
enter when changing channels).
7
When the search is complete, the TV will automatically
tune to the lowest logical channel number.
Thank you for choosing TOSHIBA television
.
First you need to tune in your television
.
Please ensure aerial is connected before proceeding
.
Press to continue
.
Select Location
Australian Capital Territory
New South Wales
Northern Territory
Queensland
South Australia
Tasmania
Victoria
Western Australia
Back Watch
TV
MENU
EXIT
Select Function
Auto Scan
7 Digital
7 Digital HD
7 Digital 1
7 Digital 2
Channel 6 found...
06-0007
06-0070
06-0071
06-0072
7 Digital 3
06-0073
7 Digital Guide
06-0077
Scan Status
6/69
Scan Percentage
Northern Territory
Back Watch
TV
Select Function
Password
Watch TV
Blocking active
Enter PIN code
To temporarily unblock
Back
Auto Scan
7 Digital
7 Digital HD
7 Digital 1
7 Digital 2
Channel 6 found...
06-0007
06-0070
06-0071
06-0072
7 Digital 3
06-0073
7 Digital Guide
06-0077
Scan Status
6/69
Scan Percentage
Back Watch
TV
Select Function
Northern Territory
Содержание 32WLT66A
Страница 43: ...43 Reference section ...
Страница 44: ......


