22
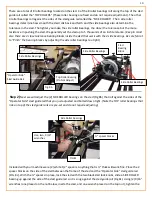
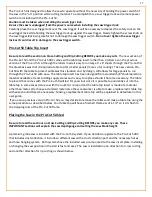
Rip cutting boards has never been easier or more accurate. The board is guided on both sides with the side
fence on one side of the board and the Aux side fence on the opposite side of the board (Fig 38). Simply side
the Aux Side Fence up to the board with
enough pressure to hold the board “true” but loose enough to allow
the board to feed through while you rip cut. Then lock the heavy duty toggle clamps of the Aux Side Fence to
the clamping rails of the Pro-Cut 50 and make your cut. Because the saw is top mounted and guided on both
sides, the board is encapsulated thus virtually eliminating the possibility of kick back. For a factory edge you
can kerf cut or pre-cut a panel to prevent chip out
or splintering. To kerf cut, raise the saw depth to cut a 1/8”
score, make the cut
and then lower the blade to ¼” below the material to complete the cut. For quality cuts,
the blade you use is very important. See the section on “selecting a blade”.
To rip-cut a board or panel
1)
Unplug the saw
and raise the blade all the way up.
2)
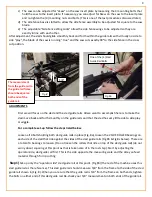
Place the saw in the correct orientation for rip cutting in the Pro-Cut 50 sled.
3)
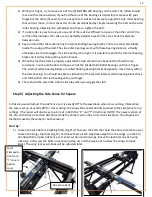
Slide the sled to the desired measurement using the built in measuring scale. (
Tip: be sure you set the
saw blade on the proper side of the cut mark to be sure your cut material is the size you want)
.
4)
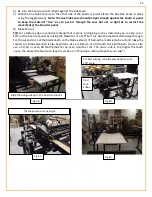
Lock the sled (See Fig 40)
5)
Be sure the saw is Unplugged
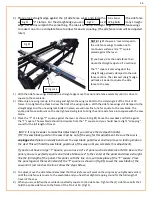
, raise the blade guard using the blade guard lever and lower the blade of
the saw so the saw blade just touches the Rip-Cut grove in the table top. Raise the saw blade slightly so
it doesn’t cut into the Cross Cut grove in the table top. Lock the saw blade, plug the saw back in, turn
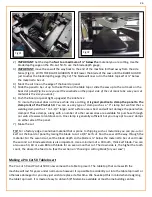
on the saw using the remote power switch and make your cut See Fig S1
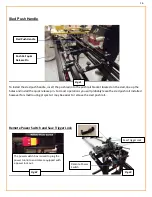
Position saw for rip cutting
Fig 37
Fig 38
Increased accuracy for rip cutting boards using
the additional side guide
NOTE: In Fig S1, The saw blade is lowered just
shy of the rip-cut grove in the table top. This
depth of cut will give you the cleanest cut in
any material.
It is standard practice in woodworking to never
exceed ¼” below the material you are cutting.
Fig S1


