For Systems with Maxon Radios
The VP satellite with Raveon radio requires a Field Interface Unit (FIU) with
a Raveon radio (P/N FIU-2011DR) to communicate. If your current system,
along with the FIUs, employs the (older) Maxon radios, the Raveon radio
must be put into “bell202” mode for successful communication.
Required Items:
• Radio Manager software from Raveon
• USB to Serial (DB9) cable with included drivers
• 12V Phoenix power connector (from authorized Toro distributor)
• 12V power supply for radio (from authorized Toro distributor)
To put the Raveon radio into bell202 mode:
1. Disconnect all power to the controller. Remove the radio. Place it next to
the Lynx computer on a static-free surface.
2. At the computer running Lynx, install the drivers for the USB
to Serial (DB9) cable. Reboot computer.
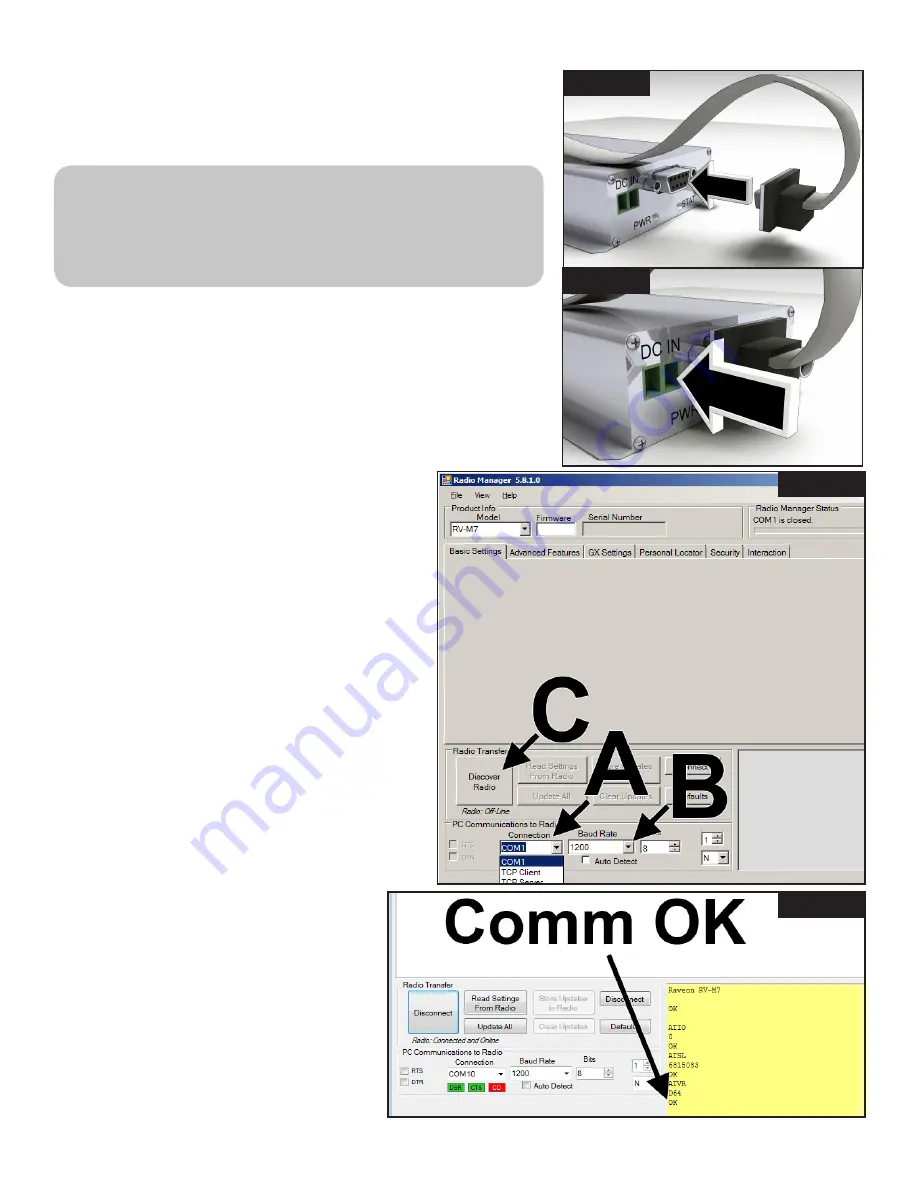
3. Plug USB cable into a USB port and Serial port on radio (
Figure 1
).
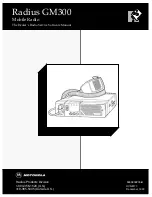
4. Connect Phoenix power cable into 12V power supply.
Plug other end into DC IN port on radio (
Figure 2
).
5. Plug in 12V power supply.
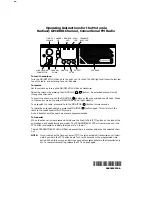
6. Launch Radio Manager. See
Figure 3
.
7. Select appropriate COM port (
Figure 3, A
).
8. Change the baud rate to 1200 (
Figure 3, B
)
9. Press ‘Discover Radio’ button (
Figure 3, C
).
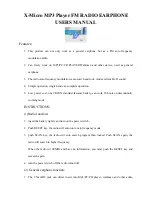
The radio should be discoverd (
Figure 4
).
10. At the command line, issue the following commands
to the Raveon radio:
ATMT 4
ATR2 15
ATBP 1
ATIO 7
TXTOT 60
11. To exit a Raveon radio from bell202 mode
(to recommunicate with other Raveon radios,
for example), issue the following commands:
ATMT 0
ATR2 3
ATBP 0
ATIO 0
12. All interface board jumpers (both the satellite
and FIU) must be set to the left, to the ‘VP’
side (see frame 1 on previous page).
Figure 1
Figure 4
Figure 3
Figure 2


