background image

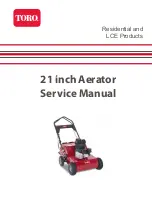
21 inch Aerator

Service Manual

Residential and 

LCE Products

Содержание 23515

Страница 1: ...21 inch Aerator Service Manual Residential and LCE Products ...

Страница 2: ......

Страница 3: ...ompact design parts were removed for photographic purposes when necessary The hydraulic components are sophisticated pieces of machinery Maintain strict cleanliness control during all stages of service and repair Cover or cap all hose ends and fittings whenever they are exposed Even a small amount of dirt or other contamination can severely damage the system We are hopeful that you will find this ...

Страница 4: ...ABOUT THIS MANUAL THIS PAGE INTENTIONALLY LEFT BLANK ...

Страница 5: ... Pressure 2 17 Adjusting the Tension of Tine Drive Chains 2 17 Checking the Hydrostatic Drive Belt 2 18 Adjusting the Machine Ground Speed 2012 13 models Serial 312000001 up Serial 313000001 up 2 19 Adjusting the Self Propel Drive 2014 models Serial 314000001 up 2 21 Changing the Hydraulic Transmission Fluid 2 22 Checking Replacing Tines 2 22 Troubleshooting 2 23 3 Chassis Handle Subsystem 2012 Se...

Страница 6: ... 4 5 Servicing the Jack Shaft Output Shaft 4 6 Jack Shaft Output Shaft Removal 4 6 Jack Shaft Output Shaft Installation 4 9 Transmission Installation 4 10 Engine Subsystem 4 13 Engine Replacement 4 14 Engine Removal 4 14 Engine Installation 4 14 5 Tine System Tines Subsystem 5 1 Checking Replacing Tines 5 2 Tine Assembly Replacement 5 3 Tine Assembly Removal 5 3 Tine Assembly Installation 5 6 ...

Страница 7: ...ment Avoid injury due to projectiles Always clear the area of sticks rocks or any other debris that could be picked up and thrown by the powered equipment Avoid modifications Never alter or modify any part unless it is a factory approved procedure Avoid unsafe operation Always test the safety interlock system after making adjustments or repairs on the machine Refer to the Electrical section in thi...

Страница 8: ...SAFETY INFORMATION 1 2 Toro 21 Aerator Service Manual 1 THIS PAGE INTENTIONALLY LEFT BLANK ...

Страница 9: ... Starter Recoil Only Fuel Tank Volume 1 0 US gal 3 8 L Power System Transmission Hydro Gear T2 Hydraulic Fluid Toro premium hydro oil or Mobil1 15w 50 Hydraulic Fluid Capacity 65 9 oz 1950ml Ground Speed fwd rev 4 mph 2 2 mph Drive Tires pneumatic 11 x 4 00 4 Tire Pressure 46 psi 317 kPa Dimensions Width in cm 31 0 79 0 Length Operating in cm 61 0 155 0 Length Handle Stored in cm 48 5 123 0 Height...

Страница 10: ...c Fluid Toro premium hydro oil or Mobil1 15w 50 Hydraulic Fluid Capacity 65 9 oz 1950ml Ground Speed fwd rev 4 mph 2 2 mph Drive Tires pneumatic 11 x 4 00 4 Tire Pressure 46 psi 317 kPa Dimensions Length handle in lowest position in cm 58 147 Length handle in middle position in cm 59 150 Length handle in highest position in cm 61 155 Length Handle Stored in cm 42 107 Width in cm 31 79 Height handl...

Страница 11: ...andle height position the hardware into one of three sets of holes on each side of the mainframe Fig 001 Fig 002 and Fig 003 Fig 001 fig 7 G023023 Fig 002 fig 8 G023052 A B C D C Front handle position lowest height A Trunion bracket C Mounting bolt location bottom hole D Handle hardware B Lift link straps front holes Middle handle position A Trunion bracket C Mounting bolt location bottom hole D H...

Страница 12: ...parts to stop 2 Disconnect the wire from the spark plug 3 Loosen the nuts securing the wheel stop on the right side of the machine Fig 004 Fig 003 fig 9 G023063 2 Secure the handle with both mounting bolts 3 Adjust the tine control lever Rear handle position highest height A Trunion bracket C Mounting bolt location top hole D Handle hardware B Lift link straps rear holes A Wheel stop C Indicator h...

Страница 13: ...e added to the back of the machine The machine has three weight pockets that hold the weights When placing weight ensure that the load is balanced if using only one weight place it in the center pocket and if using two place them in the side pockets Note The removable weights are heavy Use care when lifting them Make sure that you can hold them securely before lifting them Use caution when positio...

Страница 14: ...ne control lever should contact the handle firmly Fig 007 if not proceed to step 8 Fig 006 fig 19 G023657 A Handle pivot bolt D Lift link strap ball joint B Lower ball joint bolt E Adjust here C 1 4 6mm A Handle D Jam nut B Self propel drive bail E Link rod C Tine control lever F Ball joint contacts here Fig 007 fig 20 G023658 A A B C B C DE F A B C D E 8 Loosen both jam nuts on both ends of the l...

Страница 15: ...using Anchor Nuts so there are an equal number of threads on each end and re tighten B Fig 010 3 Adjust the lower nut all the way to the end so that one thread is showing at most Tighten the internal nut to secure the cable to the bracket C Fig 012 4 Adjust jam nut all the way to the end so no threads are showing Adjust the yoke as far onto the rod as possible and re tighten the jam against the yo...

Страница 16: ... in dusty conditions Check the tension of the hydrostatic drive belt Every 50 hours Change the engine oil Check the spark arrester if equipped Check for leaks in the fuel systems and or deteriorating fuel hose Check the tire pressures Every 100 hours Change the oil filter Inspect clean and adjust the spark plug replace it if necessary Clean the fuel filter element Change the hydraulic transmission...

Страница 17: ...with gasoline Secure the machine with a jack stand before working under it Fig 014 fig 21 G023846 Fig 015 fig 22 G017586 A Rear access panel A Jack stand A WARNING If you operate the machine with the rear access panel removed some one could be severely injured by contact with the moving tines or by flying debris Always securely install the rear access panel before operating the machine A WARNING M...

Страница 18: ...val A Tine Shaft A Bearings 1 2 25 hours B Tine B Assembly B Idlers 1 2 2 25 hours A B A B B A Lubricating Checking the Drive Chains Sprockets 1 Raise the tines stop the machine stop the engine and disconnect the spark plug wire 2 Raise the front of the machine to gain access to the chains and block it in place CAUTION If you do not securely block up the front of the machine the machine could fall...

Страница 19: ...he foam pre cleaner and wash it with a mild detergent and water then blot it dry Fig 019 5 Remove and inspect the paper air filter Fig 019 discard it if it is excessively dirty Important Do not try to clean a paper filter 6 Wipe dirt from the base and the cover with a moist rag Note Be careful to prevent dirt and debris from entering the air duct leading to the carburetor 7 Install the foam pre cl...

Страница 20: ...With oil filter 0 85 L 29 ounces Without oil filter 0 65 L 22 ounces 1 Run the engine to warm the engine oil Note Warm oil flows better and carries more contaminants WARNING Oil may be hot after engine has been run and contact with hot oil can cause severe personal injury Avoid contacting the hot engine oil when you drain it 2 Stop the engine and wait for all moving parts to stop 3 Disconnect the ...

Страница 21: ...t the engine is full Do not overfill Max fill 0 55 L 20 oz type SAE 10 w30 detergent oil with an API service classification of SH SJ SL or higher Note If you overfill the engine pour some oil out of it 9 Install the dipstick securely 10 Recycle the used oil according to local codes Changing the Oil Filter 1 Drain the engine oil 2 Place a rag under the oil filter Fig 022 to catch any oil that may l...

Страница 22: ... of SH SJ SL or higher Note If you overfill the engine pour some oil out of it 7 Install the dipstick securely 8 Connect the wire to the spark plug 9 Run the engine for about 3 minutes 10 Stop the engine wait for all moving parts to stop and check for oil leakage around the filter 11 Check and add oil to compensate for the oil in the oil filter Do not overfill 12 Recycle the used oil filter accord...

Страница 23: ...s even after the engine is stopped Hot particles exhausted during engine operation may ignite flammable materials Fire may result in personal injury or property damage DO NOT refuel or run engine unless spark arrester is installed 1 Raise the tines stop the machine stop the engine and disconnect the spark plug wire 2 Wait for the muffler to cool 3 If you observe any breaks in the screen or welds r...

Страница 24: ...the fuel line by loosening the tube clamp at the carburetor 5 Open the fuel valve by turning the lever to the open position 6 Drain the gasoline completely from the tank and fuel line into an approved fuel container 7 Remove the fuel tank from the machine 8 Close the fuel valve 9 Pour a small amount of fuel in the fuel tank move the fuel around in the tank and pour it out into an approved fuel con...

Страница 25: ... to gain access to the chains and block it in place CAUTION If you do not securely block up the front of the machine the machine could fall on you during service injuring you Ensure that you place a jack stand or block under the front of the machine to hold it up securely Important Do not raise the rear of the machine Raising the rear of the machine will cause the engine to flood and the air clean...

Страница 26: ... G023852 A Idler sprocket B Nut A B Checking the Hydrostatic Drive Belt 1 Raise the tines stop the machine stop the engine and disconnect the spark plug wire 2 Raise the front of the machine to gain access to the pump drive belt and block it in place CAUTION If you do not securely block the up the front of the machine the machine could fall on you during service injuring you Ensure that you place ...

Страница 27: ...rial 313000001 up 1 Loosen the 2 bolts securing the cable attachment bracket and slide it as far as possible to the left then tighten the 2 bolts Fig 031 A Loosen the nut securing the idler pulley Fig 030 B Push the idler pulley to the left to tighten the belt C Tighten the idler pulley nut and torque it to 30 ft lbs 40 6 Nm Fig 030 fig 33 G013125 Fig 031 fig 29 G020483 A B C A Pump drive belt C I...

Страница 28: ...om the bracket Fig 033 Move the lower nut to the end of the thread Fig 033 Note Ensure that the bail will reach the handle after the transmission is engaged Fig 032 fig 30 G020484 Fig 033 fig 31 G020485 2 Adjust the traction drive cable at the lower anchor by moving the nut to the end of the thread and tightening the jam nut Fig 032 A B A A Nut B Jam nut A Lower nut ...

Страница 29: ...001 up 1 Raise the tines stop the machine stop the engine and disconnect the spark plug wire 2 Squeeze the self propel bail to the handle until the transmission is fully stroked If the bail contacts the handle release the bail Loosen the top adjustment nut one turn and tighten the bottom adjustment nut Squeeze the bail to the handle Repeat this step until there is a gap up to 1 8 3mm between the s...

Страница 30: ... tine to the tine assembly Fig 036 Fig 036 fig 36 G013128 5 Remove the tine and replace it with a new one Ensure that the new tine is facing the same direction as the other tines on the assembly 6 Secure the new tine with the bolt and nut you removed previously and torque them to 30 ft lbs 40 6 Nm 7 When all tines have been inspected and replaced as needed lower the machine to the ground and engag...

Страница 31: ...p drive belt The front wheels move but the tines do not 1 A chain or drive sprocket is broken 1 Replace the broken chain or sprocket The engine smokes when starting 1 The engine was tipped forward 1 Check the air cleaner and replace it if it is fouled Always tip the machine back when servicing The engine is hard to start after transporting it 1 The fuel valve was not closed before transport and th...

Страница 32: ...SPECIFICATIONS MAINTENANCE 2 24 Toro 21 Aerator Service Manual 2 THIS PAGE INTENTIONALLY LEFT BLANK ...

Страница 33: ...l 3 Handle Subsystem 2012 Serial 312000001 up 2013 Serial 313000001 up Fig 037 Fig 037 subsystem handles 2012 A Mount Handle E Control Throttle B Handle Assembly F Cable Lift Lower C Tube Control G Cable Drive D Tube Lift Handle C D B G F E A ...

Страница 34: ...or 2 threads showing Handle must still be able to pivot Push angle stop down as far as possible With the handle folded adjust linkage K by hand until the ball join on the tine ground engagement lever is tight against the handle Adjust cable so when drive handle B is at full speed there is 03 10 gap between drive handle 2 and handle 1 3 4 threads exposed on the front side of the front nut Assemble ...

Страница 35: ...em 2012 Serial 312000001 up 2013 Serial 313000001 up Fig 039 G Cover transaxle J Pulley H Bracket mount axle K Bracket mounting RH cable I Brocket mount axle L weight aerator LH A Frame aerator 21 D Brackt mount cable B Stop depth E Sprocket idler C Cover assembly F Guard A D L J C B K G E H I F ...

Страница 36: ...bsys eng frame 2014 Engine Frame Subsystem 2014 Serial 314000001 up Fig 040 A Frame service D Bracket mount axle B Stop depth RH C Sprocket idler E Bracket mount axle LH F Pulley H Cover transaxle G Weight areator I Bracket mounting cable A B G C H E F D I ...

Страница 37: ... Height Linkage Subsystem Height Linkage 2012 Serial 312000001 up 2013 Serial 313000001 up Fig 041 Fig 041 subsys ht linkage 2012a A Shaft pivot C Link connecting B Arm wheel D Wheel transport E Arm lift G Screw set F Key woodruff A F F C D G E B ...

Страница 38: ...nsport H Arm guard RH Wheel pivot arms must rotate freely on frame pivot pins 2x Pivot shaft assembly must rotate freely in frame bushings 2 3 4 Tighten nut to a good finger tight snug fit against nylon bushing and washer Assemble so flange side of nut goes away from bolt head Assembly wheel so the tire does not touch the wheel arem and turns freely 2x Apply anti sieze to this area prior to assemb...

Страница 39: ...the nut to the end of the thread and tightening the jam nut Fig 045 Fig 043 drive cable 1 2 From under the machine loosen the cable lock nuts and remove the linkage that connects the cable to the transmission Remove the cable Fig 044 A Nut B Jam nut Fig 044 drive cable 2 Fig 045 fig 30 G020484 Drive Cable Removal Installation 1 Remove the cotter key and pin from the drive handle Loosen the lock nu...

Страница 40: ...en the 2 nuts Fig 047 Note The reverse speed should be around 2 0 MPH 3 2km h Fig 046 fig 31 G020485 Fig 047 fig 32 G020486 5 Adjust the traction drive cable at the handle as follows Loosen and remove the linkage adjustment from the bracket Fig 046 Move the lower nut to the end of the thread Fig 046 Note Ensure that the bail will reach the handle after the transmission is engaged A A Lower nut A N...

Страница 41: ... control bracket yoke so that no threads are showing then adjust the yoke as far onto the rod as possible Tighten the jam nut against the yoke Fig 050 Fig 048 lift lower cable 1a 2 Remove the cotter key and pin from the tine control bracket Loosen the lock nuts that connects the cable to the stationary bracket Remove cable Fig 049 Fig 049 lift lower cable 2 Fig 050 jam nut 1 5 Adjust the lower nut...

Страница 42: ...ing jam nuts so there are an equal number of threads on each side Tighten the jam nuts Fig 053 Fig 053 upper jam nuts 2a 6 Adjust the jam nut on the handle bracket yoke so no threads are showing then adjust the yoke as far onto the rod as possible and tighten the jam nut against the yoke Fig 052 ...

Страница 43: ...ront handle position Lowest height A Trunion bracket C Mounting bolt location bottom hole D Handle hardware B Lift link straps front holes Middle handle position A Trunion bracket C Mounting bolt location bottom hole D Handle hardware B Lift link straps middle holes Fig 054 fig 7 G023023 2 Secure the handle with both mounting bolts 3 Adjust the tine control lever Fig 055 fig 8 G023052 A B C D C A ...

Страница 44: ...t shaft assembly C Wheel arm assembly B 4 8 12cm A Handle pivot bolt D Lift link strap ball joint B Lower ball joint bolt E Adjust here C 1 4 6mm Adjusting the Tine Control Lever Serial 314000001 up 1 Stop engine wait for all moving parts to stop 2 Disconnect the wire from the spark plug 3 Raise the tines to the transport position 4 The wheel arm and the pivot shaft assembly should have surface to...

Страница 45: ...e the tine control cable from the tine control bracket Fig 060 Fig 059 fig 20 G023658 Fig 060 lift lower cable 2 3 Remove the snap ring and washers from the wheel arm Fig 061 Fig 061 snap ring washers_a A Handle D Jam nut B Self propel drive bail E Link rod C Tine control lever F Ball joint contacts handle A A B DE F C C B 8 Loosen both jam nuts on both ends of the link rod next to the ball joints...

Страница 46: ...t arm snap ring_a 5 Loosen the set screws on the lift arm Note There are two set screws Fig 063 Fig 063 set screws 1 Fig 064 arm removal 4 Remove the snap ring and washer from the lift arm Fig 062 7 On the opposite side remove the snap rings and washers from the wheel arm and lift arm Fig 065 Fig 065 wheel lift arm_a ...

Страница 47: ...he chassis Fig 068 Fig 066 remove pivot shaft_a 9 Once the pivot shaft is out loosen the set screws on the lift arm and remove the wheel and lift arm assembly from the shaft Replace the shaft with new inserting it into the wheel and lift arm assembly Fig 067 Fig 067 new shaft_a Fig 068 insert new shaft_a 11 Guide the pivot shaft through the hole on the opposite side Fig 069 Fig 069 pivot shaft hol...

Страница 48: ...from the right hand lift arm Fig 071 Fig 070 install snap rings_a Fig 071 RH lift arm 3 Remove the snap ring from the pivot shaft Fig 072 Fig 072 PS snap ring 12 Once the shaft is through the chassis re install the wheel and lift arm assembly Apply Loctite 242 to the threads of the set screws and tighten them to 12 14 ft lbs 16 19 Nm 13 Install all snap rings and washers Fig 070 ...

Страница 49: ...d bolt that connects the wheel arm assembly to the lift link Fig 075 Fig 073 RH arm remove Fig 075 wheel arm bolt 7 Remove the pivot shaft from the left side of the machine Fig 076 Fig 076 pivot shaft asm 5 Remove the jam nut that is connected from the ball joint to the lift link Fig 074 Fig 074 ball joint nut ...

Страница 50: ...t hole on the right hand side Fig 079 Fig 077 pivot shaft unit_a 9 Insert new shaft through LH side of machine Fig 078 Fig 078 pivot shaft asm Fig 079 RH side hole_a 11 Install the RH lift arm Fig 080 Fig 080 RH lift arm replace 8 The pivot shaft and lift arm are one complete unit Fig 077 ...

Страница 51: ...d bolt that connects the wheel arm assembly to the lift link Fig 083 Fig 081 PS snap ring 13 Install the two bolts on the right hand lift arm Fig 082 Fig 082 RH lift arm Fig 083 wheel arm bolt 15 Install the jam nut that is connected from the ball joint to the lift link Fig 084 Fig 084 ball joint nut ...

Страница 52: ... loosen the lock collar Remove lock collar Fig 088 4 With an Allen wrench loosen the set screws on the lock collars on both sides Fig 087 Fig 086 key 3 Remove the keys and bushings from both sides of the axle Fig 086 Replacing the Front Drive Axle All Models 1 Jack the front of the unit up and place jack stands under the front frame 2 Remove the snap rings and remove the front wheels Fig 085 ...

Страница 53: ... the chain onto the transmission sprocket and the drive shaft sprocket Install the master link Fig 090 12 Install the bearings and bearing flanges Torque bolts to 11 ft lbs 15 Nm 13 Make sure the large sprocket on the drive shaft and the small sprocket on the transmission are perfectly aligned To align tap the driveshaft in the necessary direction to achieve alignment Fig 091 7 Rotate the shaft un...

Страница 54: ...Install the bushings and keys 16 Install the wheels and snap rings 14 Install the lock collars onto the flange bearings With a punch tap the recess to securely lock the collar onto the bearing Apply Loctite 242 to the set screws and tighten to 12 14 in lbs 1 4 1 6 Nm Fig 092 ...

Страница 55: ...acket support shaft Ensure belt is properly tensioned with no more than 1 4 deflection witih moderate 20 30 lbs pressure Apply Loctite 242 to all bearing collar set screws and all sprocket collar set screws Set locking collar in the same direction as shaft rotation assume forward tire rotation clockwise on RH side Set locking collar in the same direction as shaft rotation assume forward tire rotat...

Страница 56: ...e the tines stop the machine stop the engine and disconnect the spark plug wire 2 Drain the fuel from the fuel tank Dispose of fuel in an approved container 3 Slide the oval locking rings on the handle upward and fold the handle towards the engine 4 Slowly lift the front of the machine until the back of the machine and weight pockets are resting on the ground Stabilize the machine with an overhead...

Страница 57: ... 9 Loosen the drive chain idler sprockets on each side of the unit Fig 099 Fig 097 3a Fig 099 5a 10 Remove and retain the connecting link from the drive chains Remove the drive chains from the transmission sprockets Fig 100 Fig 100 6 8 Remove and retain the connecting link from the front axle chain sprocket Remove chain Fig 098 Fig 098 4 ...

Страница 58: ...e Manual 4 13 Remove the transmission from the chassis Fig 103 Fig 101 7a 12 Remove the four bolts holding the transmission to the support brackets Fig 102 Fig 102 8a Fig 103 9 11 Remove the bolts securing the bearing plate to the top of the deck Fig 101 ...

Страница 59: ...e the vent cap from the tank Note Do not remove the tank hose or O ring unless a replacement is needed 5 Inspect the belt pulleys sprockets and bearings Replace as required Fig 106 Fig 104 10 3 When all the oil has drained from the transmission remove and retain the 10 32 x 1 2 self tapping screw and ratchet fastener holding the expansion tank to the housing Fig 105 Fig 105 11 Fig 106 12a 6 Instal...

Страница 60: ...he bearing plate Remove the bolts that secure the bearing plate to the transmission Fig 109 Fig 108 13 2 a 8 Install the oil fill port fitting Fig 109 14a 3 The jack shaft will be loose allowing the removal of the chain Fig 110 Fig 110 15a 7 Fill the transmission at the oil fill port until the oil level is 1 2 1 1 4 inches 13 32mm below the top of the fill port A Fig 108 Note Toro Premium Hydro Oi...

Страница 61: ... output shaft Fig 111 6 Remove the lock collar Fig 113 Fig 111 16a 5 Insert a pin punch into the recessed hole in the lock collar Tap the punch to turn the collar to loosen the collar Fig 112 Fig 112 17a Fig 113 18a 7 Remove the bearing from the shaft and the output shaft from the transmission Fig 114 Fig 114 19a ...

Страница 62: ...o the recessed hole of the lock collar and tap the collar to loosen it from the bearing Fig 116 Fig 116 21a Fig 117 22a 11 Remove the jack shaft from the transmission The sprocket is keyed To remove sprocket from shaft insert the assembly into a press and press the sprocket off Fig 118 Fig 118 23a 8 Remove the lock collar and bearing from the jack shaft the same way as the output shaft Fig 115 ...

Страница 63: ...aft and install the chain Leave the lock collars loose Fig 119 3 The bearing plate to bracket support assembly dimension should be 5 inches from center to center on the mounting holes Fig 121 Fig 119 24a 2 Install the bearing plate bearings and bearing retainers Fig 120 Fig 120 25a Fig 121 26a 4 The sprockets should be exactly aligned with one another Fig 122 Fig 122 27a ...

Страница 64: ... tighten Apply Loctite 242 to the set screw and torque to 12 14 ft lbs 16 19 Nm Fig 124 Fig 124 29a Fig 125 30a 2 Install the transmission belt on the transmission pulley Fig 126 Fig 126 3a 5 Once the sprockets are aligned apply Loctite 242 to the set screws on the large sprocket Tighten the set screws on the large sprocket to 100 in lbs 11 5 Nm Fig 123 7 Insert a pin punch into the recessed hole ...

Страница 65: ...chain on the front axle sprocket Ensure that the front axle sprocket is aligned with the sprocket on the transmission Install the master link so that the spring clip is toward the inside of the machine and the opening is to the back of forward rotation Fig 128 Fig 128 31a Fig 129 fig 35 G023507 A A A A Fig 130 fig 33 G013125 A Pump drive belt C Idler pulley nut B Idler pulley 6 Tension the transmi...

Страница 66: ... inch 3mm with 20 lbs 9 kg of force applied loosen the sprocket nut and re tighten the chain Fig 132 Fig 132 fig 31 G023864 Fig 131 fig 32 G023852 Fig 133 32a 10 Carefully remove the hoist hooks and lower the machine to the ground Raise and lock the handle into the operating position 11 Check the gap between the handle and the bail If the handle contacts the bail or if there is more than a 1 8 inc...

Страница 67: ...Torque to 30 ft lbs 40 Nm Throttle adjustment after connecting throttle choke cable to engine push throttle lever to detent then tighten clamp screw making sure choke lever is not activated Loosen throttle bracket assembly mounting bolts adjust bracket forward aft to achieve desired full throttle position Retighten bolts Apply anti seize to engine crankshaft and engine pulley prior to assembly Pul...

Страница 68: ...ten clamp screw making sure choke lever is not activated Loosen the throttle bracket assembly mounting bolts adjust bracket forward aft to achieve desired full throttle position Re tighten bolts Fig 138 Fig 136 33a Fig 138 35a Engine Replacement Engine Removal 1 Drain the fuel from the fuel tank Make sure fuel is disposed of in an approved container 2 Disconnect the throttle cable from the engine ...

Страница 69: ...Grease location Install the connecting links so the cover plate and spring clip are to the outside of the machine Install spring clip so opening is away from forward direction of rotation After confirming that snap rings are seated into grooves completely adjust the shafts inward until the idler spyder weldments contact the flange bearings Tighten set screws in bearings torque to 12 14 ft lbs Tine...

Страница 70: ... the shaft inspecting them for wear or damage 4 If any are damaged or broken remove the nut and bolt securing the tine to the tine assembly 5 Remove the tine and replace it with a new one Ensure that the new tine is facing the same direction as the other tines on the assembly Fig 141 6 Secure the new tine with the bolt and nut and torque to 30 ft lbs 40 6 Nm 7 Replace the access cover and reconnec...

Страница 71: ...rd and fold the handle towards the engine 4 Slowly lift the front of the machine until the back of the machine and weight pockets are resting on the ground Stabilize the machine with an overhead hoist Fig 142 Note Using two people or an overhead hoist to lift the machine will make this easier 5 Loosen the drive chain idler sprockets on each side of the unit Fig 143 Fig 143 5 6 Remove and retain th...

Страница 72: ...move all of the chain guard bolts Fig 147 7 Loosen the set screws on the lock collars if applic able on both sides of the machine Insert a pin punch into the recess in the lock collars and tap until lock collars come loose Fig 145 Fig 145 38 8 Loosen and remove the two nuts and bolts then remove the lock collar bearings from both sides of the unit Fig 146 Fig 146 39a ...

Страница 73: ...Service Manual 5 13 Remove the tine assembly and chain guard Fig 151 Fig 151 44a 11 Loosen the flange bearing bolts and remove the nuts Fig 149 Fig 149 42 12 Slide the inner spyder toward the outer stationary spyder Fig 150 Fig 150 43 ...

Страница 74: ... bearing flanges onto both tines using bolts and nuts Torque bolts to 17 ft lbs 23 Nm Fig 154 Tine Assembly Installation 1 Place the chain guard on the tine assembly and install into the chassis Fig 152 Fig 152 45 2 Place the chain guard on the opposite side tine assembly and install into chassis Install all the flange bearing bolts and nuts and hand tighten the nuts Fig 153 Fig 153 46 ...

Страница 75: ... and tighten to 12 14 ft lbs 16 19 Nm Fig 158 Fig 158 50a 8 Install and tighten the drive chains as outlined in Transmission Installation on page 4 10 9 Carefully remove the hoist hooks and lower the machine to the ground Raise and lock the handle into the operating position 5 Tighten the flange bearing bolts Torque to 30 ft lbs 40 Nm Fig 156 Fig 156 49a 6 Move the inner spiders all the way toward...

Страница 76: ...TINE SYSTEM 5 8 Toro 21 Aerator Service Manual 5 THIS PAGE INTENTIONALLY LEFT BLANK ...

Страница 77: ......

Страница 78: ...21 inch Aerator Service Manual Form Number 492 9335 ...

Отзывы: