background image

2

All Rights Reserved

Printed in the USA

 2001 by The Toro Company

8111 Lyndale Avenue South
Bloomington, MN  55420-1196

The engine exhaust from this product contains
chemicals known to the State of California to cause
cancer, birth defects, or other reproductive harm.

Warning

Important


This engine is not equipped with a spark

arrester muffler. It is a violation of California Public
Resource Code Section 4442 to use or operate this engine
on any forest-covered, brush-covered or grass-covered
land. Other states or federal areas may have similar laws.

This spark ignition system complies with Canadian
ICES-002.

Ce système d’allumage par étincelle de véhicule est
conforme à la norme NMB-002 du Canada.

The enclosed Engine Owner’s Manual is supplied for
information regarding The U.S. Environmental
Protection Agency (EPA) and the California Emission
Control Regulation of emission systems, maintenance
and warranty. See the emission label(s) on the engine.

Keep this engine Owner’s Manual with your unit.
Should this engine Owner’s Manual become damaged
or illegible, replace immediately. Replacements may be
ordered through the engine manufacturer.

Contents

Page

Introduction

2

. . . . . . . . . . . . . . . . . . . . . . . . . . . . . . . . 

Safety

3

. . . . . . . . . . . . . . . . . . . . . . . . . . . . . . . . . . . . . 

General Lawn Mower Safety

3

. . . . . . . . . . . . . . . . 

Safety and Instruction Decals

6

. . . . . . . . . . . . . . . . 

Setup

7

. . . . . . . . . . . . . . . . . . . . . . . . . . . . . . . . . . . . . 

Installing the Handle

7

. . . . . . . . . . . . . . . . . . . . . . 

Installing the Starter Rope

7

. . . . . . . . . . . . . . . . . . 

Before Starting

7

. . . . . . . . . . . . . . . . . . . . . . . . . . . . . . 

Filling the Crankcase with Oil

7

. . . . . . . . . . . . . . . 

Filling the Fuel Tank with Gasoline

8

. . . . . . . . . . . 

Reviewing the Maintenance Schedule

9

. . . . . . . . . 

Operation

9

. . . . . . . . . . . . . . . . . . . . . . . . . . . . . . . . . . 

Controls

9

. . . . . . . . . . . . . . . . . . . . . . . . . . . . . . . . 

Starting the Engine

9

. . . . . . . . . . . . . . . . . . . . . . . . 

Stopping the Engine

9

. . . . . . . . . . . . . . . . . . . . . . . 

Adjusting the Cutting Height

10

. . . . . . . . . . . . . . . . 

Operating Tips

10

. . . . . . . . . . . . . . . . . . . . . . . . . . . 

Maintenance

11

. . . . . . . . . . . . . . . . . . . . . . . . . . . . . . . . 

Recommended Maintenance Schedule

11

. . . . . . . . . 

Checking the Engine Oil Level

12

. . . . . . . . . . . . . . 

Cleaning the Underside of the Housing

12

. . . . . . . . 

Page

Replacing the Air Filter

12

. . . . . . . . . . . . . . . . . . . . 

Servicing the Spark Plug

13

. . . . . . . . . . . . . . . . . . . 

Changing the Engine Oil

13

. . . . . . . . . . . . . . . . . . . 

Maintaining the Blade

14

. . . . . . . . . . . . . . . . . . . . . 

Cleaning the Cooling System

15

. . . . . . . . . . . . . . . . 

Emptying the Fuel Tank

15

. . . . . . . . . . . . . . . . . . . . 

Folding the Handle

16

. . . . . . . . . . . . . . . . . . . . . . . . 

Storage

16

. . . . . . . . . . . . . . . . . . . . . . . . . . . . . . . . . . . . 

Preparing the Fuel System

16

. . . . . . . . . . . . . . . . . . 

Preparing the Engine

16

. . . . . . . . . . . . . . . . . . . . . . 

General Information

17

. . . . . . . . . . . . . . . . . . . . . . . 

Removing From Storage

17

. . . . . . . . . . . . . . . . . . . 

Accessories

17

. . . . . . . . . . . . . . . . . . . . . . . . . . . . . . . . . 

Troubleshooting

18

. . . . . . . . . . . . . . . . . . . . . . . . . . . . . 

The Toro Total Coverage Guarantee

20

. . . . . . . . . . . . . 

Introduction

Read this manual carefully to learn how to operate and
maintain your product properly. The information in this
manual can help you and others avoid injury and product
damage. Although Toro designs and produces safe
products, you are responsible for operating the product
properly and safely.

Whenever you need service, genuine Toro parts, or
additional information, contact an Authorized Service
Dealer or Toro Customer Service and have the model and
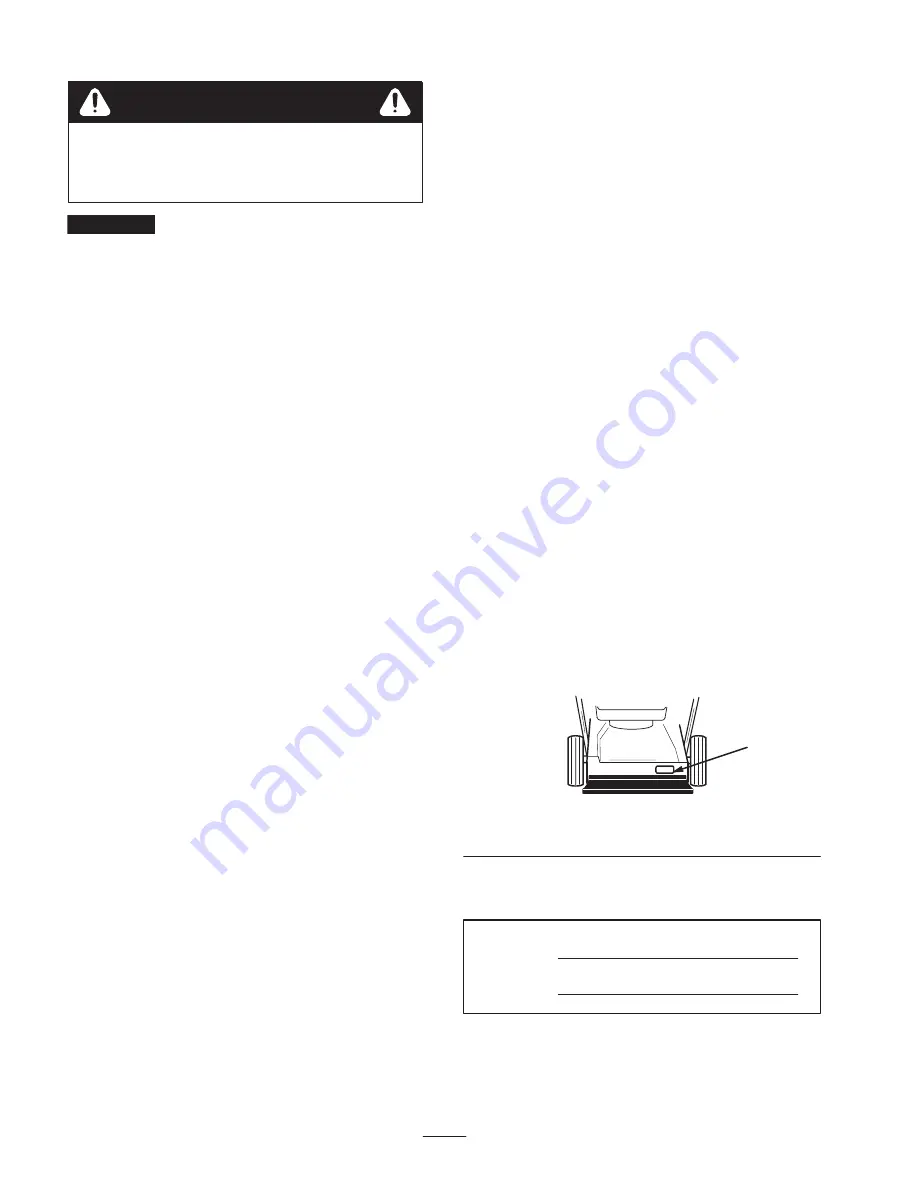
serial numbers of your product ready. Figure 1 illustrates
the location of the model and serial numbers on the
product.

1064

1

Figure 1

1.

Location of the model and serial numbers

Write the product model and serial numbers in the space
below:

Model No.

Serial No.

Содержание 20033

Страница 1: ...su producto Pour obtenir gratuitement une version en français de ce manuel écrivez à l adresse ci dessous N oubliez pas d indiquer les numéros de modèle et de série de votre produit The Toro Company Attn Parts Dept 8111 Lyndale Ave S Bloomington MN 55420 1196 Domestic English EN Form No 3327 157 Super Recycler Walk Power Lawn Mower Model No 20033 Serial No 220000001 and Up ...

Страница 2: ...he Starter Rope 7 Before Starting 7 Filling the Crankcase with Oil 7 Filling the Fuel Tank with Gasoline 8 Reviewing the Maintenance Schedule 9 Operation 9 Controls 9 Starting the Engine 9 Stopping the Engine 9 Adjusting the Cutting Height 10 Operating Tips 10 Maintenance 11 Recommended Maintenance Schedule 11 Checking the Engine Oil Level 12 Cleaning the Underside of the Housing 12 Page Replacing...

Страница 3: ...struction because it has to do with safety Failure to comply with the instruction may result in personal injury General Lawn Mower Safety The following instructions have been adapted from the ANSI OPEI standard B71 1 1998 and ISO standard 5395 1990 E Information or terminology specific to Toro lawn mowers is enclosed in parenthesis This lawn mower is capable of amputating hands and feet and of thr...

Страница 4: ...perate the lawn mower with damaged or missing guards or shields or without safety devices such as deflectors and grass catchers in place Do not change the speed settings on the engine Disengage all blade and drive clutches before starting the engine Start the engine carefully according to instructions and with feet well away from the blade s Do not tilt the lawn mower when starting the engine unle...

Страница 5: ...soline vapors are explosive Never tamper with safety devices Check their proper operation regularly Keep the lawn mower free of grass leaves or other debris buildup Clean up any oil or fuel that spills Stop and inspect the lawn mower if you strike an object Repair the lawn mower if necessary before starting the engine Never attempt to make wheel height adjustments while the engine is running Grass...

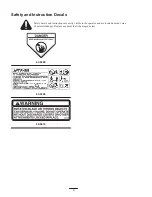
Страница 6: ...ty and Instruction Decals Safety decals and instructions are easily visible to the operator and are located near any area of potential danger Replace any decal that is damaged or lost 43 8480 93 0248 99 6018 ...

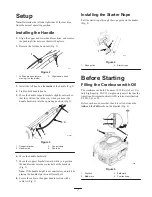
Страница 7: ...le tie 6 Move the handle backward 7 Move the support brackets inward while you position the handle studs into the center hole of the brackets Fig 3 Note If the handle height is not satisfactory adjust it by placing the handle stud into a different hole 8 Secure the cable to the upper handle section with a cable tie Fig 3 Installing the Starter Rope Pull the starter rope through the rope guide on t...

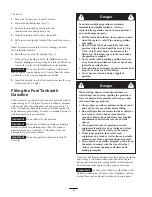
Страница 8: ... the fuel tank outdoors in an open area and when the engine is cold Wipe up any gasoline that spills Do not fill the fuel tank completely full Add gasoline to the fuel tank until the level is 1 4 to 1 2 in 6 to 13 mm below the bottom of the filler neck This empty space in the tank allows the gasoline to expand Never smoke when handling gasoline and stay away from an open flame or where a spark may...

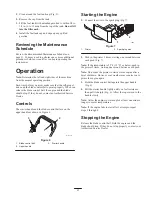
Страница 9: ...il are on the upper handle as shown in Figure 6 m 3712 1 3 2 Figure 6 1 Blade control bail 2 Upper handle 3 Starter handle Starting the Engine 1 Connect the wire to the spark plug Fig 7 1344 1 2 Figure 7 1 Primer 2 Spark plug wire 2 Push in the primer 3 times waiting one second between each push Fig 7 Note If the temperature is 55 F 13 C or below push in the primer 5 times waiting one second betwe...

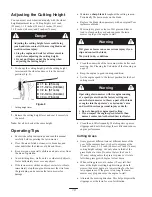
Страница 10: ...eplacement blade Mow only dry grass or leaves Wet grass and leaves tend to clump on the yard and can cause the lawn mower to plug or the engine to stall Wet grass or leaves can cause serious injury if you slip and contact the blade Mow only in dry conditions Warning Clean the underside of the lawn mower deck after each mowing See Cleaning the Underside of the Housing on page 12 Keep the engine in ...

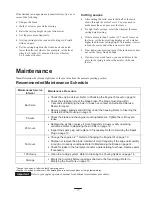
Страница 11: ...Procedure Each Use Check the engine oil level Refer to Checking the Engine Oil Level on page 12 Check the stopping time of the blade brake The blade must stop within 3 seconds of releasing the bail if it does not contact an Authorized Service Dealer for repair Remove grass clippings and dirt from under the housing Refer to Cleaning the Underside of the Housing on page 12 5 Hours Check the blade an...

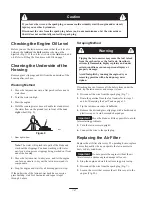
Страница 12: ...ait for all moving parts to stop If the underside of the lawn mower deck has excessive grass buildup wait for 30 minutes and repeat steps 2 through 6 above Scraping Method Tipping the lawn mower may cause the fuel to leak from the carburetor or the fuel tank Gasoline is extremely flammable highly explosive and under certain conditions can cause personal injury or property damage Avoid fuel spills ...

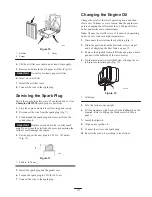
Страница 13: ...seal 6 Torque the spark plug to 15 ft lb 20 N m 7 Connect the wire to the spark plug Changing the Engine Oil Change the oil after the first 5 operating hours and then after every 50 hours or every season Run the engine just before changing the oil to warm the oil Warm oil flows better and carries more contaminants Note Change the oil after every 25 hours when operating under a heavy load or in hig...

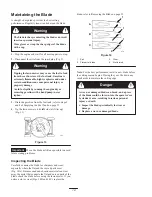
Страница 14: ...r on its left side air filter up Fig 13 757 Figure 13 Important Move the blade as little as possible to avoid future staring problems Inspecting the Blade Carefully examine the blade for sharpness and wear especially where the flat and the curved parts meet Fig 14A Because sand and abrasive material can wear away the metal that connects the flat and curved parts of the blade check the blade before...

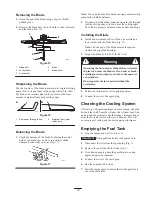
Страница 15: ...lanced Toro blade an accelerator a lock washer and the blade bolt Fig 15 Note The sail part of the blade must point upward toward the top of the housing 2 Torque the blade bolt to 50 ft lb 68 N m Operating the lawn mower without the accelerator in place can cause the blade to flex bend or break resulting in serious injury or death to the operator or bystanders Do not operate the lawn mower without...

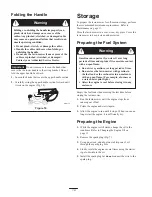
Страница 16: ...Cover the lawn mower to keep it clean and protected Preparing the Fuel System Gasoline can vaporize if you store it over long periods of time and explode if it comes into contact with an open flame Do not store gasoline over long periods of time Do not store the lawn mower with gasoline in the fuel tank or the carburetor in an enclosure with an open flame For example a furnace or a water heater pi...

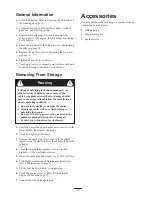
Страница 17: ...ion Do not pinch stretch or damage the cables Handle the cables with care when folding or unfolding the handle Do not use the lawn mower if one or more of the cables are pinched stretched or damaged Contact your Authorized Service Dealer Warning 1 Carefully unfold the upper handle until it nests with the lower handle then tighten the knobs 2 Check and tighten all fasteners 3 Remove the spark plug ...

Страница 18: ... fuel cap vent hole is plugged 3 The air filter element is dirty and is restricting the air flow 4 The underside of the lawn mower deck contains clippings and debris 5 The spark plug is pitted fouled or the gap is incorrect 6 The engine oil level is low or the oil is dirty 1 Drain and fill the fuel tank with fresh gasoline 2 Clean the fuel cap vent hole or replace the fuel cap 3 Clean the air filt...

Страница 19: ...4 The underside of the lawn mower deck contains clippings and debris 1 Place all 4 wheels at the same height 2 Sharpen and balance the blade 3 Change the mowing pattern 4 Clean the underside of the lawn mower deck Discharge chute plugs 1 The cutting height is too low 2 You are mowing too fast 3 The grass is wet 4 The underside of the lawn mower deck contains clippings and debris 1 Raise the cuttin...

Страница 20: ...9255 Canada customers Owner Responsibilities You must maintain your Toro Product by following the maintenance procedures described in the operator s manual Such routine maintenance whether performed by a dealer or by you is at your expense Items and Conditions Not Covered There is no other express warranty except for special emission system coverage on some products and the Toro Starting Guarantee...

Отзывы: