


Installing the Kit
Kohler Engines
Removing the Existing Brackets and
Muffler
1.
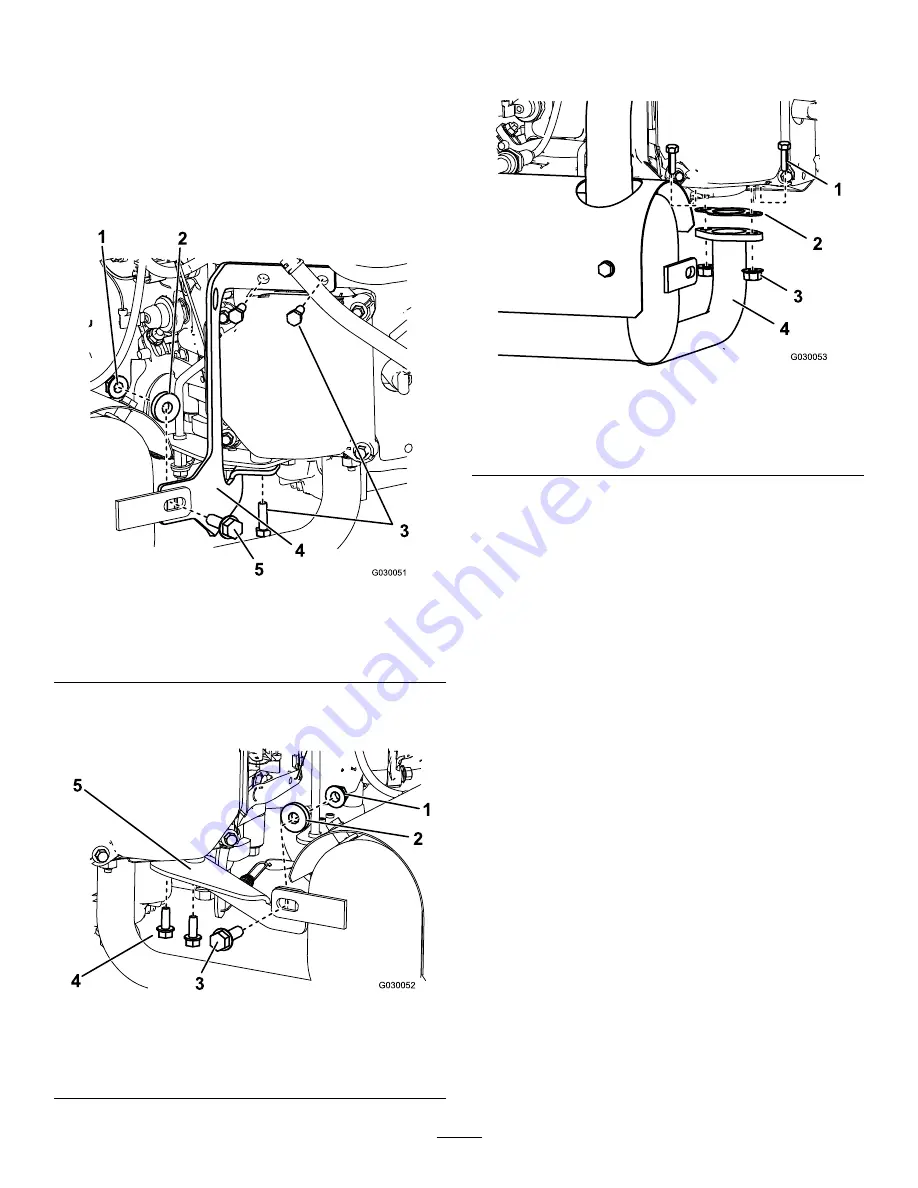
Remove the left bracket.
Note:
Retain the 3 bolts (M6).
Figure 4
1.
Nut
4.
Left bracket
2.
Spacer
5.
Bolt (5/16 x 1 inch)
3.
Bolt (M6)
2.
Remove the right bracket (
Note:
Retain the 3 bolts (M6).
Figure 5
1.
Nut
4.
Bolt (M6)
2.
Spacer
5.
Right bracket
3.
Bolt (5/16 x 1 inch)
3.
Remove the muffler (
Note:
Retain the 4 nuts (M8) and 4 bolts (M8).
Figure 6
Left side of muffler shown
1.
Bolt (M8)
3.
Nut (M8)
2.
Gasket
4.
Muffler
Installing the New Muffler and Brackets
1.
Install the new muffler and 2 new gaskets to the engine
using the nuts (M8) and bolts (M8) that you removed
from the previous muffler (see
).
2.
Apply thread-locking compound to 2 bolts (M6) that
you previously removed and install the new right
bracket to the engine (see
).
3.
Apply thread-locking compound to the other 3 bolts
(M6) that you previously removed and install the new
left bracket to the engine (see
4.
Fasten the muffler to each bracket using a nut (5/16
inch), spacer, and bolt (5/16 x 1 inch) as shown in
and
.
5.
Torque the fasteners (M8) securing the muffler to the
engine to 26 to 31 N-m (19 to 23 ft-lb).
Important:
Tighten the fasteners securing
the muffler to the engine before tightening the
fasteners securing the brackets to the muffler.
6.
Torque the fasteners (M6) securing the brackets to
the engine and the fasteners (5/16 inch) securing the
brackets to the muffler to 6 to 8.7 N-m (53 to 77 in-lb).
3
Содержание 132-1547
Страница 4: ......