


E&
Once the Patient is reminded to fixate on the target and not to blink, press the trigger on the
joystick to capture.
3. Once the Patient is
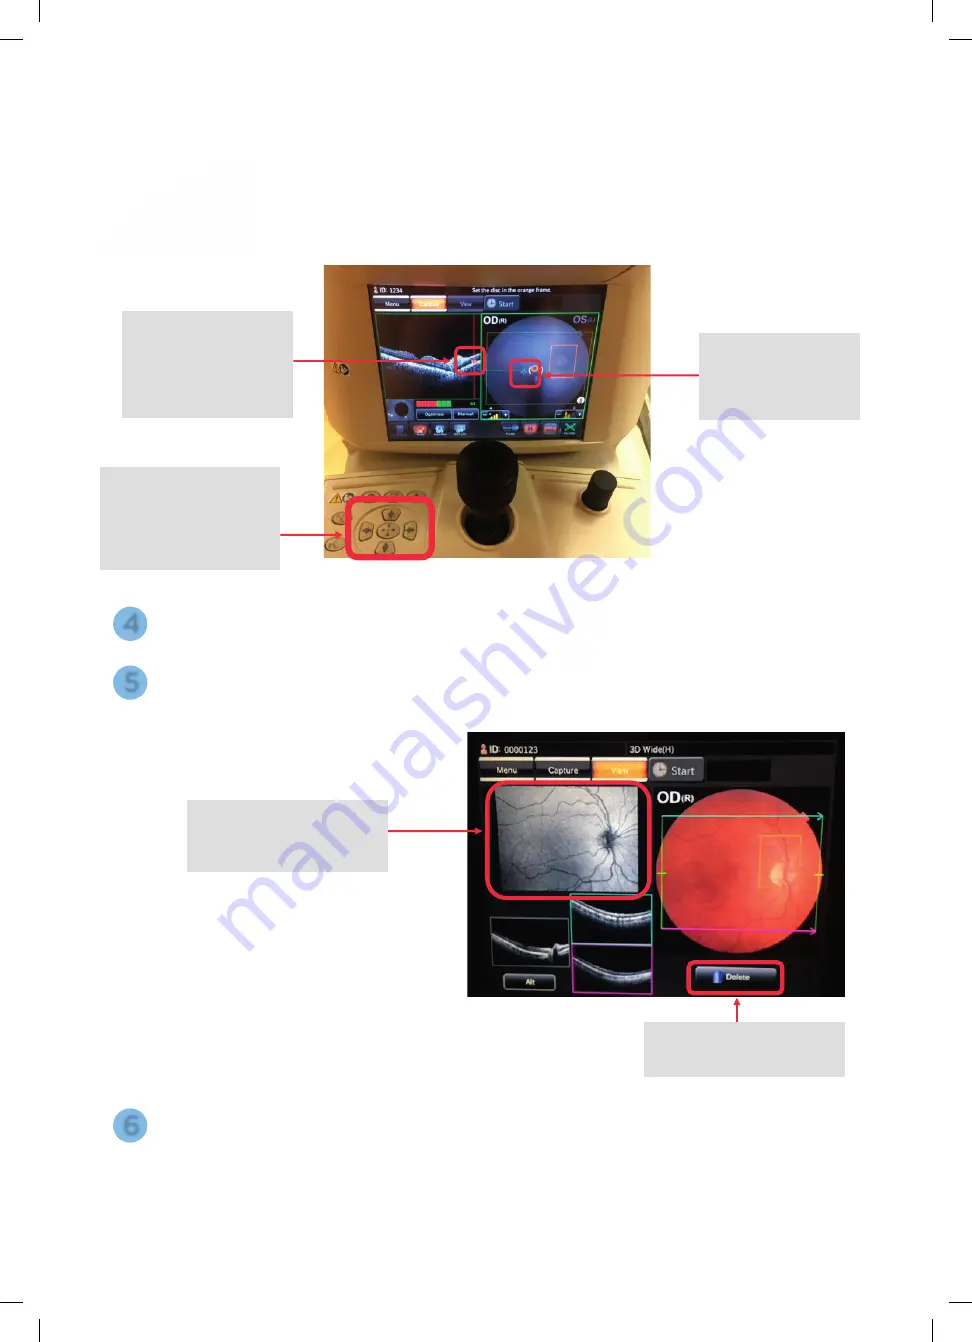
fixated correctly, you can
adjust the OCT scan to
ensure it is appearing
centrally in the box by
moving this Z Tab.
4
Images will then automatically be saved for you to view in the Imagenet 6 software.
6
Check OCT quality after capture.
5
2. Patient Fixation
Use the arrow keys on the
base of the machine to
move the Patient’s Fixation
in the direction required.
1. If the Patient Fixation
needs adjusting, this
little blue cross is the
green internal fixation
cross.
Immediately after capture,
the Shadowgram will appear
to ensure there are no fixation
losses or blinks.
If poor quality, press
[Delete]
and repeat capture process.
7
Topcon (Great Britain) Medical Limited
|
DRI OCT Triton | Quick Reference Guide |
Capturing OCT
Position the Patient.
Choose Scan Type.
Place the Patient's chin on the chinrest. Keep their chin and forehead stable.
Be sure to adjust the chinrest height to align the eye marker and the
corner of the eye.
Adjust the Patient’s height using the
[Up]
and
[Down]
chinrest buttons found next to
the joystick on the machine.
Once Scan Type is selected, the machine
will automatically go into capture mode.
You may need to use the
[Small Pupil]
setting for Patients
with small pupils or turn the
require the fundus photo.
Capturing OCT
1
2
[Small Pupil]
button
5
Topcon (Great Britain) Medical Limited
|
DRI OCT Triton | Quick Reference Guide |
Capturing OCT
[On]/[Off]
7
61647 Topcon quick start guide Triton.indd 7
27/03/2019 09:56


