Topcom LF-4719 Скачать руководство пользователя страница 5

5

ENGL

ISH

        TOPCOM Ultrasonic Humidifier LF-4719

4 Display and buttons

(see folded cover)
a. Remote control receiver LED
b. Humidity level indication
c. Empty water tank indication
d. Warm mist indicator
e. Ozone button (Ionizer)
f.

Mist intensity button

g. Warm mist button
h. Timer button
i.

On/off button

j.

Humidity level button

k. Ionizer (Ozone) icon
l.

On/Off icon

m. Timer indication
n. Room temperature indication
o. Mist intensity indication

The enclosed remote control has the same 
buttons as the front panel. The icons are the 
same.

5 Installation

• Put the humidifier on a flat surface in the room 

for half an hour. It is important that it reaches 
the ambient temperature and humidity.

• We recommend using the humidifier at a 

temperature between 5 and 40°C and a 
relative humidity of less than 55%.

• Remove the water tank 

 from the 

humidifier. 

• Turn the water tank up side down.
• Unscrew the filter cap 

 by turning it counter 

clockwise.

• Fill the water tank with clear water (maximum 

40°C). 

• Close the cover by turning filter cap clockwise.
• Verify the cleanliness and water tightness and 

then gently put the & water tank back on the 
base.

• Position Fume dispenser 

 in the desired 

direction.

• Plug the power cord in the main power wall 

connector with dry hands.
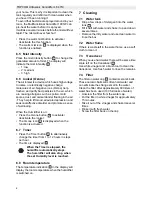
6 Operation

6.1 On/off

• Press the on/off button 

 on the unit on the 

remote control to activate the humidifier. The 
display lights up and, after a few seconds, the 
ambient humidity is displayed.

• Press the on/off button 

 again to deactivate 

the humidifier.

6.2 Empty water tank

If the water tank is empty, the empty water tank 
indication 

 is displayed.

6.3 Humidity level control

• Press the humidity level button 

 to increase 

the humidity setting from 45% to 90%. After 
flashing for 5 seconds, the LCD display shows 
the level of ambient humidity 

.

When the moisture level reaches the pre-set 
value, the humidifier automatically stops for 
five minutes in order to test the humidity in 
the air.

• Instead of selecting the humidity level 45% to 

90%, go one step above 90% for continuous 
operation

.

6.4 Warm mist

If the water gets stagnant, it will spray the 
stagnant water, and any bacteria it contains, into 

It is recommended to use soft (distilled - 
low-mineral) water to minimize lime 
scale on the transducer.
Do not remove the water tank when the 
humidifier is connected to the main 
power.
When you remove the water tank after 
usage, there will still be water in the 
water flume.
Remove the water from the tank and 
flume when it is not used for a long 
period.
Clean the water box, spray mouth and 
water flume if the humidifier is not used 
for a long period.
Do not position the humidifier near heat 
sources or direct sunlight.
Do not aim the fume dispenser to 
furniture, electronic equipment or baby 
beds.

The ideal comfort RH for a human 
being is 40 to 60

RH

i

i

c

j

b

Содержание LF-4719

Страница 1: ...ULTRASONIC HUMIDIFIER LF 4719 USER GUIDE V2 0 05 2012...

Страница 2: ...5 6 10 9 8 7 4 1 3 2 a b c d e f g o h i n m l k j i e g j f h...

Страница 3: ...eholder os retten til ndringer af de specifikationer der er beskrevet i denne brugsanvisning N Funksjoner beskrevet i denne manualen kan endres uten n rmere informasjon SF T ss ohjekirjassa julkaissut...

Страница 4: ...is damaged Do not plug or unplug the humidifier with wet hands Never disassemble the basic unit Never operate the humidifier with a defective plug or cord or after a breakdown or damage of any kind In...

Страница 5: ...e unit on the remote control to activate the humidifier The display lights up and after a few seconds the ambient humidity is displayed Press the on off button again to deactivate the humidifier 6 2 E...

Страница 6: ...con is displayed when the function is activated 6 7 Timer Press the Timer button to alternatively change the timer from 1 to 12 hours in steps per hour The time is displayed 6 8 Room temperature The t...

Страница 7: ...t wenn das Kabel besch digt ist Achten Sie darauf dass Sie keine nassen H nde haben wenn Sie den Humidifier anschlie en oder den Stecker entfernen Nehmen Sie das Ger t niemals auseinander Betreiben Si...

Страница 8: ...len Sie den Wasserbeh lter wieder vorsichtig auf die Basis zur ck Stellen Sie den Dunstverteiler in die gew nschte Richtung Stecken Sie den Netzstecker mit trockenen H nden in die Steckdose 6 Betrieb...

Страница 9: ...ie Ozon Taste um den Ionisator zu aktivieren deaktivieren Das Symbol f r Ozon wird angezeigt wenn diese Funktion aktiviert ist 6 7 Timer Dr cken Sie die Timer Taste um den Timer nacheinander in 1 Stun...

Страница 10: ...eschadigd is Steek de stekker niet in het stopcontact en haal hem niet uit het stopcontact met natte handen Demonteer het basistoestel nooit Gebruik de bevochtiger niet met een defecte stekker of snoe...

Страница 11: ...e stekker van het netsnoer met droge handen in het wandstopcontact 6 Gebruik 6 1 Aan uit Druk op de aan uit toets op het toestel of op de afstandsbediening om de bevochtiger in te schakelen Het scherm...

Страница 12: ...voel van welzijn Als de Humidifier ingeschakeld is Druk op de Ozon toets om de ionisator te activeren deactiveren Het Ozon pictogram wordt weergegeven als de functie is geactiveerd 6 7 Timer Druk op d...

Страница 13: ...utilisez pas si le cordon n est pas en parfait tat Ne branchez ni ne d branchez l humidificateur avec les mains humides Ne d montez jamais l l ment principal de l appareil N utilisez jamais l humidif...

Страница 14: ...nt en veillant avoir les mains bien s ches 6 Fonctionnement 6 1 Marche Arr t Appuyez sur la touche Marche Arr t sur la t l commande pour activer l humidificateur L cran s allume et au bout de quelque...

Страница 15: ...pression et les d sordres affectifs saisonniers il favorise un sentiment de bien tre Lorsque l humidificateur est enclench Appuyez sur la touche Ozone pour activer d sactiver l ionisateur Le pictogra...

Страница 16: ...luftfuktaren med v ta h nder Montera aldrig is r underdelen Anv nd aldrig luftfuktaren om kontakten eller sladden r defekt eller efter att den slutat fungera eller skadats p n got s tt Vid tillf llen...

Страница 17: ...ck p p av knappen p enheten eller fj rrkontrollen f r att sl p luftfuktaren Displayen t nds och efter n gra sekunder visas omgivningens luftfuktighet Tryck p p av knappen igen f r att st nga av luftfu...

Страница 18: ...a av v lm ende N r luftfuktaren r p Tryck p ozon knappen f r att starta st nga joniseraren Ozonikonen visas n r funktionen r aktiverad 6 7 Timer Tryck p timerknappen f r att v xla timerinst llningen f...

Страница 19: ...edningen er beskadiget Tilslut ikke luftfugteren stikkontakten og tr k ikke stikket ud hvis du har v de h nder Skil aldrig sokkelenheden ad Betjen aldrig luftfugteren med defekt stik eller ledning ell...

Страница 20: ...r f sekunder vises omgivelsernes luftfugtighed Tryk p t nd sluk tasten igen for at stoppe luftfugteren 6 2 T m vandtanken Hvis vandtanken er tom lyser indikatoren for tom tank 6 3 Styring af fugtighed...

Страница 21: ...or ozon vises n r funktionen er aktiveret 6 7 Timer Tryk p timertasten for at skifte timeren fra 1 til 12 timer i timevise trin Tiden vises 6 8 Temperatur i rummet Indikatoren for temperatur p display...

Страница 22: ...adet str mledning eller st psel eller hvis den er defekt eller skadet I slike tilfeller m apparatet leveres til n rmeste autoriserte forhandler verksted for eventuelle reparasjoner eller justeringer I...

Страница 23: ...under og viser deretter luftfuktigheten N r fuktighetsniv et n r innstilt verdi stopper luftfukteren automatisk i fem minutter for teste luftfuktigheten I stedet for velge et fuktighetsniv p 45 til 90...

Страница 24: ...Vannbeholder Drypp noen dr per vaskemiddel i vannbeholderen Fyll beholderen halvveis med vann og rist den opp og ned flere ganger Hell ut det skitne vannet og skyll beholderen med rent vann 7 2 Vannka...

Страница 25: ...tke tai irrota kostuttimen johtoa m rin k sin l koskaan pura peruslaitetta l koskaan k yt kostutinta jos pistoke tai johto on viallinen tai laite on jollakin tavoin hajonnut tai vaurioitunut Vie sen s...

Страница 26: ...n 6 3 Kosteustason s t Voit suurentaa kosteusasetusta 45 prosentista 90 prosenttiin painamalla kosteustason n pp int Kun nestekiden ytt on vilkkunut 5 sekuntia n ytt n ilmestyy ymp r iv n ilman kosteu...

Страница 27: ...askelin Aika n kyy n yt ll 6 8 Huoneen l mp tila N yt n l mp tilan yt ss ilmaistaan huoneen l mp tila kun kostutin kytket n p lle 7 Puhdistus 7 1 Vesis ili Tiputa vesis ili n muutama pisara puhdistus...

Страница 28: ...no est da ado No lo utilice si el cable est da ado No enchufe o desenchufe el humidificador con las manos mojadas No desmonte nunca la unidad b sica No haga funcionar nunca el humidificador si el ench...

Страница 29: ...aci n a un conector de pared de la red el ctrica con las manos secas 6 Funcionamiento 6 1 Encendido y apagado Pulse el bot n de encendido apagado del control remoto de la unidad para activar el humidi...

Страница 30: ...n Ozono para activar desactivar el ionizador El icono Ozono se muestra cuando la funci n est activada 6 7 Temporizador Pulse el bot n del temporizador para cambiar el temporizador de 1 a 12 horas en i...

Страница 31: ...verifique se n o est danificado N o o utilize se o cabo estiver danificado N o coloque nem retire a ficha do humidificador com as m os h midas Nunca desmonte a unidade de base Nunca coloque o humidifi...

Страница 32: ...vapor na direc o pretendida Ligue a ficha do cabo de alimenta o tomada de corrente el ctrica na parede com as m os secas 6 Opera o 6 1 Ligar desligar Prima o bot o Ligar Desligar sobre a unidade ou n...

Страница 33: ...tar Quando o humidificador estiver ligado Prima o bot o de ozono para activar desactivar o ionizador O cone do ozono apresentado quando a fun o activada 6 7 Temporizador Prima o bot o do Temporizador...

Страница 34: ...n inserire o disinserire la spina con mani bagnate Non smontare la base Non azionare l umidificatore con una spina o un cavo difettosi o dopo un guasto o un danneggiamento di qualunque natura In quest...

Страница 35: ...e con mani asciutte 6 Funzionamento 6 1 On off Premere il tasto on off sull unit o sul telecomando per attivare l umidificatore Il display si accende e dopo pochi secondi visualizza l umidit ambiental...

Страница 36: ...tore acceso Premere il tasto Ozono per attivare disattivare lo ionizzatore L icona Ozono viene visualizzata quando la funzione attivata 6 7 Timer Premere il tasto del timer per impostare il timer da 1...

Страница 37: ...37 TOPCOM Ultrasonic Humidifier LF 4719 1 1 1 6 8 45 Multifunctional Humidifier 1901W 1 2 15 Multifunctional Humidifier 1901W 50 2 250 ml 6 230 V AC 50 Hz 130 W 0 05 PPM 3 1 2 3...

Страница 38: ...38 TOPCOM Ultrasonic Humidifier LF 4719 4 5 6 LED 7 8 9 10 4 a LED b c d e f g h i n ff j k l on off m n o 5 5 40 C 55 40 C 6 6 1 On off on off on off 6 2 6 3 45 90 LCD 5 45 90 90 40 60 RH i i c j b...

Страница 39: ...39 TOPCOM Ultrasonic Humidifier LF 4719 6 4 Multifunctional Humidifier 1901W 6 5 1 2 3 6 6 6 7 1 12 6 8 7 7 1 7 2 7 3 7 4 600 100 15 g f o e k h m n...

Страница 40: ...ma Z kladn jednotku nikdy nerozeb rejte Zvlh ova nikdy nepou vejte s vadnou z str kou nebo kabelem ani po poru e nebo po kozen jak hokoliv druhu V t chto p padech p stroj vra te nejbli mu schv len mu...

Страница 41: ...6 Pou v n 6 1 Zapnut vypnut Zapn te zvlh ova stisknut m vyp na e na p stroji nebo na d lkov m ovl d n Rozsv t se displej a za n kolik sekund se zobraz okoln vlhkost Zvlh ova vypnete dal m stisknut m...

Страница 42: ...my a podporovat pocit pohody Jestli e je zvlh ova zapnut Pro aktivaci deaktivaci ioniz toru stiskn te tla tko Ozone Po aktivaci funkce se zobraz ikona Ozone 6 7 asov sp na Stisknut m tla tka asova e m...

Страница 43: ...ywaj urz dzenia Nie pod czaj ani nie od czaj nawil acza od sieci elektrycznej mokrymi r koma Nigdy nie demontuj jednostki podstawowej Nigdy nie u ytkuj nawil acza z wadliw wtyczk lub przewodem ani po...

Страница 44: ...i nij przycisk On Off na urz dzeniu lub pilocie zdalnego sterowania aby uruchomi nawil acz Uruchomi si wy wietlacz a po kilku sekundach zostanie wy wietlona wilgotno otoczenia Naci nij ponownie przyci...

Страница 45: ...l acz jest w czony Naci nij przycisk ozonu aby w czy lub wy czy jonizator Gdy funkcja jest w czona wy wietlana jest ikona ozonu 6 7 Wy cznik czasowy Naci nij przycisk wy cznika czasowego aby zmieni je...

Страница 46: ...zza ki a k sz l k dugasz t Soha ne szerelje sz t az alapegys get Soha ne zemeltesse a leveg p r s t t hib s dugasszal vagy k bellel illetve zemzavar vagy b rmilyen t pus s r l s eset n Ilyen esetekben...

Страница 47: ...s A p r s t bekapcsol s hoz nyomja meg a be ki kapcsol gombot a k sz l ken vagy a t vvez rl n Bekapcsol a kijelz s n h ny m sodperc eltelt vel megjelenik rajta a k rnyezeti p ratartalom rt ke A k sz...

Страница 48: ...t llapot ban Az ioniz l funkci be vagy kikapcsol s hoz nyomja meg az zon gombot Amikor a funkci aktiv lva van l that lesz az zon ikonja 6 7 Id z t Az id z t gombbal 1 12 r s id z t st ll that be r nk...

Страница 49: ...e a neodp jajte mokr mi rukami Z kladn jednotku nikdy nerozoberajte Zvlh ova nikdy nepou vajte s chybnou nap jacou n rou alebo z suvkou alebo ak jav zn mky poruchy alebo po kodenia V t chto pr padoch...

Страница 50: ...tene 6 Obsluha 6 1 Zapnutie a vypnutie Stla en m tla idla zap vyp na zariaden alebo dia kovom ovl da i zapnite zvlh ova Displej sa rozsvieti a po nieko k ch sekund ch sa zobraz vlhkos okolit ho prostr...

Страница 51: ...lo oz nu na zapnutie resp vypnutie ioniz tora Ak je funkcia zapnut na displeji svieti ikona oz nu 6 7 asov sp na Na zmenu nastavenia asov ho sp na a od 1 do 12 hod n po hodin ch stla te tla idlo asov...

Страница 52: ...ULTRASONIC HUMIDIFIER LF 4719 visit our website www tristar eu MD10600422...

Отзывы: