33
i) Calibration
You will need a ruler for calibration.
1.
Select: Options → Crossing → On.
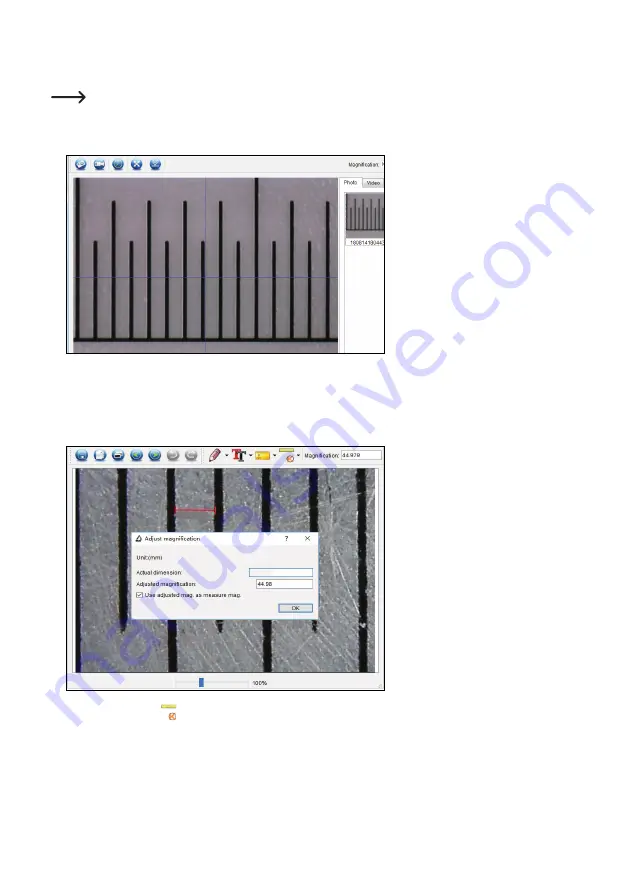
2. Focus the microscope on the ruler.
3. Rotate the focus dial until the image becomes sharp.
4. Adjust the ruler position so the image is lined up square with the XY guide lines.
5. Take a photo of the image when the selected area is lined up with the crossing as shown.
6. Double-click the image of the ruler in the saved images window
(B7)
to enter the “Image Preview” interface.
1.000
1.000
7. Select the calibration
icon → Calibration.
8. Click and drag to select start and end points across a known value e.g. 1 mm increment along the ruler.
9.
When the dialog box shows, enter the exact value of the measurement sample in the “Actual dimension” field. The
software will calculate the magnification.
10. Select “OK”
to confirm. The adjusted magnification value will show in the upper right corner.


