background image

IT - 42

ASSEMBLAGGIO

Prima di utilizzare l'apparecchio per la prima volta, è necessario procedere come segue: estrarre con cautela il ventilatore dalla 

confezione e rimuovere tutti i materiali da imballaggio e gli eventuali adesivi promozionali. 

Tenere i materiali da imballaggio (buste di plastica ed elementi in cartone) fuori dalla portata dei bambini. 

Verificare accuratamente che l'apparecchio non presenti danni visibili a occhio nudo, eventualmente subiti durante il trasporto. 

Assemblare il ventilatore seguendo le istruzioni. 

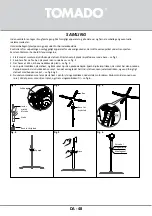
1.  Agganciare la base a croce alla piantana: iniziare inserendo la piantana nell'anello della base a croce (dovrà udirsi un clic) - fig. 1. 

2.  Quindi, agganciare i quattro sostegni all'anello - fig. 2.

3.  Anche in questo caso, dovrà udirsi un clic per ciascun sostegno - fig. 3. 

4.  Allentare il dado di regolazione dell'asta e impostare l'asta telescopica nella posizione desiderata. Serrare il dado 

di regolazione dell'asta per fissare la posizione desiderata. Nota: qualora l'asta telescopica non si veda, potrebbe essere 

totalmente inserita all'interno della piantana. Allentare il dado di regolazione dell'asta e capovolgere la piantana prestando 

molta attenzione - figg. 4 e 5. 

5.  Per fissare il motore sulla piantana, allentare il dado ad alette sulla parte inferiore del motore. Inserire completamente 

il motore sull'asta telescopica allineando i fori di fissaggio e serrare il dado ad alette - fig. 6. 

Apertura  

di controllo

Anello base

Piantana

Dado di 

regolazione 

dell'asta

Sostegno base

Anello base

Serrare

Allentare

Foro filettato
Dado ad alette
Foro di fissaggio

Fig. 1

Fig. 2

Fig. 3

Fig. 4

Fig. 5

Fig. 6

Clic

Содержание TFS4003B

Страница 1: ...nstrucciones de uso IT Istruzioni per l uso DA Instruktioner til brug PL Instrukcje u ytkowania CS N vod k pou it SK N vod na pou itie Statiefventilator Pedestal fan Standventilator Ventilateur sur pi...

Страница 2: ...2...

Страница 3: ...ebrauchsanleitung Seite 17 23 FR Mode d emploi page 24 30 ES Instrucciones de uso p gina 31 37 IT Istruzioni per l uso pagine 38 44 DA Instruktioner til brug side 45 50 PL Instrukcje u ytkowania stron...

Страница 4: ...Het apparaat op afstand houden van muren of andere objecten die vlam kunnen vatten zoals gordijnen handdoeken katoen of papier etc Zorg er altijd voor dat het apparaat op een effen vlakke ondergrond...

Страница 5: ...oit zonder toezicht met elektrische apparaten werken Houd het apparaat en het snoer buiten bereik van kinderen jonger dan 8 jaar Het apparaat kan worden gebruikt door kinderen van 8 jaar en ouder en d...

Страница 6: ...mgevingen in Bed Breakfast type omgevingen boerderijen Wanneer het apparaat oneigenlijk gebruikt wordt kan er bij eventuele defecten geen aanspraak op schadevergoeding worden gemaakt en vervalt het re...

Страница 7: ...rf voor 2 Bevestigingsdop 3 Ventilatorblad 4 Borgring 5 Beschermkorf achter 6 Motoras 7 Oscillatiepin 8 Motorbehuizing 9 Bedieningsknoppen 10 Buis 11 Statiefstelmoer 12 Statief 13 Voet vast draaien 13...

Страница 8: ...ruisdelen vast aan de ronde basis fig 2 3 Als u de kruisdelen goed bevestigt dan hoort u per deel een klik fig 3 4 Draai de statiefstelmoer los en trek de buis omhoog tot de gewenste hoogte Draai de s...

Страница 9: ...Plaats de ventilator op een vlakke stabiele ondergrond Reinig de buitenkant van de ventilator met een licht vochtige doek wrijf met een droge doek na De ventilator is klaar voor gebruik DE BEDIENING...

Страница 10: ...churende schoonmaakmiddelen om het apparaat te reinigen Dompel de ventilator nooit in water of een andere vloeistof onder Dit symbool betekent dat dit product niet bij het gewone huishoudelijke afval...

Страница 11: ...curtains towels cotton or paper etc Always make sure the appliance is placed on an even flat surface Only use the appliance indoors Do not leave the appliance unsupervised if the appliance is operati...

Страница 12: ...s involved Children must not play with the appliance The appliance may not be cleaned or maintained by children unless this is done under supervision If the appliance is not being used or is being cle...

Страница 13: ...d front 2 Fastening cap 3 Fan blade 4 Lock ring 5 Protective guard rear 6 Motor shaft 7 Oscillation pen 8 Motor casing 9 Operating buttons 10 Tube 11 Pedestal adjusting nut 12 Pedestal 13 Foot tighten...

Страница 14: ...e cross parts correctly you will hear a click for each part fig 3 4 Loosen the pedestal adjusting nut and pull the tube upwards to the required height Fasten the pedestal adjustment nut when the tube...

Страница 15: ...h other 9 Place the fan on a flat stable surface Clean the exterior of the fan using a slightly damp cloth and then wipe it with a dry cloth The fan is ready for use OPERATING THE PEDESTAL FAN Place t...

Страница 16: ...abrasive cleaning agents for cleaning the appliance Never submerge the fan in water or any other liquid This symbol means that this product should not be disposed of with regular household waste 2012...

Страница 17: ...des Kabels vorzubeugen Stellen Sie das Ger t nie in die N he von W rmequellen wie fen Gasherden Herdplatten usw Halten Sie mit dem Ger t immer einen sicheren Abstand zu W nden oder anderen Gegenst nd...

Страница 18: ...hrliche Situationen entstehen Sorgen Sie daf r dass das Ger t f r Kinder unzug nglich ist Kinder verstehen die Gefahren nicht die beim Umgang mit elektrischen Ger ten entstehen k nnen Lassen Sie Kind...

Страница 19: ...auch ausgelegt z B in Personalk chen in Gesch ften B ros und anderen Arbeitsumgebungen von G sten in Hotels Motels und anderen Unterkunftsbereichen in Bed and Breakfast Unterk nften auf b uerlichen An...

Страница 20: ...ngskappe 3 Ventilatorblatt 4 Sicherungsring 5 Schutzkorb hinten 6 Motorachse 7 Oszillationsstift 8 Motorgeh use 9 Schalter f r die Bedienung 10 Rohr 11 Feststellmutter des Stativs 12 Stativ 13 Fu Mutt...

Страница 21: ...festigen h ren Sie bei jedem Teil ein Klickger usch Abb 3 4 L sen Sie die Feststellmutter des Stativs und ziehen Sie das Rohr bis auf die gew nschte H he nach oben Drehen Sie die Feststellmutter des S...

Страница 22: ...nd Reinigen Sie die Au enseite des Ventilators mit einem leicht angefeuchteten Tuch und trocknen Sie diese mit einem trockenen Tuch nach Die Ventilator ist jetzt gebrauchsbereit BEDIENUNG DES STANDVEN...

Страница 23: ...keine aggressiven oder scheuernden Reinigungsmittel Tauchen Sie den Ventilator nie in Wasser oder andere Fl ssigkeiten ein Dieses Symbol weist darauf hin dass dieses Produkt nicht mit dem normalen Ha...

Страница 24: ...nt de la chaleur comme les fours cuisini res gaz plaques de cuisson etc Maintenez l appareil loign des murs ou d autres objets susceptibles de s enflammer tels que les rideaux serviettes coton ou papi...

Страница 25: ...ppareils lectriques sans surveillance Tenez l appareil et le c ble d alimentation hors de port e des enfants de moins de 8 ans L appareil peut tre utilis par les enfants partir de 8 ans et par des per...

Страница 26: ...tels et autres environnements r sidentiels dans les environnements de type chambre d h te dans les fermes Une utilisation inappropri e de l appareil annule tout droit une indemnisation en cas d ventue...

Страница 27: ...ixation 3 H lice de ventilateur 4 Rondelle d arr t 5 Cage de protection arri re 6 Arbre du moteur 7 Goujon d oscillation 8 Carter du moteur 9 Boutons de commande 10 Tube 11 Molette de r glage du suppo...

Страница 28: ...nt les l ments de croix vous entendez un d clic pour chaque l ment ins r fig 3 4 Desserrez la molette de r glage du support et tirez le tube vers le haut jusqu la hauteur souhait e Resserrez la molett...

Страница 29: ...ext rieur du ventilateur l aide d un chiffon l g rement humide puis s chez l aide d un chiffon sec Le ventilateur est pr t l emploi COMMANDE DU VENTILATEUR SUR PIED Placez le ventilateur sur pied sur...

Страница 30: ...produits de nettoyage agressifs ou abrasifs Ne plongez jamais le ventilateur dans de l eau ou dans un autre liquide Ce symbole signifie que ce produit ne peut pas tre jet avec les d chets m nagers or...

Страница 31: ...aratos que emitan calor como hornos cocinas de gas placas de cocina etc Mantenga el aparato alejado de paredes y otros objetos inflamables como cortinas pa os de algod n o papel etc Aseg rese siempre...

Страница 32: ...enga el aparato y el cable fuera del alcance de menores de 8 a os El aparato lo podr n utilizar ni os de 8 o m s a os y personas con capacidades f sicas sensoriales o mentales limitadas o sin experien...

Страница 33: ...forma indebida en caso de aver a no se podr n reclamar da os y perjuicios y la garant a perder su validez Si decide no usar m s el aparato por haberse averiado le recomendamos que corte el cable despu...

Страница 34: ...jeci n 3 Aspas del ventilador 4 Arandela de seguridad 5 Rejilla protectora trasera 6 Eje del motor 7 Clavija de oscilaci n 8 Carcasa del motor 9 Botones de manejo 10 Tubo 11 Rosca de ajuste de la colu...

Страница 35: ...Cuando las piezas de la cruz est n bien sujetas escuchar un clic figura 3 4 Afloje la rosca de ajuste de la columna y tire del tubo hacia arriba hasta la altura deseada Apriete la rosca otra vez cuand...

Страница 36: ...rficie plana y estable Limpie la parte exterior del ventilador con un pa o ligeramente humedecido y seguidamente fr tela con un pa o seco As el ventilador estar listo para el uso MANEJO DEL VENTILADOR...

Страница 37: ...rasivos para limpiar el aparato No sumerja nunca el ventilador en agua ni en otros l quidos Este s mbolo indica que el producto no se puede tirar con la basura normal del hogar 2012 19 UE Siga las nor...

Страница 38: ...me forni fornelli a gas piastre di cottura eccetera L apparecchio deve essere tenuto a distanza da muri o altri oggetti infiammabili come tende fazzoletti in cotone o carta eccetera Assicurarsi sempre...

Страница 39: ...o elettrico fuori dalla portata dei bambini di et inferiore agli 8 anni L apparecchio pu essere utilizzato da bambini di et superiore agli 8 anni da persone con capacit fisiche sensoriali o mentali li...

Страница 40: ...a disposizione degli ospiti l uso nei bed breakfast e in tipi di alloggio simili l uso nelle fattorie Se il dispositivo viene usato in modo improprio in caso di eventuali guasti non ci si pu appellare...

Страница 41: ...o 3 Pale 4 Rondella 5 Gabbia protettiva parte posteriore 6 Albero motore 7 Blocco oscillazione 8 Alloggio motore 9 Pulsanti comandi 10 Asta telescopica 11 Dado di regolazione dell asta 12 Piantana 13...

Страница 42: ...llo fig 2 3 Anche in questo caso dovr udirsi un clic per ciascun sostegno fig 3 4 Allentare il dado di regolazione dell asta e impostare l asta telescopica nella posizione desiderata Serrare il dado d...

Страница 43: ...un panno leggermente inumidito quindi asciugarle con un panno asciutto Il ventilatore ora pronto per l uso UTILIZZO DEL VENTILATORE A PIANTANA Posizionare il ventilatore su una superficie piana e stab...

Страница 44: ...abrasivi per la pulizia dell apparecchio Non immergere mai il ventilatore in acqua o in altri liquidi Questo simbolo indica che il prodotto non pu essere smaltito insieme ai rifiuti domestici indiffe...

Страница 45: ...vnt underlag Apparatet m kun bruges indend rs Efterlad ikke apparatet uden opsyn n r det er t ndt Hvis apparatet skal flyttes skal det f rst sikres at det er slukket Brug ikke apparatet hvis stikket l...

Страница 46: ...ke reng res eller vedligeholdes af b rn medmindre det sker under opsyn N r apparatet ikke skal bruges eller reng res skal det slukkes helt og stikket skal tages ud af stikkontakten Forl ngerledninger...

Страница 47: ...sgitter for 2 L seknap 3 Ventilatorvinge 4 L sering 5 Beskyttelsesgitter bag 6 Motoraksel 7 Oscillationsknap 8 Motorhus 9 Betjeningsknapper 10 R r 11 Justerm trik til stativ 12 Stativ 13 Fod sp nd 13...

Страница 48: ...en runde base se fig 2 3 Der h res et klik n r benene klikkes p plads se fig 3 4 L sn justerm trikken p stativet og tr k r ret op i den nskede h jde Sp nd justerm trikken n r r ret har den nskede h jd...

Страница 49: ...sgitter samles 9 Anbring ventilatoren p et plant stabilt underlag Reng r ventilatorens yderside med en let fugtig klud og t r efter med en t r klud Ventilatoren er nu klar til brug BETJENING AF STATIV...

Страница 50: ...ggressive reng ringsmidler eller skuremidler til reng ring af apparatet Neds nk aldrig ventilatoren i vand eller anden v ske Dette symbol betyder at produktet ikke m bortskaffes sammen med almindeligt...

Страница 51: ...we p yty grzewcze itp Urz dzenie nale y trzyma z dala od cian lub innych obiekt w kt re mog zaj si ogniem np zas ony r czniki bawe niane lub papierowe itd Zawsze dbaj o to aby urz dzenie sta o na r wn...

Страница 52: ...ci nie powinny mie kontaktu z urz dzeniami elektrycznymi bez nadzoru W zwi zku z tym trzymaj urz dzenie i kabel poza zasi giem dzieci poni ej 8 roku ycia Urz dzenie mo e by u ywane przez dzieci w wiek...

Страница 53: ...elach i innych obiektach rezydencyjnych w obiektach typu Bed Breakfast w gospodarstwach rolnych Je li urz dzenie jest niew a ciwie u ytkowane w razie ewentualnych defekt w nie mo na ro ci adnych praw...

Страница 54: ...3 mig o wentylatora 4 Pier cie mocuj cy 5 Os ona ochronna ty 6 Wa silnika 7 Przycisk funkcji oscylacji 8 Obudowa silnika 9 Przyciski obs ugi 10 Rura 11 Nakr tka nastawcza statywu 12 Statyw 13 Podstaw...

Страница 55: ...e us yszysz w przypadku ka dej z nich charakterystyczne klikni cie rys 3 4 Odkr rub nastawcz statywu i poci gnij rur do g ry na odpowiedni wysoko Dokr nakr tk nastawcz statywu kiedy rura znajdzie si n...

Страница 56: ...ylatora przy u yciu lekko wilgotnej cierki a nast pnie wytrzyj wszystko such cierk Wentylator jest gotowy do u ycia OBS UGA WENTYLATORA NA STATYWIE Wentylator na statywie ustawia si na p askim i stabi...

Страница 57: ...dnych r cych ani ciernych rodk w czyszcz cych Nigdy nie zanurzaj wentylatora w wodzie ani jakichkolwiek innych cieczach Ten symbol oznacza e tego produktu nie mo na utylizowa wraz ze standardowymi odp...

Страница 58: ...st l na pevn m a rovn m povrchu Spot ebi pou vejte pouze uvnit Nenech vejte spot ebi bez dozoru kdy je v provozu Pokud chcete spot ebi p em stit jste povinni zajistit aby byl vypnut Spot ebi nepou vej...

Страница 59: ...em nesm hr t i t n ani dr bu spot ebi e nesm prov d t d ti leda e by p itom byly pod dozorem Pokud spot ebi nepou v te nebo ne ist te vypn te jej pln odpojen m z str ky ze z suvky Prodlu ovac kabely...

Страница 60: ...ovac uz v r 3 Lopatka ventil toru 4 Pojistn krou ek 5 Ochrann ko zadn 6 H del motoru 7 Oscila n kol k 8 Kryt motoru 9 Ovl dac tla tka 10 Trubka 11 Se izovac matice stojanu 12 Stojan 13 Patka utahov n...

Страница 61: ...pr vn usly te zacvaknut obr 3 4 Povolte se izovac matici stojanu a vyt hn te trubku nahoru do po adovan v ky Kdy je trubka v po adovan v ce dot hn te se izovac matici stojanu Pozn mka pokud trubku nev...

Страница 62: ...abiln povrch Vy ist te vn j stranu ventil toru lehce navlh en m had kem a pak ot ete such m had kem Ventil tor je p ipraven k pou it OVL D N STOJANOV HO VENTIL TORU Um st te stojanov ventil tor na rov...

Страница 63: ...vejte dn agresivn nebo abrazivn istic prost edky Ventil tor nikdy nepono ujte do vody nebo jin kapaliny Tento symbol znamen e v robek nesm b t likvidov n spole n s b n m domovn m odpadem 2012 19 EU P...

Страница 64: ...u ako s z vesy uter ky bavlnen alebo papierov at Spotrebi v dy umiestnite na ploch a rovn povrch Spotrebi pou vajte v lu ne v interi ri Zapnut spotrebi nikdy nenech vajte bez dozoru Ak chcete spotrebi...

Страница 65: ...trebi pou va deti od veku 8 rokov a osoby so zn en mi fyzick mi zmyslov mi alebo ment lnymi schopnos ami ako aj osoby bez sk senost alebo potrebn ch znalost Deti sa nesm so spotrebi om hra Deti sm spo...

Страница 66: ...pr vnym sp sobom nie je pri pr padn ch poruch ch mo n po adova n hradu kody a zanik platnos z ruky Ak sa rozhodnete spotrebi pre poruchu viac nepou va odpor ame v m aby ste po vytiahnut z str ky z n s...

Страница 67: ...ovacia skrutka 3 Lopatky ventil tora 4 Poistn kr ok 5 Ochrann k zadn 6 Hriade motora 7 Kol k oscil cie 8 Kryt motora 9 Tla idl ovl dania 10 Ty 11 Nastavovacia matica stojana 12 Stojan 13 Noha utiahnu...

Страница 68: ...ti kr ovej nohy pripevnili spr vne budete zaka d m po u kliknutie obr 3 4 Uvo nite nastavovaciu maticu stojana a vytiahnite ty do elanej v ky Po nastaven ty e do elanej v ky nastavovaciu maticu stojan...

Страница 69: ...povrch Vonkaj iu stranu ventil tora vy istite mierne navlh enou handri kou a n sledne utrite suchou utierkou Ventil tor je teraz pripraven na pou itie OBSLUHA STOJANOV HO VENTIL TORA Stojanov ventil t...

Страница 70: ...epou vajte agres vne ani abraz vne istiace prostriedky Ventil tor nikdy nepon rajte do vody alebo inej tekutiny Tento symbol znamen e v robok nesmie by likvidovan spolo ne s be n m domov m odpadom 201...

Страница 71: ...nstimmung mit den Anweisungen in der Gebrauchsanleitung und f r den Zweck f r den es hergestellt wurde verwendet wird Dar ber hinaus muss der originale Kaufbeleg mit Kaufdatum Namen des Einzelh ndlers...

Страница 72: ...mado com support ZAMAWIANIE AKCESORI W Ten produkt jest obj ty 24 miesi czn gwarancj Gwarancja jest wa na kiedy u ytkuje si produkt zgodnie z instrukcj obs ugi oraz zgodnie z przeznaczeniem Opr cz teg...

Страница 73: ...73...

Страница 74: ...74...

Страница 75: ...75...

Страница 76: ...und Druckfehler vorbehalten Sous r serve de modification Modifications and printing errors reserved Sujeto a cambios y errores de impresi n Con riserva di modifiche ed errori di stampa Der tages forb...

Отзывы: