


8
8.4. Making Announcements Directly from the Microphone (TALK)
8.3. Broadcasting Recorded Messages (PLAY)
Recorded messages for broadcast are output through the Line output terminal.
The Busy output terminal is closed during broadcast.
Step 1.
Press the Playback key for 1 second or more.
The recorded message is broadcast when the indicator remains continuously lit.
When the message reaches its end, the broadcast is automatically terminated and the indicator is
extinguished.
Step 2.
Press the Playback key again to stop broadcasts while in progress.
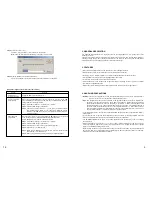
[Operating status of the PM-20EV and its indicator after the Playback key is pressed]
Delay*
1
*
1
Can be set to 0, 2 or 4 seconds using the Delay time setting switch.
*
2
Time length changes depending on the set chime type.
Chime*
2
Broadcast
Flashing
Steady-ON
1 second
or more
ON
1 second
Playback indicator
status
Broadcast status
Playback Key
Follow the procedure below to make announcements directly from the microphone using the Talk key, instead
of broadcasting recorded messages.
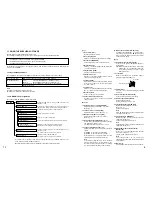
The Talk key's operations can be set using the Talk Key Mode Selector DIP switch located on the bottom of
the unit. (Factory-preset to ON.)
ON
5
4
1 2 3
ON
5
ON
5
Talk Key Mode
Selector DIP Switch
Talk Key Mode
Selector DIP Switch
Setting Contents
ON
(Factory-preset)
Pressing the Talk key permits announcements to be
made. (Because the microphone remains turned on,
the Talk key may be released.)
The announcement broadcast is terminated when
the Talk key is pressed again.
OFF
Announcements can be made while the Talk key is
held down.
The announcement broadcast is terminated when
the Talk key is released.
3: CHIME 1
4: CHIME 2
1: DELAY 2S
2: DELAY 4S
5: ALT/PTT
9
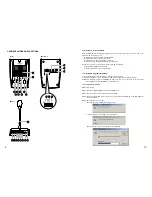
8.4.1. When the Talk key mode selector switch is set to ON (initial setting at the factory)
8.4.2. When the Talk key mode selector switch is set to OFF
Step 1.
Hold down the Talk key until the indicator remains lit, then speak into the microphone.
Tip
Do not release the Talk key even if the indicator begins to flash.
When the chime is set to ON, the indicator flashes and a chime tone sounds 1 second after the Talk
key is pressed. After chime play completion, indicator operation changes from flashing to steady ON,
allowing the microphone announcement to be made.
Step 2.
Release the Talk key and terminate the broadcast.
When the chime is set to ON, the indicator mode changes to flashing and a chime tone sounds.
Step 1.
Hold down the Talk key until the indicator remains lit, then speak into the microphone.
Tip
When the chime is set to ON, the indicator flashes 1 second after the key is pressed and a chime tone
sounds. After chime play completion, indicator operation changes from flashing to steady ON,
allowing the microphone announcement to be made.
Step 2.
Press the Talk key again to terminate the broadcast.
When the chime is set to ON, the indicator mode changes to flashing and a chime tone sounds.
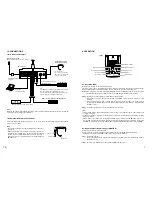
9. VOLUME ADJUSTMENT
CHIME
MIC
SPEAKER
Use a screwdriver to adjust.
VOLUME LOW
VOLUME HIGH
Speaker Volume Control
Chime Volume Control
Microphone Volume Control
The output sound volume of the monitor speaker, chime and microphone can be adjusted with the
corresponding volume controls located on the bottom of the unit.