172-65694MA-01 (BD800) 25 Jul 2018
13
Cleaning the Valve Seat Section
When disassembling or removing the product, wait until the internal
pressure equals atmospheric pressure and the surface of the product
has cooled to room temperature. Disassembling or removing the
product when it is hot or under pressure may lead to discharge of fluids,
causing burns, other injuries or damage.
CAUTION
Take measures to prevent people from coming into direct contact with
product outlets. Failure to do so may result in burns or other injury from
the discharge of fluids.
CAUTION
When scale adheres to the valve seat section, sealing is inhibited, causing fluid
leakage that affects the work environment.
Restore sealing performance and eliminate fluid leakage by following the steps
described below.
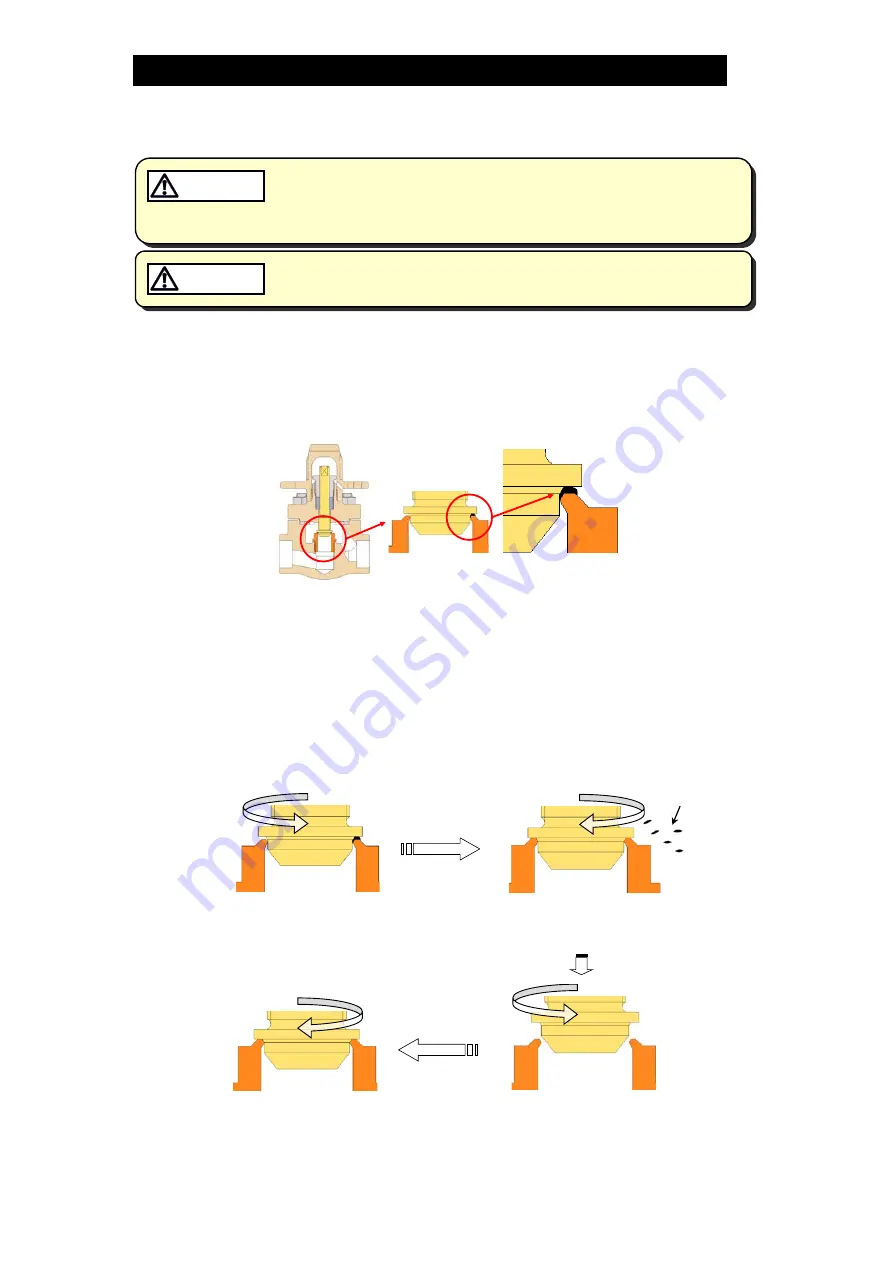
The figure below illustrates scale accumulation between the valve seat and valve
stem resulting in the valve not being able to fully close.
1. Remove the spanner cap.
2. Turn the valve stem counter-clockwise one to two times.
3. Turn the valve stem clockwise (right rotation) until it cannot be turned any further.
4. Repeat steps 2 and 3 two to three times. When the secondary side of the product
is open to the atmosphere, visually check whether fluid is leaking on the
secondary side after performing step 3.
5. When no fluid is leaking and the valve closes fully, cleaning is complete.
If leakage still occurs, repeat steps 2 and 3 another two to three times.
Turn the valve stem
counter- clockwise
Scale is scraped off the valve seat
when turning the valve stem back
clockwise
Cleaning is complete if no
leakage occurs after closing the
valve again
Turn the valve stem counter-
clockwise again
Scale


