


12
| Section 2
create a mono feed, a dual-mono feed or a split-channel stereo feed using multiple Livewire
audio sources.
For a detailed description of how VMIX and VMODE can be used, please refer to Chapter
7 of the Axia Element v2.0 Installation and Users Guide, downloadable from AxiaAudio.
com/manuals/ .
MPEG Receive
The
Buffering
drop-down box lets you choose how much buffer is applied to the received
streams. A lower value gives lower delay, but depends upon the network to have low jit-
ter. There are a range of values, so that you can experiment to find the optimum for your
network conditions. The usual procedure is to try successively lower values until you hear
audio interruptions. Then back off to a higher value with a bit of margin.
The
Protocol type
is set to correspond to the value set at the encode side unit.
When all values are entered, click the
Apply
button. This both accepts your changes and
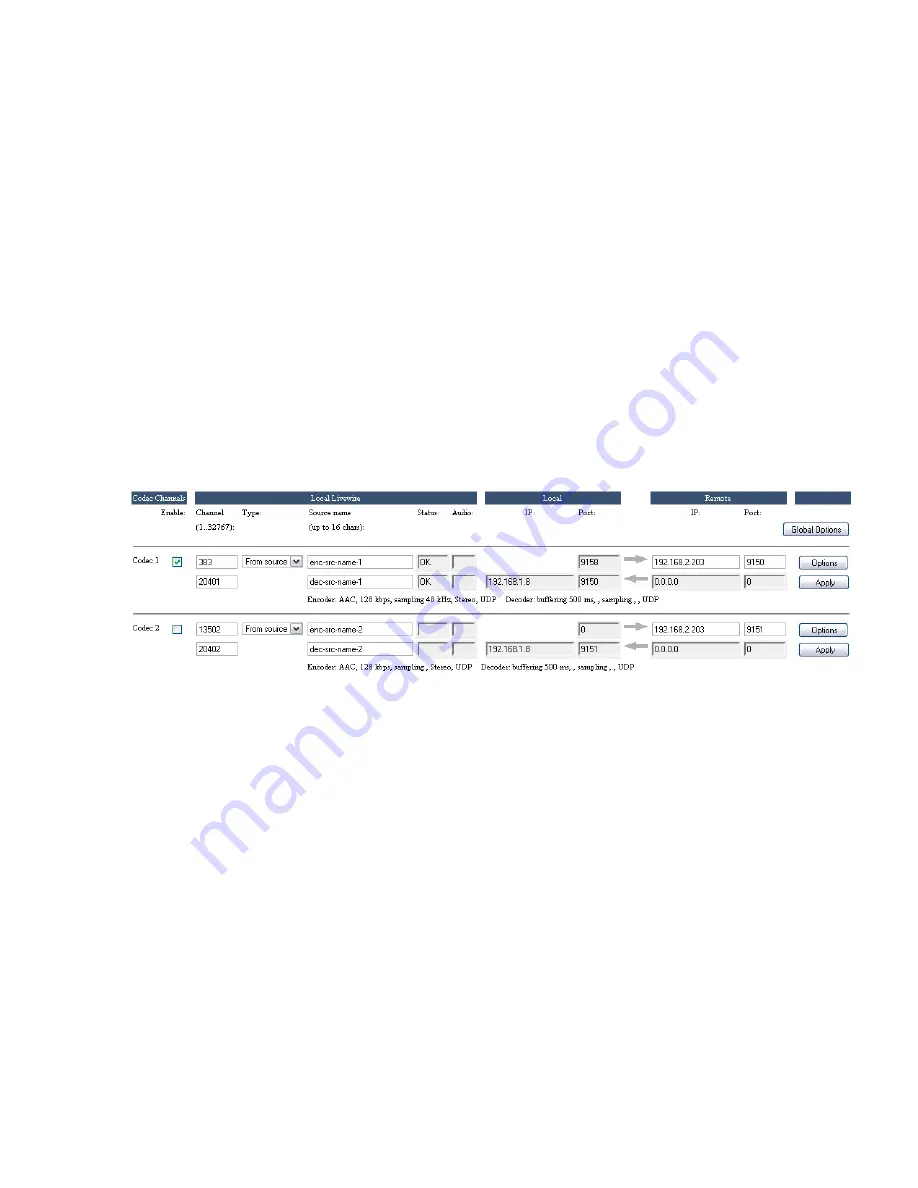
takes you back to the main Codec page. Here are sample configurations for the first two
channels:
The Livewire channel numbers and names are entered as you would for any LW device.
While it’s possible to enter separate channel numbers and names for the send and receive
directions (as in this example), normally these would be the same, since Livewire channel
numbers/names identify a bundle of both send and receive audio.
The
Status
box shows the condition of the LW channel.
OK
means that the Livewire audio
stream is being correctly sent and/or received and has proper synchronization. The Audio
box is a kind of simple level indicator that shows green when audio is present.
Under the
Local
heading, you can see the IP number and ports being used by the iPort for
the MPEG stream. These are greyed-out because they are for your information only; the
values cannot be changed.
Under the Remote heading are the values for the far-end iPort to which this one is con-
nected. You should enter the IP number and port for the send stream destination. The
greyed IP values are automatically filled-in to show the source of the MPEG streams from
the remote iPort.
Don’t forget to click the
Apply
button when all of your entries are made. This must be done
individually for each channel.
The line of text at the bottom of each channel’s field shows the configured codec and stream
protocol values that were made on the page under the
Options
button.


