© Titan Tool Inc. All rights reserved.
21
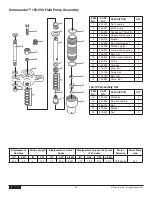
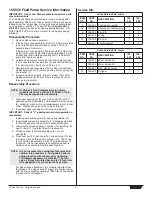
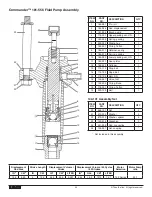
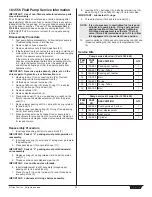
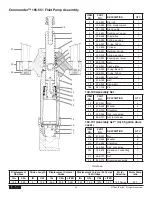
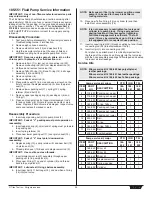
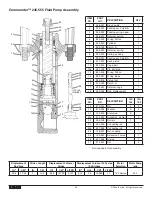
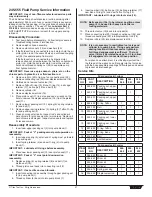
155-559 Fluid Pump Service Information
IMPORTaNT: use of non-Titan manufactured service parts
may void warranty.
The 155 Series Pump should receive a routine servicing after
approximately 1000 hours of use or earlier if there is excessive
leakage from the top packing, or if pump strokes become faster
on one stroke or another. The use of Titan
Lubrisolv Part #
310-200
is recommended as an upper packing lubricant.
DO
NOT SUBSTITUTE oil, water or solvent for an upper packing
lubricant.
Disassembly Procedure
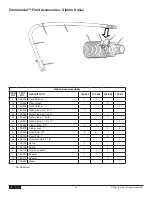
1. Remove siphon hose assembly.
2. If the pump is connected to an air motor, hold motor piston
rod at wrench flats and unthread coupling nut (1a) to
separate pump from motor.
If the pump is connected to a hydraulic motor, hold motor
piston rod at wrench flats (after removing locking pin with
an allen key) and unthread coupling nut (1) to separate
pump from hydraulic motor.
3. Unthread and remove foot valve (16) and pump cylinder
(12) to separate from pump block (2) and remove ball stop
(13), ball cage (14), ball (15) and O-ring (11).
4. Secure piston seat assembly (10) in a vise and unthread
displacement rod (6) to remove packing set (3), spring (8)
and washer (7).
5. Inspect and clean all parts. Reject cylinder (12) and/or
displacement rod (6) if hard chrome is grooved or worn
through to gray metal.
Reassembly Procedure
NOTE: If cylinder (12) and displacement rod (6) are
reusable then only a minor kit # 155-051 or 155-
055 may be required for reassembly.
1. Place new packing set (3) over piston seat (10) with “V”
packings pointing downward and reassemble with new ball
(9), spring (8), washer (7) and displacement rod (6) in that
order. Tighten and use Loctite on clean threads.
2. Insert new upper packing set (3) into pump block (2).
IMPORTaNT: Peak of “v” packings must point upwards on
reassembly.
Install upper packing spring (4) and spring retainer (5).
3. Insert displacement rod assembly (6) through pump block
(2) holding upper packing set (3) in place with fingers.
4. Lubricate the threaded ends of cylinder (12) including the
new O-rings (11) to protect them on reassembly.
5. Thread cylinder (12) into pump block (2). Do not
overtighten.
6. Place new ball (15), ball cage (14), and ball stop (13) into
foot valve (16) and thread onto cylinder (12). The O-ring
(11) should be lubricated to protect it on replacement of
foot valve. It is not necessary to overtighten as seal is
obtained when parts are fully threaded together.
NOTE: It is not necessary to overtighten foot valve and
cylinder into pump block. O-ring seals perform
sealing function without excessive tightening.
Full thread engagement is sufficient. The foot
valve (16) may be rotated back up to 1/2 turn from
full engagement for convenient hose position.
For siphon hose attachment, it is critically important that
the thread of the siphon hose fit snugly into the foot valve
with the hose assembly couplings Teflon-taped and sealed
to prevent air inlet leakage.
Service Kits
Pump Service Kits, minor
ITEM
NO.
PaRT
NO.
DEScRIPTION
155-
051
155-
055
3
155-052
Packing set, leather
2
3a
155-053 Packing set, leather/poly.
2
9
155-225
Ball, S.S.
1
1
11
891-373 O-ring
2
2
15
178-700
Ball, S.S.
1
1
426-051 Loctite sealant
1
1
Pump Service Kits, major
ITEM
NO.
PaRT
NO.
DEScRIPTION
155-
500
155-
505
155-051 Minor service kit
1
155-505 Minor service kit
1
6
155-981
Rod, displacement
1
1
12
155-932 Cylinder
1
1
Содержание SPEEFLO Admiral 830-331
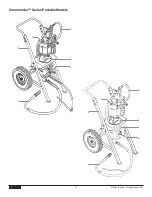
Страница 12: ...12 Titan Tool Inc All rights reserved Commander Series Portable Models 1 3 3 7 7 2 5 6 4 2 8 8 1 ...
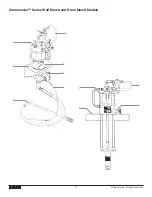
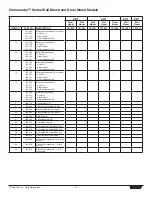
Страница 14: ...14 Titan Tool Inc All rights reserved Commander Series Wall Mount and Drum Mount Models 1 4 9 3 1 2 2 6 6 8 5 ...
Страница 39: ... Titan Tool Inc All rights reserved 39 Notes ...

