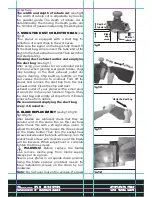
are too loose, alignment of the new blade will not
be accurate.
Before removing old blades, take notice of the
direction of cut as well as how the tapered edge
of the old blades are oriented. The tapered edge
of the new blades must be in the same orientation
as the original blades.
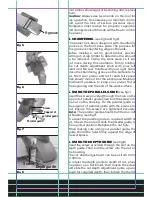
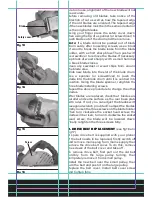
Using your finger press the safety cover down,
then using the tip of a spanner (or screwdriver) to
push blade out of the drum and then remove.
Note:
If a blade cannot be pushed out of blade
drum easily after loosening screws, use a block
of wood to break the blade loose from the blade
holder, with a short sharp blow. Then push with
a screwdriver to remove the blades. If necessary,
tap block of wood sharply with a small hammer
to break blades loose.
Clean any sawdust or wood chips from around
the blade area.
Slide new blade into the slot of the blade drum.
Use a spanner (or screwdriver) to push the
blade into the blade drum until it is centred into
position. Using the blade spanner, retighten the
three blade installing screws.
Repeat the above procedure to change the other
blades.
After blades are replaced, check that blades are
parallel and same surface as the rear base plate
with ruler. If not, you can adjust the blades with
hexagonal wrench provided. To adjust the blades,
firstly loosen the three screws on the blade holder.
Then turn clockwise the socket head screw, the
blade will be risen, turn anti-clockwise the socket
head screw, the blade will be lowered down.
Finally retighten the three screws fully.
9. DRIVE BELT REPLACEMENT
(see fig16 and
fig17)
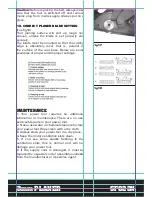
A spare drive belt is supplied with your planer.
If the belt needs to be replaced, firstly switch off
and remove mains plug from mains supply then
remove the drive belt cover. To do this, remove
the screws of the belt cover and take off .
To remove drive belt, first pull out the old belt
forcibly from the large pulley turning, then
completely remove it from small pulley.
Install the new belt over the small pulley, then
turn the belt and push it on the large pulley.
Replace the belt cover. Install belt cover screw
and tighten fully.
Blade
Safety cover
Fig 13
Fig 14
Fig 15
Screw
Fig 16
Содержание SF823N
Страница 1: ...3mm PLANER SF823N SAFETY AND OPERATING MANUAL ...
Страница 2: ......
Страница 16: ......

