Titan PROTOUCH Скачать руководство пользователя страница 2

English


Safety

Safety

Important Safety 

Information

Read all safety information before operating 

the equipment. Save these instructions

Indicates a hazardous situation which, if not 

avoided, could result in death or serious injury.

a)     To reduce the risks of fire or explosion, electrical shock 

and the injury to persons, read and understand all 

instructions included in this manual. Be familiar with the 

controls and proper usage of the equipment.

b)     WARNING - To reduce the risk of fire or 

explosion:

  1.  Do not spray flammable or combustible 

materials near an open flame, pilot lights 

or sources of ignition such as hot objects, cigarettes, motors, 

electrical equipment and electrical appliances.  Avoid creating 

sparks from connecting and disconnecting power cords.

  2.  For units intended for use with only water-based materials 

— Do not spray or clean with flammable liquids. For use with 

water-based liquids only.

  3.  For units intended for use with only water-based or mineral 

spirit-type materials with a minimum flash point of 21ºC 

(69.8ºF) — Do not spray or clean with liquids having a flash 

point of less than 21ºC (69.8ºF).  Flash point is the temperature 

at which a fluid can produce enough vapor to ignite.

  4.  Verify that all containers and collection systems are grounded 

to prevent static discharge.

  5.  Connect to a grounded outlet and use grounded extension 

cords (electric models only).  Do not use a 3 to 2 adapter.

  6.  Do not use a paint or solvent containing halogenated 

hydrocarbons.  Such as chlorine, bleach mildewcide, 

methylene chloride and trichloroethane.  They are not 

compatible with aluminum.  Contact the coating supplier about 

compatibility of material with aluminum.

  7.  Keep spray area well ventilated.  Keep a good supply of fresh 

air moving through the area to keep the air within the spray 

area free from accumulation of flammable vapors. Keep pump 

assembly in well ventilated area. 

  8.  Do not smoke in the spray area.

  9.  Do not operate light switches, engines, or similar spark 

producing products in the spray area.

 10.  Keep area clean and free of paint or solvent containers, rags, 

and other flammable materials.

 11.  Know the contents of the paint and solvents being 

sprayed.  Read all Material Safety Data Sheets (MSDS) 

and container labels provided with the paints and 

solvents.  Follow the paint and solvent manufacturer’s 

safety instructions.

 12.  Fire extinguisher equipment shall be present and working.

  c)  WARNING - To reduce the risk of skin 

injection:

  1.  Do not aim the gun at, or spray any person or 

animal.

  2.  Keep hands and other body parts away from the 

discharge. For example, do not try to stop leaks with any 

part of the body.

  3.  Always use the nozzle tip guard.  Do not spray without the 

nozzle tip guard in place.

  4.  Only use a nozzle tip specified by the manufacturer.

  5.  Use caution when cleaning and changing nozzle tips.

  6.  High-pressure spray is able to inject toxins into the body 

and cause serious bodily injury.  In the event that injection 

occurs, seek medical attention immediately.

  7.  This system is capable of producing 2800 PSI / 193 

Bar.  Only use replacement parts or accessories that 

are specified by the manufacturer and that are rated a 

minimum of 2800 PSI.  This includes spray tips, nozzle 

guards and extensions. 

  8.  Verify that all connections are secure before operating the 

unit.

  d)  WARNING - To reduce the risk of injury:

  1.  Always wear appropriate gloves, eye protection, clothing 

and a respirator or mask when painting.  Hazardous 

vapors – Paints, solvents, insecticides, and other 

materials can be harmful if inhaled or come in contact 

with body.  Vapors can cause severe nausea, fainting or 

poisoning.

  2.  Do not operate or spray near children.  Keep children 

away from equipment at all times.

  3.  Do not overreach or stand on an unstable support.  Keep 

effective footing and balance at all times.

  4.  Stay alert and watch what you are doing.

  5.  Do not operate the unit when fatigued or under the 

influence of drugs or alcohol.

  e)  WARNING - To reduce the risk of electric 

shock:

  1.  Keep electrical cord plug and spray gun 

trigger free from paint and other liquids.  

Never hold cord at plug connections to support cord.  

Failure to observe may result in an electrical shock.

  2.  Never immerse electrical parts in water or any other 

liquid.  Wipe the exterior of the sprayer with a damp cloth 

for cleaning.  

Important safety instructions about your charger 
and battery

  •  Before using charger, read all instructions and cautionary 

markings on (1) charger, (2) battery pack, and (3) product 

using battery pack.

  •  DANGER:  120 volts present at charging terminals.  Do 

not probe with conductive objects.  Danger of electric 

shock or electrocution.

  •  DANGER:  If battery pack case is cracked or damaged, 

do not insert into charger.  Danger of electric shock or 

electrocution.

  •  The charger and battery pack are specifically designed 

to work together.  DO NOT attempt to charge the battery 

pack with any chargers other than the ones in this 

manual.

  •  Do not recharge battery in damp or wet environment.

  •  Do not expose the charger to rain or snow.

  •  Charge battery pack in temperatures above 40ºF (4ºC) 

and below 105ºF (41ºC).  Store tool and battery pack 

in locations where temperatures will not exceed 120ºF 

(49ºC).  This is important to prevent serious damage to 

the battery cells.

  •  These chargers are not intended for any uses other than 

charging Titan rechargeable batteries.  Any other uses 

may result in risk of fire, electric shock, or electrocution.

  •  To reduce risk of damage to electric plug and cord, pull by 

plug rather than cord when disconnecting charger.  

  •  Make sure cord is located so that it will not be stepped on, 

tripped over, or otherwise subjected to damage or stress.

  •  An extension cord should not be used unless absolutely 

necessary.  Use of improper extension cord could result in 

risk of fire, electric shock, or electrocution.

  •  An extension cord must have adequate wire size (AWG 

or American Wire Gauge) for safety.  The smaller the 

gauge number of the wire the greater the capacity of the 

cable, that is 16 gauge has more capacity than 18 gauge.  

When using more than one extension to make up the total 

length, be sure each individual extension contains at least 

the minimum wire size. 

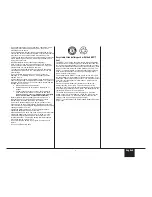
Recommended Minimum AWG Size for Extension Cords

Total extension cord length (feet)

25 

50 

75 

100 

125 

150 

175

Wire gauge

18 

18 

16 

16 

14 

14 

12

  •  The charger is ventilated through slots in the housing.  

Do not place any object on top of charger or place the 

charger on a soft surface that might block the ventilation 

slots and result in excessive internal heat.  Place the 

charger on a flat, non-flammable surface in a position 

away from any heat source.  If smoke or melting of the 

case are observed, unplug the charger immediately and 

do not use battery pack or charger.

  •  Do not operate charger with damaged cord or plug - have 

them replaced immediately.

Содержание PROTOUCH

Страница 1: ...g Technique 9 Spraying Troubleshooting Français page 19 Español página 37 PROTOUCH 10 Cleanup Using the Quick Flush lid 12 Cleanup oil based materials 14 Reassembly Maintenance 15 Replacement Parts 16 Troubleshooting 54 Parts List 56 Warranty Questions Call Titan Technical Service at 1 866 848 2698 Register your product online at www titantool com Proper registration will serve as proof of purchas...

Страница 2: ...it d WARNING To reduce the risk of injury 1 Always wear appropriate gloves eye protection clothing and a respirator or mask when painting Hazardous vapors Paints solvents insecticides and other materials can be harmful if inhaled or come in contact with body Vapors can cause severe nausea fainting or poisoning 2 Do not operate or spray near children Keep children away from equipment at all times 3...

Страница 3: ... be short circuted causing damage to the battery pack and possibly causing severe burns or fire Charge the battery packs only in Titan chargers that are specifically designed for this exact battery When battery pack is not in use keep it away from other metal objects like paper clips coins keys nails screws or other small metal objects that can make a connection from one terminal to another Shorti...

Страница 4: ... be adjusted horizontally or vertically n a b c1 c2 g e d f o p q s r m l k j i h Item Description a Sprayer b Spray tip c1 Suction tube with filter c2 Suction tube with filter lacquers only d Low battery indicator e Flow control knob f Trigger Item Description g Pump assembly h Locking nut i Atomizer valve 5 j Pump housing ring k Pump housing l Spring 2 m Piston 2 Item Description n Charger o Bat...

Страница 5: ...attery pack from the handle as shown 3 When the battery pack is fully charged unplug the charger and remove the battery pack from the charger 2 Slide the battery pack into the charger as shown Make sure you hear the battery pack snap into place Plug in the charger 4 Slide the battery pack into the sprayer handle as shown Make sure you hear the battery pack snap into place Notes The indicator light...

Страница 6: ...g to thread the container onto the pump housing 3 Place a few drops of household oil down the intake a and return openings b in the pump housing Material Preparation It is important to mix the material thoroughly before you begin Do not shake the material to mix it Always stir the material gently but thoroughly before use Remove any skin that has formed on the top of the material Do not mix the sk...

Страница 7: ...ome from the sprayer in a fine mist 1 Slide the battery pack into place inside the handle of the sprayer 4 Turn the flow knob clockwise until you have a good spray pattern 2 Turn the flow knob fully counterclockwise to maximum 5 A poor spray pattern a will concentrate the paint in the center of the spray pattern and go on blotchy A good spray pattern b has an even amount of material throughout the...

Страница 8: ... the sprayer at a constant distance from the surface The sprayer should be triggered at the beginning of the stroke and released at the end of the stroke 1 Spraying horizontally side to side Orient the spray tip as shown 4 Keep the sprayer at right angles to the surface This means moving your entire arm back and forth rather than just flexing your wrist 2 Spraying vertically up and down Orient the...

Страница 9: ...nserted into the intake opening recommendation Firmly install the suction tube into the intake opening a An empty container recommendation Be sure to maintain sufficient levels of spraying material in the material container c Tipping the sprayer too far in one direction recommendation Keep your arm even and steady when spraying Adjust the spray tip to change spraying direction 2 Remove the atomize...

Страница 10: ...our the remaining material back into the original container 2 Remove the suction tube 3 Turn the spray tip counter clockwise until it is removed Pull out the atomizer valve being careful not to lose it 5 Slide the pump housing assembly off the sprayer Remove the piston and spring from the pump housing Place all removed parts except the pump housing into the material container see inset 4 Using the...

Страница 11: ...ake sure to completely remove all material from the inside of the piston chamber by scrubbing with the brush 9 slowly turn on the garden hose Let the water run for approximately 30 seconds Turn the water off remove the garden hose and Quick Flush lid from the material container and properly dispose of the cleaning solution Be careful not to lose any of the parts that are still in the material cont...

Страница 12: ...ove it 4 Attach the container and replace the battery pack Squeeze the trigger until the solution comes through the sprayer for several seconds 2 Pour the remaining material back into the original container Rinse the inside of the cup with the appropriate cleaning solution 5 Remove the battery pack Remove the container and properly dispose of the remaining solution 3 Fill the container half full o...

Страница 13: ...ved 11 important Make sure to completely remove all material from the inside of the piston chamber by scrubbing with the brush Even a small amount of material can dry like glue and keep the piston from moving causing damage to the sprayer 9 Slide the pump housing assembly off the sprayer 12 important Make sure to keep the vent hole a on the pump housing clean and unblocked or a vacuum can build up...

Страница 14: ...e atomizer valve into the front end of the pump housing Place the spray tip onto the pump housing and turn it clockwise until it is tightened securely 2 Insert the pump housing assembly into the front of the sprayer 6 Replace the battery pack Aim at piece of scrap wood or cardboard and squeeze the trigger of the sprayer for 2 to 3 seconds while sprayer is still inverted 7 Replace the suction tube ...

Страница 15: ...duce a good spray pattern the valve needs to be replaced 1 1 2 3 Front view of a good atomizer valve 2 Front view of a atomizer valve after spraying 7 10 gallons of latex paint Replace 3 Front view of a atomizer valve after spraying 7 10 gallons of latex stain Replace Piston and Spring The average life of a piston and spring will vary depending on the types of material being sprayed Replace the pi...

Страница 16: ... Clean tip 6 Intake filter plugged Clean intake filter 7 Control knob needs adjusting Adjust 8 Worn piston Clean and oil or replace Problem D Material spitting or globbing Cause Solution 1 Low on paint Refill container 2 Material too thick Thin material 3 Loose suction tube is drawing in air Clean and insert firmly into intake opening on pump housing 4 Worm atomizer valve Replace atomizer valve 5 ...

Страница 17: ...Solution 1 Spray tip is loose Tighten securely 2 Atomizer valve not positioned properly Unplug the sprayer remove the spray tip and reposition the atomizer valve 3 Worn atomizer valve Replace 4 Eroded pump housing Replace the pump housing Troubleshooting Have you tried the recommendations above and are still having problems In the United States to speak to a customer service representative call ou...

Страница 18: ...English Français Español 54 Parts List Liste de pièces Lista de piezas o c d e f i2 b h g a i1 j m k l n ...

Страница 19: ...ro 1 i2 0525244 Suction tube with filter lacquers only Tube d aspiration avec filtre laques seulement Tubo de succión con filtro lacas solamente 1 j 0525239 Material container Réservoir de materiel Contenedor de material 1 k 0525417 Battery pack Groupe accumulateur Paquete de batería 2 l 0525425 Charger Chargeur Cargador 1 m 0518428 Quick Flush lid Capuchon de nettoyage rapide Tapa de limpieza ráp...

Страница 20: ...s centres de service autorisé par Titan Une liste des adresses de ces centres accompagne tous les produits Le centre de service autorisé réparera ou remplacera le produit au choix de Titan et le renverra port payé et utilisateur Garantie à vie de l embout du pulvérisateur L embout livré avec ce produit Titan est garanti contre l usure pour toute la durée utile de l appareil Cette garantie ne couvr...

Отзывы: