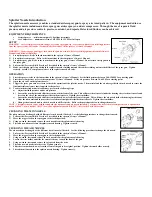
Splatter Nozzle Introduction
The splatter nozzle accessory enables a standard airless spray gun to spray a textured pattern. The equipment needed to use
the splatter nozzle includes an airless spray gun, airless sprayer, and air compressor. Through the use of separate fluid
pressure and air pressure controls, precise, consistent, and repeatable textured finishes can be achieved.
EQUIPMENT REQUIREMENTS
•
Airless Sprayer — minimum output of 1.0 gallons per minute
•
Air Compressor — minimum air flow of 4.0 CFM to 12 CFM at full open
SETUP
WARNING - Never attempt to assemble, change, or clean a spray gun, tip, or accessory without first relieving pressure
from the spray system. Follow the “Pressure Relief Procedure” in the sprayer’s Owner’s Manual.
WARNING - Always engage gun trigger lock when the gun is not in use. Before servicing equipment, consult Owner’s
Manuals and follow all warnings.
1)
Set up the sprayer. Refer to the instructions in the sprayer’s Owner’s Manual.
2)
Set up the air compressor. Refer to the instructions in the compressor’s Owner’s Manual.
3)
Set up the spray gun. Refer to the instructions in the spray gun’s Owner’s Manual. Do not attach the tip guard to
the spray gun.
4)
Perform the “Pressure Relief Procedure” described in the sprayer’s Owner’s Manual.
5)
Make sure the gun seal is in position in the splatter nozzle retaining nut and thread the retaining nut onto the diffuser of the spray gun. Tighten
securely. Attach 1/4” compressor air hose to the splatter nozzle air valve.
OPERATION
1)
Start the sprayer (refer to the instructions in the sprayer’s Owner’s Manual). Set the fluid pressure between 500–1500 PSI as a starting point.
2)
Start the air compressor (refer to the compressor’s Owner’s Manual). Set the air pressure between 30–60 PSI as a starting point.
3)
Open the air valve on the splatter nozzle.
4)
Trigger the spray gun onto a test area to check the operation of the splatter nozzle. The material and the air mix together in the mix nozzle to create the
final material consistency that is applied to the surface.
5)
To obtain the desired material consistency, perform the following steps:
a)
Adjust the fluid pressure and/or air pressure
b)
Loosen the stem holder and slide the stem toward the front of the gun. This will move the air nozzle inside the housing closer to the mix nozzle and
decrease the size of the material particles in the mix nozzle. Tighten the stem holder.
c)
Loosen the stem holder and slide the stem backward, away from the front of the gun. This will move the air nozzle inside the housing further away
from the mix nozzle and increase the size of the material particles inside the mix nozzle. Tighten the stem holder.
d)
Change the air nozzle and/or the mix nozzle to a different size. Refer to the procedures below to change the nozzles.
NOTE: The splatter nozzle comes with the standard size mix nozzle and air nozzle installed. To increase the size of the material particles, use optional mix
nozzle 2 (0.240”) or mix nozzle 3 (0.312”) as well as optional air nozzle B (0.102”) (refer to the Parts List section).
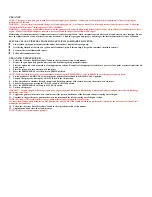
CHANGING THE MIX NOZZLE
The mix nozzle can be changed with a different size mix nozzle, if desired. Use the following procedure to change the mix nozzle.
1)
Perform the “Pressure Relief Procedure” described in the sprayer’s Owner’s Manual.
2)
Move the trigger lock on the spray gun to the locked position.
3)
Using a wrench, loosen and remove the mix nozzle from the splatter nozzle housing.
4)
Thread a new mix nozzle into the splatter nozzle housing. Tighten securely.
CHANGING THE AIR NOZZLE
The air nozzle can be changed with a different size air nozzle, if desired. Use the following procedure to change the air nozzle.
1.
Perform the “Pressure Relief Procedure” described in the sprayer’s Owner’s Manual.
2.
Move the trigger lock on the spray gun to the locked position.
3.
Using a wrench, loosen and remove the mix nozzle from the splatter nozzle housing.
4.
Loosen the stem holder and slide the stem all the way toward the front of the gun.
5.
Using a wrench, loosen and remove the air nozzle from the stem.
6.
Thread a new air nozzle into the stem. Tighten securely.
7.
Slide the stem backward, away from the front of the gun to its original position. Tighten the stem holder securely.
8.
Thread the mix nozzle into the splatter nozzle housing. Tighten securely.


