Tiptel 31XX IP Phone Configuration Guide
5/10
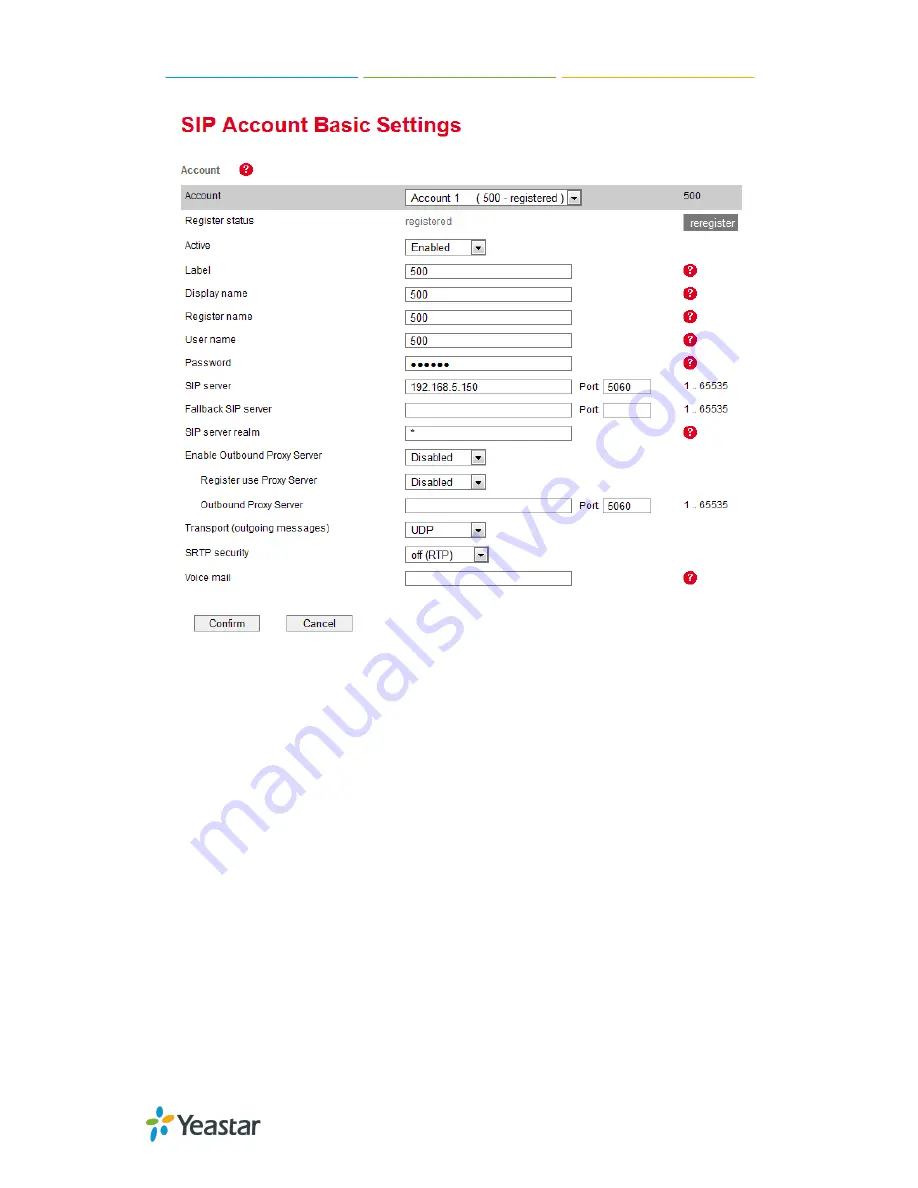
Figure 1-2
1) Set the "Active" field to "Enabled".
2) Set the "Label" field to the name you want to appear on the Phone
display.
3) Set the "Display Name" field to the name you want to appear on another
phone's display when calling other phones.
4) Set the "Register Name" field to the extension number you want to
associate with this phone.
5) Set the "User Name" field to the extension's Authentication ID.
6) Set the "Password" field to the extension's Authentication Password.
7) Set the "SIP Server" field to the IP Address of MyPBX, in this example,
192.168.5.150.
8) Set the SIP Server "Port" field to the SIP Port of MyPBX (default "5060").
9) Click the "Confirm" button at the bottom of the page. The phone will now
register with MyPBX. This can be verified via the “Status" page of
MyPBX Management Console.


