background image

1-47

Option Descriptions

HRM SETTINGS

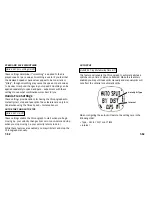
These settings allow you to set a target zone for your heart rate
and an out-of-zone alert when using the Heart Rate Sensor. You
may select from a set of 5 preset zones, or enter a manual upper
and lower limit value.

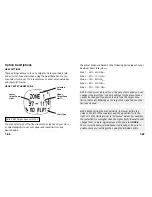
HEART RATE TARGET ZONE

QUICK SET: Target Zone selection.

You may select one of the five preset zones (based on your HR

MAX

)

or select MANUAL to set your upper and lower limits to any
desired value.

1-46

Selected
Zone

Lower
Target Zone
Limit

Alert Type

Upper
Target Zone
Limit

The preset zones are based on the following percentages of your
maximum heart rate (HR

MAX

):

Zone 1 – 50% - 60% HR

MAX

Zone 2 – 60% - 70 % HR

MAX

Zone 3 – 70% - 80% HR

MAX

Zone 4 – 80% - 90% HR

MAX

Zone 5 – 90% - 100% HR

MAX

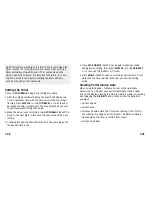
NOTE: If you select a preset zone, the only other option you can
change is the alert type; the limit settings for the preset zones
cannot be changed. If you wish to enter specific target zone
limits, first select MANUAL as the target zone, and then set the
limits as desired.

NOTE: When setting the manual limits, the lower limit is the
value to the left of the separator and the upper limit is to the
right of it. If the limits are set to “nonsense” values (for example,
the lower limit is set higher than the higher limit), the watch will
change them to more logical values when you press 

DONE

.

These corrections may yield unexpected results, so be sure to
double-check your settings when using the MANUAL limits.

Содержание 117-095000 NA

Страница 1: ...lity to use the Bodylink Performance Monitor in a safe manner and to maintain full awareness of conditions and surroundings at all times Consulting the Bodylink Performance Monitor while moving is uns...

Страница 2: ...E SPLIT AVG PACE DISTANCE LAP AVG PACE DISTANCE Viewing Performance Data in Chrono Mode HRM ONLY S D ONLY HRM S D Push and release DISPLAY until you see data you want Press START SPLIT to change the Q...

Страница 3: ...RTNER 1 9 THE MODES 1 9 THE DISPLAY 1 11 BUTTON FUNCTIONS 1 12 STARTING THE BODYLINK SYSTEM 1 14 VIEWING PERFORMANCE DATA 1 15 BODYLINK INFORMATIONAL AND ERROR MESSAGES 1 16 CONFIGURING THE WATCH FOR...

Страница 4: ...ime 1 54 Button Beep 1 54 Length Units 1 54 CHANGING THE BATTERY 1 55 COMMON QUESTIONS 1 57 1 iii 1 ii SETTING THE TIME OF DAY 1 22 VIEWING PERFORMANCE DATA 1 25 CHRONOGRAPH MODE 1 26 A NOTE ABOUT LAP...

Страница 5: ...ink sensor data 3 Configuring the Watch for First Use page 19 is the section that describes how to set up the most important watch options so you ll get the most benefit from the watch before you go o...

Страница 6: ...tic performance are as simple as setting a realistic fitness objective and using the Timex Digital Heart Rate Sensor as a personal trainer Welcome The Timex Bodylink System offers athletes and fitness...

Страница 7: ...one values using an age based method 220 minus your age Here is how it works First Select a Fitness Objective That s Right for You Improve Your Fitness Lose Weight and Burn Fat Increase Stamina and Ae...

Страница 8: ...age can do this by using cross training to optimal condition Follow these guidelines Pick the exercise activities you enjoy or the ones you need for a training program Train at the appropriate Target...

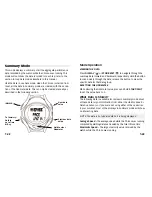
Страница 9: ...e Modes First you might want to take a spin through the modes to famil iarize yourself with the different features present in your watch Press and release the MODE button to cycle through the watch mo...

Страница 10: ...Rate target zones speed pace alert settings and Chrono hands free features are set here TIP Press and hold the MODE button for 1 5 seconds to return to Time of Day from any other mode The Display Your...

Страница 11: ...ns correspond to the symbols visible on the display 1 12 INDIGLO Done setting Increase Decrease Here is a second example of the button functions in Lap Data mode Here the buttons change their function...

Страница 12: ...sors nearby it will search for one minute The antenna icon will appear on the watch display indi cating that the Bodylink system is active NOTE As a convenience Chrono and Timer will automatically sea...

Страница 13: ...com municate the status of the sensor device or of the radio link between the watch and the sensors 1 16 SEARCHING Speed Distance The Speed Distance Sensor has not yet detected enough GPS satellites...

Страница 14: ...sed age based method is 220 age use this formula if you don t know your maximum heart rate 3 Select your desired length units Again in Configure Mode select Watch Settings then select Length Units Thi...

Страница 15: ...igure Mode and select S D Settings As with the heart rate settings you will see the cur rent settings for your Speed Pace Zone Press SET FORMAT SELECT to begin the setting procedure or press START SPL...

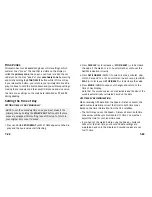
Страница 16: ...IME appears on the dis play and the hours value starts flashing 2 Press DISPLAY to increase or STOP RESET to decrease the value If the watch is in 12 hour format be sure to set the AM PM indication co...

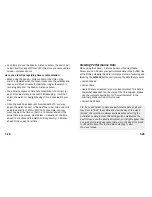
Страница 17: ...lly set the time ahead 10 minutes and the watch will stay exactly 10 minutes ahead of the correct local time 1 24 Viewing Performance Data When using the Speed Distance Sensor or the Heart Rate Sensor...

Страница 18: ...running A Note About Laps and Splits Throughout this section we will talk about laps and splits When describing time lap time is the time for one segment lap of an event Split time is the total time s...

Страница 19: ...During this time the stopwatch icon will be flashing and all buttons will function normally This feature was included to allow you to view the Chrono data for these timing actions even if you have sel...

Страница 20: ...ber labeled RCL for Recall If you were not using any of the sensors each recalled lap will consist of one display only lap and split time Data Stored For Each Lap Lap and Split Time The first data sto...

Страница 21: ...te through the summary data forward and backward respectively Hold the button to scan quickly through the data release the button to view the specific data for that data group RESETTING THE ODOMETER W...

Страница 22: ...ount of time that the displayed heart rate was within your heart rate target zone See the section for 1 34 Configure mode for detailed instructions for setting your target heart rate zone Average Hear...

Страница 23: ...ess START SPLIT to start the Timer counting down 2 Press STOP RESET to stop the countdown 3 With the Timer stopped press START SPLIT to resume the countdown or STOP RESET to reset the Timer to the sta...

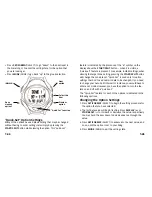
Страница 24: ...MAT SELECT to move to the next digit in this case the ones value of the hour setting 4 Continue through minutes and seconds in the same way until the desired time is set 1 38 5 Press SET FORMAT SELECT...

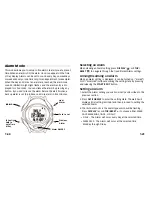
Страница 25: ...s Alarm Alarm ON OFF Push to set Selecting an Alarm When viewing an Alarm setting press DISPLAY or STOP RESET to navigate through the five different Alarm settings Arming Disarming an Alarm While an A...

Страница 26: ...ure mode allows you to set a number of options that make operations in the other modes easier and more useful The set tings in this mode are divided into four groups WATCH SETTINGS Night Mode Hourly C...

Страница 27: ...k Set is used only for option settings that don t need numeric data to be changed If you need to change your Auto Split interval for instance you would have to enter a set mode However you have the op...

Страница 28: ...te HRMAX Zone 1 50 60 HRMAX Zone 2 60 70 HRMAX Zone 3 70 80 HRMAX Zone 4 80 90 HRMAX Zone 5 90 100 HRMAX NOTE If you select a preset zone the only other option you can change is the alert type the lim...

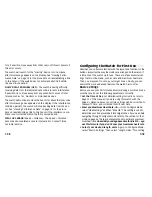
Страница 29: ...ce Sensor Here you may set speed or pace limits a distance alert and enable or disable smoothing for the speed and pace information 1 48 SPEED PACE ZONE QUICK SET Alert type NONE SILENT AUDIBLE The wa...

Страница 30: ...E IN TERMS OF TIME PER DISTANCE Alert Type Alert Type Slowest Speed Fastest Pace DISTANCE ALERT QUICK SET Alert on off You can set the watch to alert you when you have traveled a specific distance or...

Страница 31: ...res are only func tional when using the Timex Speed Distance Sensor AUTO START AND AUTO STOP QUICK SET On Off These settings enable the Chronograph to start when you begin moving i e your velocity cha...

Страница 32: ...OSSIBILITY OF PERMANENTLY DAMAGING THE WATCH TIMEX STRONGLY RECOMMENDS TAKING YOUR WATCH TO A RETAILER OR JEWELER TO HAVE THE BATTERY REPLACED If you choose to replace the battery yourself check the b...

Страница 33: ...ters it is not a diver watch and should not be used for diving 1 56 3 Timex recommends rinsing your watch with fresh water after exposure to salt water Common Questions Q When using the Auto Split by...

Страница 34: ...The Overall Time and Overall Distance data are based only on data received from the Timex Speed Distance Sensor Q I am already monitoring data from one Timex sensor and I want to also view data from...

Страница 35: ...check or money order in the U S a CAN 6 00 cheque or money order in Canada and a UK 2 50 cheque or money order in the U K In other coun tries you will be charged for postage and handling NEVER INCLUD...

Страница 36: ...Timex as set forth in the Timex International Warranty or addressed to HotLine Watch Service P O Box 2740 Little Rock AR 72203 Street address HotLine Watch Service 1302 Pike Ave North Little Rock AR...

Страница 37: ...x Product Type Unintentional Radiator This equipment has been tested and found to comply with the limits for a Class B digital device pursuant to Part 15 of the FCC rules These limits are designed to...

Страница 38: ...elville NY 11747 Timex Corporation declares that these low power radio equipment devices are in compliance with the essential requirements and other relevant provisions of R TTE Directive 1999 5 EC Pr...

Отзывы: