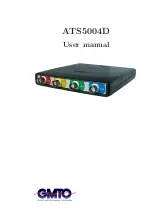
TiePie GMTO ATS5004D Скачать руководство пользователя страница 3

Contents

1

Safety

1

2

Declaration of conformity

3

3

Introduction

5

3.1

Differential input

. . . . . . . . . . . . . . . . . . . .

5

3.1.1

Differential attenuators

. . . . . . . . . . . .

7

3.1.2

Differential test lead

. . . . . . . . . . . . . .

9

3.2

Sampling

. . . . . . . . . . . . . . . . . . . . . . . .

9

3.3

Sample frequency

. . . . . . . . . . . . . . . . . . . .

10

3.3.1

Aliasing

. . . . . . . . . . . . . . . . . . . . .

11

3.4

Digitizing

. . . . . . . . . . . . . . . . . . . . . . . .

13

3.5

Signal coupling

. . . . . . . . . . . . . . . . . . . . .

13

4

Driver installation

15

4.1

Introduction

. . . . . . . . . . . . . . . . . . . . . . .

15

4.2

Where to find the driver setup

. . . . . . . . . . . .

15

4.3

Executing the installation utility

. . . . . . . . . . .

15

5

Hardware installation

21

5.1

Power the instrument

. . . . . . . . . . . . . . . . .

21

5.1.1

External power

. . . . . . . . . . . . . . . . .

21

5.2

Connect the instrument to the computer

. . . . . . .

22

5.2.1

Found New Hardware Wizard

. . . . . . . . .

22

5.3

Plug into a different USB port

. . . . . . . . . . . .

25

6

Front panel

27

6.1

Channel input connectors

. . . . . . . . . . . . . . .

27

6.2

Power indicator

. . . . . . . . . . . . . . . . . . . . .

27

7

Rear panel

29

7.1

Power

. . . . . . . . . . . . . . . . . . . . . . . . . .

29

7.1.1

USB power cable

. . . . . . . . . . . . . . . .

30

7.1.2

Power adapter

. . . . . . . . . . . . . . . . .

31

7.2

USB

. . . . . . . . . . . . . . . . . . . . . . . . . . .

31

7.3

Extension Connector

. . . . . . . . . . . . . . . . . .

31

8

Specifications

33

Contents

I

Содержание GMTO ATS5004D

Страница 1: ...ATS5004D User manual...

Страница 2: ...rous Copyright c 2016 TiePie engineering All rights reserved Revision 2 14 January 2016 Despite the care taken for the compilation of this user manual TiePie engineering can not be held responsible fo...

Страница 3: ...5 4 2 Where to find the driver setup 15 4 3 Executing the installation utility 15 5 Hardware installation 21 5 1 Power the instrument 21 5 1 1 External power 21 5 2 Connect the instrument to the compu...

Страница 4: ...ger system 34 8 4 Physical 34 8 5 Power 34 8 6 Interface 34 8 7 I O connectors 34 8 8 System requirements 35 8 9 Environmental conditions 35 8 10 Certifications and Compliances 35 8 11 Measure leads 3...

Страница 5: ...DC should only be performed by qualified personnel Avoid working alone Observe all indications on the ATS5004D before connecting any wiring Check the probes test leads for damages Do not use them if t...

Страница 6: ...2 Chapter 1...

Страница 7: ...the product ATS5004D for which this declaration is valid is in compliance with EN 55011 2009 A1 2010 IEC 61000 6 1 EN 61000 6 1 2007 EN 55022 2006 A1 2007 IEC 61000 6 3 EN 61000 6 3 2007 according the...

Страница 8: ...oid release of such substances into the environment and to reduce the use of natural resources recycle the ATS5004D in an appropriate system that will ensure that most of the materials are reused or r...

Страница 9: ...he native resolution is 12 bits but user selectable resolutions of 14 and 16 bits are available too with adjusted maximum sampling frequency resolution Maximum sampling frequency 12 bit 50 MS s 14 bit...

Страница 10: ...by connecting one of the channels to one point and another channel to the other point and then use the math function CH1 CH2 in the oscilloscope to display the actual voltage difference There are som...

Страница 11: ...accurate measurements since only one channel intro duces a measurement error The CMRR of a differential input is high If both points have a relative high voltage but the voltage difference between th...

Страница 12: ...5 Differential input The Differential Attenuator and the inputs of the Handy scope HS4 Diff are differential which means that the outside of the BNC s are not grounded but carry life signals When usin...

Страница 13: ...carry the ATS5004D etc 3 1 2 Differential test lead The ATS5004D comes with a special differential test lead This test lead is specially designed to ensure a good CMRR The special heat resistant diffe...

Страница 14: ...ure 3 7 Figure 3 7 connecting the samples 3 3 Sample frequency The rate at which the samples are taken is called the sampling frequency the number of samples per second A higher sampling frequency cor...

Страница 15: ...ut with frequencies equal to the sum and difference of the signal frequency and multiples of the sampling frequency For example when the sampling frequency is 1000 Hz and the signal frequency is 1250...

Страница 16: ...3 9 the green input signal top is a triangular signal with a frequency of 1 25 kHz The signal is sampled with a fre quency of 1 kHz The corresponding sampling interval is 1 1000Hz 1ms The positions at...

Страница 17: ...ed In figure 3 10 the same signal is digitized using two different amounts of levels 16 4 bit and 64 6 bit Figure 3 10 The effect of the resolution The ATS5004D measures at e g 12 bit resolution 212 4...

Страница 18: ...n the input connector and the input circuit This capacitor will block all DC components of the input signal and let all AC components pass through This can be used to remove a large DC component of th...

Страница 19: ...alled by the driver setup program This makes sure that all required files are located where Windows can find them When the instrument is plugged in Windows will detect new hardware and install the req...

Страница 20: ...on Figure 4 1 Driver install step 1 When drivers were already installed the install utility will re move them before installing the new driver To remove the old driver successfully it is essential tha...

Страница 21: ...t should now be disconnected Then the removal of the existing driver can be continued by clicking Next Clicking Yes will ignore the fact that the instrument is still connected and continue removal of...

Страница 22: ...em and can be safely installed Please ignore this warning and continue the installation Figure 4 5 Driver install step 4 The driver install utility now has enough information and can install the drive...

Страница 23: ...tep 5 As mentioned Windows XP SP2 and newer may warn for the USB drivers not being Windows Logo tested Please ignore this warning and continue anyway Figure 4 7 Driver install Ignore warning and conti...

Страница 24: ...Figure 4 8 Driver install Finished 20 Chapter 4...

Страница 25: ...tabilize at the nominal current USB ports have a maximum limit for both the inrush current peak and the nominal current When either of them is exceeded the USB port will be switched off As a result th...

Страница 26: ...hich it will ask for information regarding the drivers of the newly found hardware The appearance of the dialogs will differ for each Windows version and might be different on the computer where the A...

Страница 27: ...on the Windows Update Web site so select No not this time and click Next Figure 5 2 Hardware install step 2 Since the drivers are already pre installed on the computer Windows will be able to find th...

Страница 28: ...will now copy the required files to their destination Figure 5 4 Hardware install step 4 The first part of the new driver is now installed Click Finish to close the wizard and start installation of t...

Страница 29: ...can be used 5 3 Plug into a different USB port When the ATS5004D is plugged into a different USB port some Windows versions will treat the ATS5004D as different hardware and will ask to install the dr...

Страница 30: ...26 Chapter 5...

Страница 31: ...BNC connectors are the main inputs of the acqui sition system The isolated BNC connectors are not connected to the ground of the ATS5004D 6 2 Power indicator A power indicator is situated at the top...

Страница 32: ...28 Chapter 6...

Страница 33: ...ector The specifications of the dedicated power connector are Pin Dimension Description Center pin 1 3 mm ground Outside bushing 3 5 mm positive Figure 7 2 Power connector Besides the external power i...

Страница 34: ...cable Figure 7 3 USB power cable One end of this cable can be connected to a second USB port on the computer the other end can be plugged in the external power input at the rear of the instrument The...

Страница 35: ...B voltage the adapter can supply enough current preferably 1 A the plug has the correct dimensions for the external power input of the instrument 7 2 USB The ATS5004D is equipped with a USB 2 0 High s...

Страница 36: ...n TTL 21 Reserved 9 Data OK out TTL 22 Ground 10 Ground 23 I2C SDA 11 Trigger out TTL 24 I2C SCL 12 Reserved 25 Ground 13 Ext sampling clock out TTL Table 7 2 Pin description Extension connector All T...

Страница 37: ...3 3 V TTL 5 V TTL tolerant Frequency range 95 MHz to 105 MHz Memory 128 kSamples per channel 8 2 BNC inputs CH1 to CH4 Type Differential Resolution 12 14 16 bit user selectable Accuracy 0 3 of full s...

Страница 38: ...gger hold off 0 to 1 MSamples 1 sample resolution Digital external trigger Input extension connector Range 0 to 5 V TTL Coupling DC 8 4 Physical Instrument height 25 mm 1 0 Instrument length 170 mm 6...

Страница 39: ...and Compliances CE mark compliance Yes RoHS Yes 8 11 Measure leads Model TP C812B Type differential Connectors Instrument side isolated female BNC connector Test point side red and black 4 mm shrouded...

Страница 40: ...imensions Length 79 mm Diameter 19 mm Weight 30 g Suitable instrument ATS5004D 8 13 Package contents Instrument ATS5004D Test lead 4 x TP C812B low noise differential test leads with 4 mm banana jacks...

Страница 41: ......

Отзывы: