background image


    .                                 

.                                 

.                                 

.                                                                 


13

13

13

13

7

77

7

  NMS Operation 

With the Network Management Software (MNS) the user can set all the parameters 

on a PC and transfer the data to the device.    This is the recommended technique for 

setting  parameters such as  IP  and  Port  number.    To use  the  NMS software,  connect 

the Ethernet port on a computer to the 

Ethernet

 port on the device.    Determine the 

units 

Local IP

 address through the front panel.    This is the IP that is found under 

the 

Network  Settings

  menu,  not  the  IP

s  found  under 

Parameter  Settings


menu.    The  local  IP  for  the 

Ethernet

  Management  port  can  also  be  changed via 

the 

Network  Settings

  Menu.    To  change  the  IP,  press  enter  while  the  IP  is being 

displayed.    The  curser  will  appear,  and  the  arrows  can  be  used  to  set  the  new  IP.   

Press enter to confirm the new IP.    Remember to always 

Save Parameters

 on the 

home menu after making any changes.    Make sure that the computer IP range is in the 

same range and the devices IP address to ensure proper communication. 


Once the management local IP is determined or set, launch the Network 

Management Software (NMS).    Log into the software with username 

admin

 and 

password 

admin

.    These can be changed from inside the software later. 

Содержание H-1ASI-IP-B

Страница 1: ...DVB ASI Over IP Bi Directional Gateway User s manual H 1ASI IP B...

Страница 2: ...pecifications 3 3 1 ASI Interface 3 3 2 Network port 3 3 3 Power failure auto save 4 3 4 Power 4 3 5 Working environment 4 3 6 Mechanics 4 3 7 Weight 5 4 4 4 4 Equipment connection 5 4 1 Front panel a...

Страница 3: ...ave current settings 10 5 2 6 Load settings 11 5 2 7 Version No 11 5 2 8 Language setting English 11 5 2 9 Error info 11 6 6 6 6 SYSTEM FAILURE OR TROUBLE SHOOTING 12 6 1 INDICATOR status 12 6 2 Troub...

Страница 4: ...y power plug or power supply to avoid fire or electric shock Do not touch power supply with wet hands Handle with care when pulling out power plug no touch with the wire No flammable or liquid allowed...

Страница 5: ...The H 1ASI IP B unit consists of an ASI input output module an Ethernet IP output input module and a CPU module An ASI Transport Stream that is input into the ASI module is encapsulated by the CPU and...

Страница 6: ...o function It is important to note that the Data port IP address does not support the ping function It is also important to note that when making changes to the IP configurations either via front pane...

Страница 7: ...et port IEEE802 3 Ethernet RJ45 port Software protocol UDP IP 3 3 3 3 3 3 3 3 Power failure auto save Enabled by default this setting automatically saves the system parameters in the event of a power...

Страница 8: ...quipment connection 4 1 4 1 4 1 4 1 Front panel and keyboard 4 1 1 4 1 1 4 1 1 4 1 1 Front panel Power indicator Error indicator 4 2 4 2 4 2 4 2 Front panel 1 LCD Display 2 Error indicator 3 Power ind...

Страница 9: ...witch 6 5 4 3 2 1 180 250v 50HZ 0 5A Ether 100M CAT ASI OUT1 DATA ASI OUT2 ASI IN1 The front key panel and LCD can be used to make local changes to the device configuration The arrow keys and enter an...

Страница 10: ...lay following menu 5 2 3 5 2 3 5 2 3 5 2 3 Parameter Settings ASI IP Adaptor 00 000 mbps 00 000 mbps 1 Parameter Settings 2 Network Settings 3 Save Config 4 Load Config 5 Version No 6 Language 7 Error...

Страница 11: ...Destination port 1 1 1 on off off 1 1 2 Destination IP 224 002 002 002 1 1 3 Destination port 1234 This Menu is used to enable TS Output from the unit and to set the destination address and port of th...

Страница 12: ...68 000 195 1 3 2 Gateway 192 168 000 001 1 3 3 Submask 255 255 255 000 This menu controls Transport Receiving related settings This menu turns Transport Stream receiving on or off This sets the port n...

Страница 13: ...a MAC hardware address for the Local IP TS Port This menu is used to set parameters for the MANAGMENT port The managment port is a seperate Ethernet port used to remotely manage the gateway This addr...

Страница 14: ...the software and hardware number 5 2 8 5 2 8 5 2 8 5 2 8 Language setting English Here you can select languages After all settings the system runs normally 5 2 9 5 2 9 5 2 9 5 2 9 Error info in this...

Страница 15: ...ing 6 2 1 6 2 1 6 2 1 6 2 1 POWER INDICATOR OFF Check power cable plug and switch 6 2 2 6 2 2 6 2 2 6 2 2 ERROR ON RED If the device is working abnormally please check the device error info If unlock...

Страница 16: ...r Parameter Settings menu The local IP for the Ethernet Management port can also be changed via the Network Settings Menu To change the IP press enter while the IP is being displayed The curser will a...

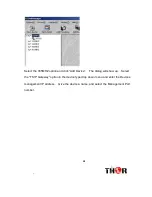
Страница 17: ...ce the main NMS menu comes up Select Add Freq Node and you will see the following dialog box In the Add Frequency Node Dialog box enter 385MHZ and hit ok You will then see the option populate in left...

Страница 18: ...MHZ option and click Add Device The dialog will show up Select the TS IP Gateway option in the device type drop down menu and enter the Devices management IP address Give the device a name and select...

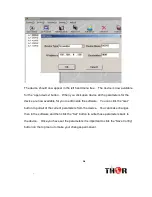
Страница 19: ...e are now available for you to edit inside the software You can click the Get button to pull all of the current parameters from the device You can make changes then in the software and then click the...

Страница 20: ...You can also save configurations with this software as well as load your saved configurations Device status Link Status and ASI status are all visible from this menu You can also read the ASI Bitrate...

Отзывы: