2
FM radio frequency wireless headphones
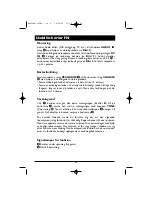
Set-up
Make use of the connection cable (see
Fig. 3
) to link the Audio source
(hi-fi system,TV set, etc.) to the transmitter’s
AUDIO IN
de socket
3
.
Connect the jack of the mains adapter included to the
DC IN
2
power
supply socket at the rear of the transmitter (see
Fig. 3
). Then plug the
mains adapter into a mains outlet. Insert 2 rechargeable batteries of type
LR 03
@
into the headphones compartment as shown in
Fig. 2
. Mind the
polarity.
Battery loading
With the connection cable included, link the transmitter’s
RECHARGE
socket
4
to the headphones’
CHARGE
!
socket.
•
First charge: leave the headphones in the charging position all over the
night (approximately 15 hours).
•
First use: let the batteries get completely empty (until the headphones do
no longer work), before you recharge them again.
The second and following recharging operations will take 10 hours.
Operation
Select
1
the channel providing the best reception quality (
A
or
B
). Put the
headphones into operation
7
. While listening, adjust reception with the
TUNE
knob (fine tuning)
0
to obtain a proper sound (the LED
8
then
turns into green).Then adjust the headphones volume
9
to a suitable level.
This headphones transmitter unit has been designed to switch itself off
after two minutes if its input level drops below a certain level. This is to
comply with the current legislation on reduce the amount of radio
emissions in the environment.Therefore, to ensure that this function is not
accidentally triggered, we suggest that you set the television, audio amplifier
or DVD/CD player headphone volume level at approximately half way
(50%). Please consult your equipments user manual for details on how to
set the head/earphones volume level.
Status indicators
5
Transmitter on,
6
Charging.
WHP360R/360RU - 16 L. 14/03/03 16:38 Page 2


