background image

16

Software Setup

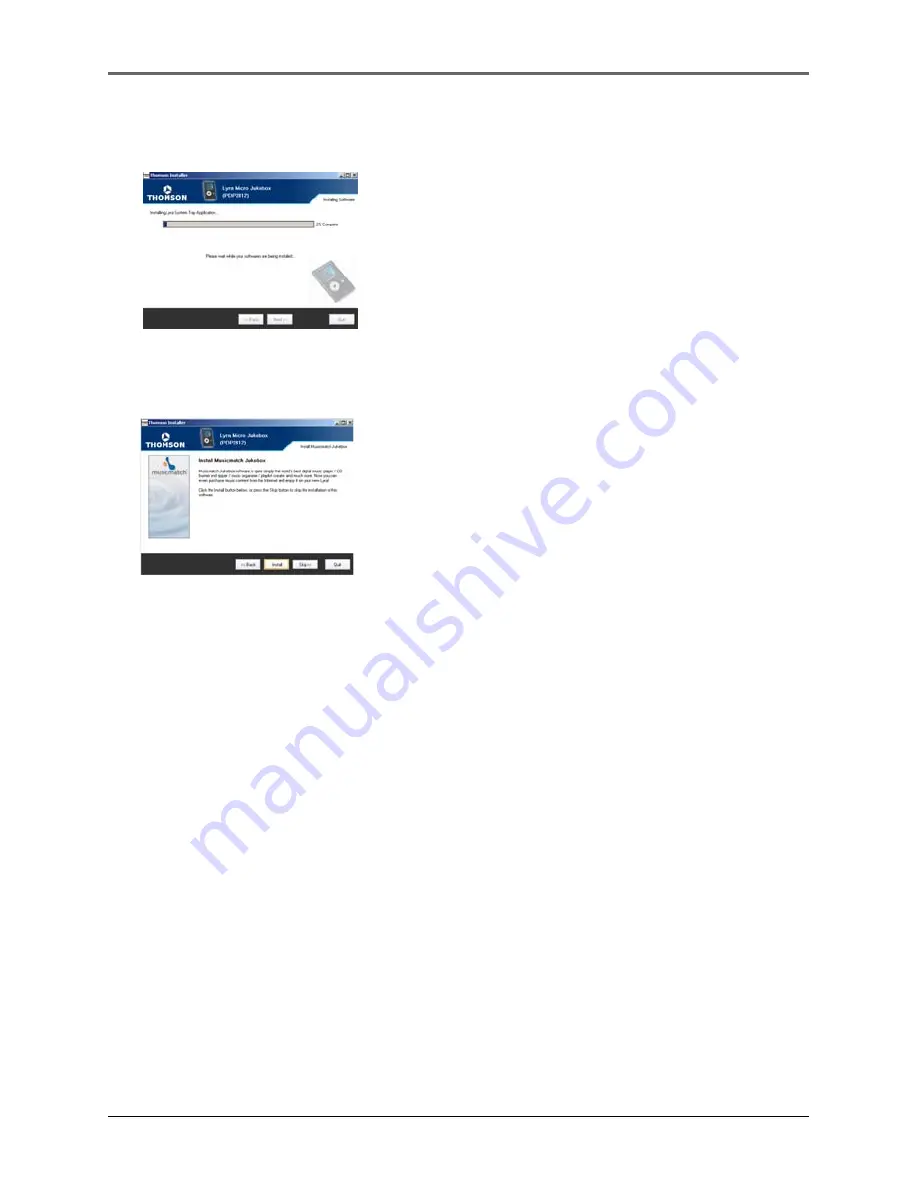
Install MusicMatch

1.

Click 

Install 

to continue the installation of the

MusicMatch software.

2.

Click 

Back 

to return to previous screen.

3.

Click 

Skip 

to skip the musicmatch installation.

4.

Click 

Quit 

to abort installation.

Note:

 Actual installation software presented may

vary based on the name of the store entered in
the Purchased Location screen.

1.

At this point during the installation process, the
necessary software components will be installed
on your system and may take a few moments to
complete.

2.

When the installation is completed, click 

Next 

to

continue.

Performing the Installation

Содержание PDP2812

Страница 1: ...Lyra Jukebox User s Guide PDP2812...

Страница 2: ...isk of injury charge only rechargeable batteries recommended by the manufacturer for this product Other types of batteries may burst causing damage and personal injury Sound Pressure Control Les artic...

Страница 3: ...ded Product Information Keep your sales receipt for proof of purchase to obtain warranty parts and service and attach it here Record the serial number and model numbers both numbers are located on the...

Страница 4: ...f the Program provided the copy contains all of the original Program s proprietary notices b You may transfer the Program and license only as part of the Thomson Lyra device to another party if the ot...

Страница 5: ...e license is terminated you must destroy or permanently erase the Program and all copies thereof WARRANTY DISCLAIMER THE PROGRAM IS PROVIDED AS IS WITHOUT WARRANTY OF ANY KIND EITHER EXPRESSED OR IMPL...

Страница 6: ...Software is licensed to you for use with the RCA THOMSON Portable Audio Device digital music player under the following conditions By installing and using this version of the Lyra Player you are agree...

Страница 7: ...ontent from the Internet or from a PC Microsoft may in conjunction with such license also download revocation lists onto your device on behalf of Secure Content Owners THIRD PARTY SOFTWARE ANY THIRD P...

Страница 8: ...4 The Welcome Screen 14 End User License Agreement 15 Install Necessary Software 15 Install MusicMatch 16 Performing the Installation 16 Install Moodlogic 17 Install Additional Software 17 Launch the...

Страница 9: ...Navigation Menu 40 Playlists 42 MySelections 42 Save MySelections as a Playlist 43 View Playlists 44 Clear Playlists 45 Folder mode 46 Additional Features 47 Shuffle and Repeat 48 Adjusting DSP Setti...

Страница 10: ...this publication are for representation only and subject to change Lyra Jukebox Music Management CD Contains the Lyra Jukebox applications MusicMatch Jukebox software AC DC adapter charger Headphones...

Страница 11: ...sonal use only Unauthorized recording or duplication of copyrighted material may infringe upon the rights of third parties and may be contrary to copyright laws Caution Keep product out of direct sunl...

Страница 12: ...le parts inside To reduce risk of injury use only rechargeable batteries recommended by the manufacturer for this product Other types of batteries may burst causing damage and personal injury Keep the...

Страница 13: ...lready compressed and then transfer those files to your Lyra Jukebox or play the music on your computer Inserting the Included CD ROM into CD ROM Drive Note Do not connect your Lyra Jukebox to your co...

Страница 14: ...he Welcome Screen 1 After the welcome screen the program will ask you to choose your favourite language 2 Select your favourite language 3 Click Back to return to previous screen and check again 4 Cli...

Страница 15: ...User License Agreement carefully you can quit the installation anytime if you do not agree with it 1 Click Install to install all the necessary software Note The installation program will detect wheth...

Страница 16: ...Click Quit to abort installation Note Actual installation software presented may vary based on the name of the store entered in the Purchased Location screen 1 At this point during the installation p...

Страница 17: ...ck Back to return to previous screen 3 Click Skip to skip the Moodlogic installation 4 Click Quit to abort installation Install Additional Software 1 Click Launch to continue the installation of addit...

Страница 18: ...r desktop Rebooting the Computer 1 The installer may ask you to reboot your computer It is highly recommended to reboot your computer for your device to work properly To reboot your computer click Reb...

Страница 19: ...yra Jukebox to be detected especially in Windows 2000 XP Click Refresh in My Computer or Explorer to make sure the device has been detected Note The Lyra Jukebox is capable of transferring files at hi...

Страница 20: ...Jukebox or via Windows Explorer If your Lyra Jukebox isn t already connected to your computer connect the Lyra Jukebox to the computer using the provided USB cable as illustrated above Important Do no...

Страница 21: ...listed under Portable Device Only those playlists saved in step 1 are displayed on the playlist window The songs in the playlist will now be automatically transferred to your Lyra Player When the tra...

Страница 22: ...he Jukebox Pre defined playlists can be created on your PC using MusicMatch Jukebox Refer to the MusicMatch Jukebox User Manual for details Note that only playlists created with songs stored on the Ly...

Страница 23: ...tton on the icon and select Unplug or eject hardware Select the drive corresponding to your Lyra player The Stop a Hardware device screen appears Select the device to be stopped again for confirmation...

Страница 24: ...m tray and select the USB Mass Storage device for the drive associated with the Lyra Jukebox and click STOP See the Windows Help for details about the Unplug or Eject Hardware topic In Windows 98SE Me...

Страница 25: ...nsure the songs in your User Playlists on the device are still present on your device 1 Connect your Lyra Jukebox to the computer using the provided USB cable if it is not already connected and turn t...

Страница 26: ...puter 5 Select the desired LyraSync direction PC overwrites Device The PC is the source and the Device Lyra Jukebox is the destination Device overwrites PC The Device Lyra Jukebox is the source and th...

Страница 27: ...older that were not in the source folder will be erased At the end of synchronization both sides will be identical 1 Create a folder called Music on the PC For example on the C drive C Music 2 Organiz...

Страница 28: ...related content that you can listen to and enjoy Important Note 1 LyraDJ will only work with mp3 files 2 LyraDJ will only work with files that are on the Lyra Jukebox 3 LyraDJ will only work on files...

Страница 29: ...to generate playlist 5 When the analysis is completed the software will create playlists the number of playlists created will vary depending on the total number of songs stored in the Lyra Jukebox you...

Страница 30: ...for an explanation of the items that appear on the LCD during playback Navigation Controls 2 CONTROL For navigation control and various functions in different modes Audio navigation mode Control joys...

Страница 31: ...own Control ring Rotate clockwise to increase volume rotate counterclockwise to decrease volume Photo navigation mode Control joystick Press once to view the selected item if the item selected is a fo...

Страница 32: ...he small end Type mini B of the mini USB cable here Attach the large end Type A to your computer The unit will enter USB mode automatically and you can transfer files to and from the computer The Lyra...

Страница 33: ...rnet or music you already had loaded onto your computer 2 If you haven t unplugged the Lyra Jukebox from your computer detach the USB cable from the Lyra Jukebox follow the procedure below depending o...

Страница 34: ...needs to be plugged in for about 3 hours before the battery is fully charged Note If the battery isn t fully charged keep the Lyra Jukebox plugged in while you listen to the music 4 Connect the headph...

Страница 35: ...given time press the M button 1 This icon will change to show whether the device is playing or paused 2 This icon will change to indicate the shuffle mode 3 This icon will change to indicate the repea...

Страница 36: ...mp3 wma 7 Displays artist name 8 Displays album name 9 Displays genre type 10 Displays year 11 Shows whether the device is playing or paused 12 Shows whether the shuffle function is activated or not...

Страница 37: ...rol joystick in navigation mode or during playback You can add an album an artist or an individual songs Songs saved in this list can be played and viewed through the Playlists menu Press M repeatedly...

Страница 38: ...Display 3 2 1 1 The current viewing photo 2 Shows whether the slide show is playing or paused 3 Shows whether the repeat function is activated or not 4 Show the battery level of the unit When chargin...

Страница 39: ...view is highlighted press the Control joystick to view If the item you select is a folder press the Control joystick to start the slide show To skip to the next item push the Control joystick to the...

Страница 40: ...ck to the left To go to the previous menu push the Control joystick to the left 3 To view the songs for the artist highlighted push the Control joystick to the right to enter the highlighted item the...

Страница 41: ...ck To end playback press the Stop On Off button the display will return to the last screen you were in To return to the previous menu push the Control joystick to the left Note The information provide...

Страница 42: ...ging to the selected item and place them into the MySelections playlist If the item is a song press and hold the Control joystick to tag the song and place it into the MySelections playlist When addin...

Страница 43: ...ck when you see this screen the unit will use Playlist 1 as the default setting You can change the name of the playlist as you wish Push the Control joystick to left and right to move the cursor Rotat...

Страница 44: ...the desired playlist to be viewed 4 Push the Control joystick to the right to view tagged items in the selected playlist Lyra Jukebox Albums Titles Genres Years LyraDJ Playlists Playlists MySelection...

Страница 45: ...Control joystick to move the cursor to go to the playlist you want to delete 5 Press M to enter the option menu 6 Rotate the Control ring to move the cursor to Delete Playlist then press the Control j...

Страница 46: ...and individual files are listed next 4 You can play music files or view photos at any time by pressing the Control joystick when an item is selected Folder mode Your Lyra Jukebox is a USB mass storage...

Страница 47: ...ption menu will appear regardless of which mode you are currently in Note during playback M has to be pressed twice to display option menu Additional Features Menu Delete Playlist Save as Playlist Shu...

Страница 48: ...omly Shuffle Off Shuffle is Off Repeat and shuffle will work differently depending your cursor is on a song or a set album genre etc You can select your desired combination of Shuffle and Repeat to su...

Страница 49: ...Adjusting DSP Settings DSP Settings Digital Signal Processor settings adjust the various levels of the audio output for different types of songs For example the DSP setting for BASS makes the bass so...

Страница 50: ...show 3 Press the Control joystick to select the slideshow time interval Off 3S 5S 10S 15S Slideshows Slideshow enables you to view photos continuously at a specified time interval This function is onl...

Страница 51: ...you want to adjust by rotating the Control ring 5 Press the Control Joystick to select among options in the following settings Contrast between 3 to 3 Backlight 5 sec 10 sec 20 sec 30 sec On PowerSav...

Страница 52: ...menu item to hide or show Press Control Joystick to toggle between On and OFF Select On to show the item on the music menu Select Off to hide the item from the music menu 7 Push the Control Joystick t...

Страница 53: ...the Control Joystick to the right 4 Push the Control Joystick to the left to return to the previous submenu or press the M button to exit the menu System Info System Information shows Lyra Jukebox sy...

Страница 54: ...re as follows Create back ups archive files Connect to other computers at work for example Transport digital photo albums Transport files from one computer to another computer For example instead of p...

Страница 55: ...ransfer Select the Profile Device Contents menu item from the Lyra Jukebox profiler system tray application on your PC to profile sort the contents of the device The icon in the system tray looks like...

Страница 56: ...o the Music Folder for use with LyraDJ To resolve the problem delete the duplicate files that are outside Music Folder LyraDJ only works on files that are in a folder called Music Next time when you n...

Страница 57: ...n Specifications System Requirements Hardware Dimensions 3 3 H 2 W 0 6 D Unit Weight 3 Ounces 5 Giga Byte Storage Stereo Headphones Jack Mini USB Connection Jack Battery Operated Internal rechargeable...

Страница 58: ...tions spreadsheets and any other computer files Capacity 5 GB Rotational Speed 3600 RPM Connection USB 2 0 Hi speed capable Software Includes Music Management software with the Lyra Jukebox applicatio...

Страница 59: ...commended CD ROM drive capable of digital audio extraction USB port 2 0 recommended Installed sound card 16 bit color video card Accessories CD ROM Music Management Software USB Connection Cable AC DC...

Страница 60: ...ope com or www thomson lyra com Please do not send any products to the address listed in this manual or on the carton This will only add delays in service for your product THOMSON 46 quai Alphonse Le...

Отзывы: