background image

21

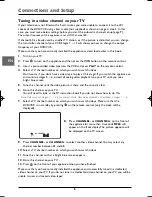
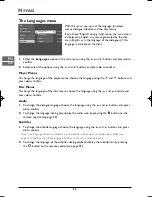
Info menu

EN

DVD

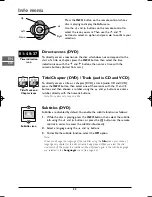
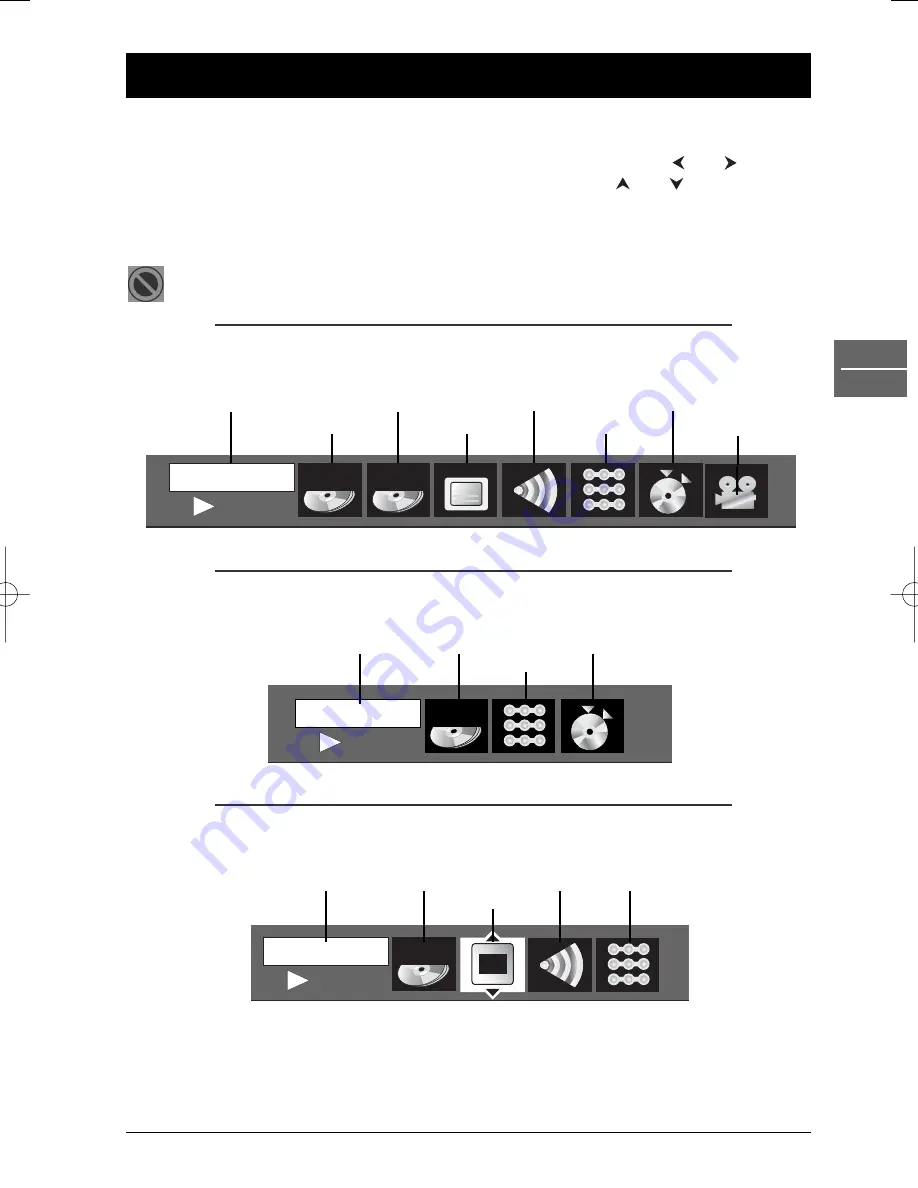
You can display information about the disc during playback using the 

Info

menu. It will also allow

you to access certain functions.To display the menu, press 

PLAY

to start playback and then press

the 

INFO

button on the remote control. Select the various options using the 

and 

buttons.

Then follow the instructions which appear on the screen and use the 

and 

buttons on the

remote control to scroll through the options.

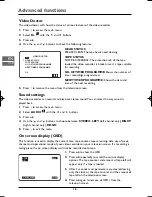
Note: When one of the icons is greyed out, this means that the relevant function is not available on the disc
being played.

The invalid symbol indicates that the function selected or the button used is not available
at this stage.

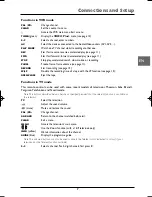
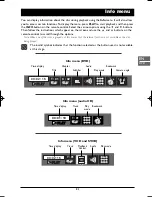
Info menu (DVD)

Time display

Chapter

Audio

Bookmark

Title

Subtitles

Play mode

Camera angle

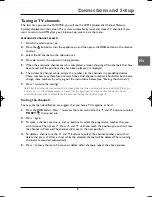
Info menu (audio CD)

Time display

Track

Play

Bookmark

mode

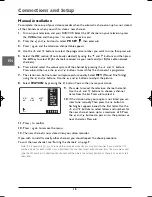
Info menu (VCD and SVCD)

Time display

Track

PlayBack

Audio

Play mode

Control

PLAY

T : 01

0 0 : 0 1 : 1 0

PLAY

T : 01

0 0 : 0 2 : 1 6

PBC

PLAY

T : 01

0 0 : 0 2 : 1 6

C : 02

1 o f  1

DTH6100U_EN  18/07/03  13:46  Page 21

Содержание DTH6100U

Страница 1: ...me advance 20 Variable slow motion 20 Changing chapter 20 Zoom 20 Scene replay 20 Info menu Direct access 22 Title Chapter Track 22 Subtitles 22 Audio 23 Play mode 23 Bookmark 24 Camera angle 24 PlayBack Control 24 mp3 WMA and JPEG files Displaying JPEG files or playing mp3 or WMA files 25 Playing JPEG and mp3 files at the same time 26 Menus Player menus 27 The Play Mode menu 28 The Parental Contr...

Страница 2: ...ikely to cause condensation on some components inside the appliance Let the condensation disappear of its own accord before turning the appliance on again Before moving the player make sure the disc tray is empty Other important use and cleaning information at the end of the booklet Accessories provided Scart lead Remote control 2 non rechargeable batteries type AAA Coaxial cable Inserting batteri...

Страница 3: ...ange channel inVCR mode EJECT Eject the cassette from the video recorder Front panel controls buttons appear left to right below Front panel display DVD Appears when the appliance is in DVD mode Appears when a disc is loaded Appears when the appliance is in repeat mode COPY Appears when a copy from a disc onto a tape is in progress Indicates that a recording is programmed or a timer recording is i...

Страница 4: ... according to the make using the Scart lead provided 4 Connect the DVD VCR to the mains socket using the mains lead Basic connections DVD VCR TV satellite or cable receiver 1 Connect the DVD VCR to the television set as described above step 1 to 3 2 Connect the satellite or cable receiver scart socket to the DVD VCR s second Scart socket EURO AV2 DECODER using a Scart lead not provided 3 Connect t...

Страница 5: ... audio connection Use one of these sockets to connect your DVD Player to a Dolby Digital or DTS receiver or decoder Some receivers have only one of these sockets Under most conditions optical and coaxial connections work equally well The coaxial and optical cables are not supplied with the device Front panel audio and video sockets Connect your camcorder to the AUDIO L left AUDIO R right and VIDEO...

Страница 6: ...nu MENU Access the disc menu during play if there is one or resume play red Access the audio function of the Info menu see page 23 green Access the subtitle function of the Info menu see page 22 INFO yellow Access the Info menu see page 21 TITLE blue Access the disc menu purple Access the camera angle function of the Info menu see page 24 PLAY MODE Access the play mode function of the Info menu se...

Страница 7: ...function see page 12 OPEN CLOSE Eject the tape Functions in TV mode This remote control can be used with some recent models of televisions Thomson Saba Brandt Ferguson Telefunken and Nordmende Note The buttons described below operate as specified provided that the relevant function is available on the television TV Select the television Adjust the sound volume mute Mute and restore the sound PR PR...

Страница 8: ...eing video playback tune your TV until you see a bright blue screen 5 Tune this channel until the video picture is sharp and the sound is clear 6 Store this channel on your TV You will need to look at the TV instruction book if you do not know how to do this Note Only carry out stages 7 13 if you cannot obtain clear video playback as described in stages 1 6 7 Select a TV channel number on which yo...

Страница 9: ...t the instructions below see Sorting the channels 7 Press to store the settings Note After the automatic channel search has taken place the time and date will set automatically If the time is shown as on the display window it means that the signal was too weak to allow the clock to be set automatically If you wish to manually set the clock see Setting the clock on page 15 Sorting the channels For ...

Страница 10: ... to adjust the picture 8 Select STATION by pressing the button You can then name your station 9 Press ok to reveal the television channel name list Use the and buttons to choose a channel name from the list Press ok to select it 10 If the station name you require is not listed you can insert one manually Then press the button A flashing bar appears beneath the first letter Use the and buttons to s...

Страница 11: ...back press PLAY Note During slow motion noise bars may appear on the picture according to the status of tape If distortions can be seen in the picture reduce them with the and buttons Still image Press the PAUSE button for freeze frame This picture may display some interference in the form of black and white horizontal lines This is perfectly normal and does not mean that the video tape is damaged...

Страница 12: ... RECORD button to start recording RECORD SP appears on the television screen and REC is displayed on the front display The video recorder starts recording until the end of the tape is reached or it is manually stopped Instant Timer Recording 1 To set the length of time you want to record for press the RECORD button twice The television screen shows 0H30 2 Press the RECORD button again to increase ...

Страница 13: ...d PlusCode number are displayed If PLEASE CHECK appears check the number and re enter it If appears enter the programme number of the channel It will automatically be stored in the internal VIDEO Plus channel map 5 To change one of the settings select it using the and buttons 6 Press the button to select the PDC function and activate or deactivate it using and Note Some channels telecast their pro...

Страница 14: ...ord 7 Press the button and activate or deactivate the PDC function using the and buttons 8 Press to select the recording speed Use the and buttons to scroll options Standard Play SP Intelligent Play IP and Long Play LP 9 Check that the timer recording details are correct and press to save your settings If PLEASE CHECK is displayed you have entered incorrect information Check the details on the tel...

Страница 15: ...date has been entered If you make a mistake use and to select the item and re enter the details 4 When you are finished press to store your settings The new time is displayed on the front display Note If Auto Adjust is on and the signal is sufficiently strong the clock settings will be automatically checked against teletext and adjusted as necessary Colour standards The video recorder comes with a...

Страница 16: ...main menu 2 Select AUDIO with the and buttons 3 Press ok 4 Use the and buttons to choose between STEREO LEFT left channel only RIGHT right channel only MONO 5 Press to exit the menu On screen display OSD This function is used to display the current time tape counter tape remaining date day of week channel and operational mode of your video recorder on your television screen If a recording is takin...

Страница 17: ... and record in 16 9 format 4 Press to save your settings OPR Optimum Picture Response This feature enhances the picture from the video tape by adjusting to the condition of the video tape If you feel that the picture needs adjusting you can manually change the OPR setting You can only set OPR when a tape is playing in the video recorder 1 Press to enter the main menu 2 Use and to select OPR then p...

Страница 18: ...n you press STOP and then REV the video recorder will stop rewinding at 0 00 00 Playing NTSC tapes NTSC is the colour television standard used in the United States in Japan and other countries Your video recorder can play VHS NTSC tapes but you must have a television set compliant with the PAL standard Most PAL television sets provide proper reproduction of the pictures from NTSC tapes ...

Страница 19: ...g the menus Disc menu The appearance and contents of this menu vary according to the type of disc you have inserted and are independent of the player s menus When the disc is playing press the MENU button to display and hide this menu Info menu The player s Info menu appears as a bar at the top of the screen while the disc is playing During this time press the INFO button on the remote control to ...

Страница 20: ...ion of the accelerated play Still image While the disc is playing press PAUSE once for freeze frame Note After 30 seconds in PAUSE with no user interaction the player goes into screen saver mode Frame advance 1 Press PAUSE twice FRAME is displayed 2 Press the REV or FWD button a number of times to advance forward image by image Variable slow motion 1 While the disc is playing press the PAUSE butto...

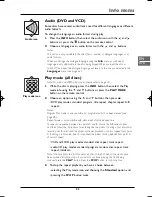
Страница 21: ...tons on the remote control to scroll through the options Note When one of the icons is greyed out this means that the relevant function is not available on the disc being played The invalid symbol indicates that the function selected or the button used is not available at this stage Info menu DVD Time display Chapter Audio Bookmark Title Subtitles Play mode Camera angle Info menu audio CD Time dis...

Страница 22: ...choose a number using the and buttons or enter a number directly with the numeric buttons Note Many discs only have one title Subtitles DVD Subtitles are disabled by default You enable the subtitle function as follows 1 While the disc is playing press the INFO button then select the subtitle info using the and buttons or press the button on the remote control in order to access the subtitle info d...

Страница 23: ...n option using the and buttons then press ok DVD play modes standard program title repeat chapter repeat A B repeat Notes Program Play mode is only available if a programmed list has been created see page 28 Repeat mode is only available with discs which display elapsed time To repeat a sequence between two points A and B choose the A B repeat option and then follow the instructions for entering t...

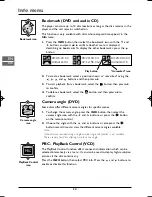
Страница 24: ...ifferent camera angles for specific scenes 1 To change the camera angle press the INFO button then select the camera angle icon with the and buttons or press the button on the remote control 2 Choose the angle with the and buttons or else press the button several times to view the different camera angles available Note If the disc was recorded using a single camera angle this function is not avail...

Страница 25: ...n the remote control then press ok to display the list of files or press PLAY to start playing all the files contained in the folder 5 Select a file using the and buttons then press ok and then PLAY to start playback mp3 or WMA file the player begins by playing the selected file then all the files and subfolders contained in the same folder The player then plays the contents of the folders at the ...

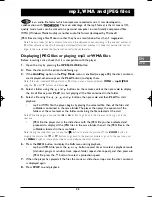
Страница 26: ...You can also select a folder containing JPEG and mp3 files using the and buttons then press PLAY In this case the player starts playing the pictures and music at the same time beginning with the first file of each type The player starts the slide show with the JPEG file selected and proceeds by displaying all the JPEG files in the same folder and then all the JPEG files in the subfolders located i...

Страница 27: ... Other menu options also followed by arrows can be used to enable or disable an option Example when you select the option AutoPlay from the Play mode menu each time you press the ok button you enable or disable On or Off the AutoPlay function Finally menu options not followed by arrows can be used to carry out an action immediately In this case select the option and press ok Example when you confi...

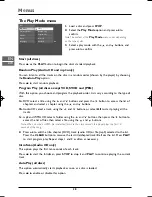
Страница 28: ... Audio CD select a track using the and buttons or select All to start playing all the tracks 1c mp3 and WMA CD select a folder using the and buttons then press the button to access the list of files then select a file using the and buttons Note When an mp3 or WMA file is selected for more than two seconds the player plays the first 10 seconds of the song 2 Press ok to add the title chapter DVD tra...

Страница 29: ...l option 4 Enter your password 5 Select the Lock function and press ok to confirm Change Password 1 To change the password select this option and press ok to confirm 2 Enter the four digits of your new password Ratings limits The disc publisher is responsible for coding scenes according to the rating limits In Europe very few discs have coded scenes 1 Select Ratings limits and press ok to confirm ...

Страница 30: ...mat best suited to the format of your TV screen 1 Select a format using the and buttons 4x3 Letterbox gives best reproduction of pictures recorded in this format i e with horizontal bands at the top and bottom of the screen or in 16x9 4x3 Standard reproduces a 4x3 picture without distortion 16x9 Widescreen reproduces 16x9 format films in full on a 16x9 screen 2 Press ok to confirm 16 x 9 Play Play...

Страница 31: ... appropriate digital signals If the device connected to the DIGITAL AUDIO OUT socket does not support Dolby or DTS signals neither Dolby Digital nor DTS must be selected Select one or two option s Dolby Digital or and DTS depending on the disc format and the type of sound you want to obtain then press ok to confirm Notes DTS is a digital sound compression technique developed by Digital Theater Sou...

Страница 32: ... disc menus choose the language using the and buttons and press ok to confirm Audio 1 To change the dialogue language choose the language using the and buttons and press ok to confirm 2 To change the language during play display the audio icon by pressing the button on the remote control see page 23 Subtitles 1 To change the subtitle language choose the language using the and buttons and press ok ...

Страница 33: ...t assigned to the player on the TV VCR Try a different video tape If the problem is solved the problem may be caused by the tape itself VCR Try to correct tracking using the and buttons to reduce the amount of visible interference DVD It is impossible to read the disc Insert the disc with the printed side facing up Check that the disc can actually be played by this device see page 37 If you are tr...

Страница 34: ...mpossible to record a TV programme Check the reception on your television set If you cannot receive a picture through the aerial the video recorder will be unable to record television broadcasts Check the connections Check that channels are tuned on the video recorder Check the protection tab of the tape is not broken Check the quality of the signal received by the television It is impossible to i...

Страница 35: ... files for sale or any other business purpose constitutes or could constitute a violation of copyright law Cleaning Use a soft dry clean cloth Regularly dust the vents at the back or sides Using solvents abrasive or alcohol based products risks damaging the appliance If an object or liquid enters inside the appliance unplug it immediately and have it checked by an authorised engineer Handling and ...

Страница 36: ...enting our brand If this condition is not met your rights will no longer be valid Never open the appliance yourself since this may put you at risk or damage the equipment THOMSON does not accept any liability if the appliance is used in any way other than in accordance with this manual DISCLAIMER OFWARRANTIES TOTHE MAXIMUM EXTENT PERMITTED BYAPPLICABLE LAW DECLARATIONS AND WARRANTIES OF NON INFRIN...

Страница 37: ...respective of the actual recording capacity of the CD R do not use its full capacity CD Rs should be preferably used instead of CD RWs rewritable CDs as in certain cases CD RW playback may be faulty Use reliable good quality CD write software Close all other applications on the computer to ensure reliable CD R disc recording mp3 files CD R and CD RW discs containing audio files in mp3 format As fo...

Отзывы: