background image


Assembly 


1


Feet Assembly & Adjustable Level 

□ 

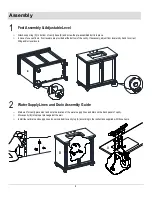
Attach suppot leg (D) to bottom of vanity base (B) and screw the pre-assembled bolt into place. 

□ 

In case of uneven floors, floor levelers are provided at the bottom of the vanity. If necessary, adjust floor levelers by hand to correct 
tilting and/or level doors.  

2


Water Supply Lines and Drain Assembly Guide 

□ 

Mark wall for vanity placement and note the location of the water supply lines and drain on the back panel of vanity. 

□ 

Move vanity (B) into proper place against the wall. 

□ 

Install faucet, drain and supply lines (none included) to vanity top (A) according to the instructions supplied with those items. 


B


A


Содержание Ellamar THMSVL36CVDG

Страница 1: ... 2021 03 10 Rev 0001 A USE AND CARE GUIDE 36 VANITY Customer Service 1 866 942 5362 English French and Spanish Monday Friday 8 30 a m 4 30 p m PST Toll free in U S and Canada only E mail parts whalenfurniture com www whalenfurniture com ...

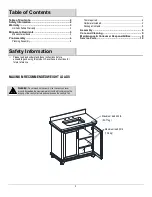
Страница 2: ...e Consumer Responsibilities 9 Service Parts 10 Safety Information Please read and understand these instructions before assembling and using this product Save these instructions for future reference MAXIMUM RECOMMENDED WEIGHT LOADS WARNING Do not stand on the vanity Use the vanity on level ground Exceeding the maximum weight limits will compromise the integrity of the vanity structure and could cau...

Страница 3: ...rights and you may have other rights which vary from state to state Minnesota Residents MINNESOTA RESIDENTS IMPORTANT HEALTH NOTICE SOME OF THE BUILDING MATERIALS USED IN THIS HOME OR THESE BUILDING MATERIALS EMIT FORMALDEHYDE EYE NOSE AND THROAT IRRITATION HEADACHE NAUSEA AND A VARIETY OF ASTHMA LIKE SYMPTOMS INCLUDING SHORTNESS OF BREATH HAVE BEEN REPORTED AS A RESULT OF FORMALDEHYDE EXPOSURE EL...

Страница 4: ...amaged do not assemble this product and contact the Customer Service Team at 1 866 942 5362 TOOLS REQUIRED Phillips screwdriver Drill Bit Silicone compound Level Stud finder HARDWARE INCLUDED NOTE Hardware not shown to actual size Pre Assembly Part Description Quantity AA Touch up Pen 1 AA not included for Item THMSVL36CVW ...

Страница 5: ...5 C Pre Assembly continued PACKAGE CONTENTS Part Description Quantity A Vanity Top preassembled 1 B Vanity Base 1 C Backsplash 1 D Feet 4 B D A ...

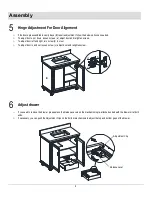
Страница 6: ...necessary adjust floor levelers by hand to correct tilting and or level doors 2 Water Supply Lines and Drain Assembly Guide Mark wall for vanity placement and note the location of the water supply lines and drain on the back panel of vanity Move vanity B into proper place against the wall Install faucet drain and supply lines none included to vanity top A according to the instructions supplied wit...

Страница 7: ...l need to reposition the shelf by following the steps below a Look under the shelf and locate the wood screws holding the shelf to the shelf supports b Remove the wood screws from each shelf support with a Phillips screwdriver not included c Remove the adjustable shelf from the vanity B d Remove the shelf supports from the vanity B and re position them in the desired location Make sure you place t...

Страница 8: ...adjust door left and right turn screw b in or out To adjust door in and out loosen screw c adjust door and retighten screw 6 Adjust drawer If you need to remove the drawer please press the Release Levers on the mechanisms pre attached underneath the drawer kit at both ends If necessary you can push the Adjustment Clips on the bottom mechanisms to adjust the top and bottom gaps of the drawer B Adju...

Страница 9: ...e of sealers is also a powerful preventative measure Your stone was sealed at the factory but reapplication is necessary over time How often is determined by the quality of the sealer used and the frequency of use We recommend using a penetrating non toxic sealer for bath areas but a food safe sealer is is typically not necessary If stains and scratches do occur there are many things you can do as...

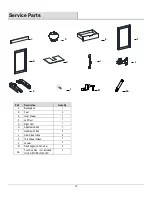
Страница 10: ... D Feet 4 E Inner Drawer 1 F Left Door 1 G Right Door 1 H Adjustable Shelf 1 I Handle with Bolt 2 J Slow Close Hinge 4 K 12in Drawer Slides 1 L Leveler 4 M Shelf Support with Screw 4 AA Touch up Pen not included for Item THMSVL36CVW 1 AA C G D I J E K F L H M ...

Страница 11: ...T D ENTRETIEN MEUBLE LAVABO DE 91 4CM 36PO Service à la clientèle 1 866 942 5362 anglais français et espagnol Du lundi au vendredi entre 8 h 30 et 16 h 30 heure du Pacifique Sans frais aux États Unis et au Canada seulement Courriel parts whalenfurniture com www whalenfurniture com ...

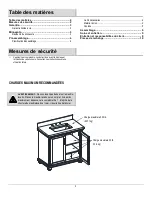
Страница 12: ...èces de rechange 10 Mesures de sécurité Veuillez lire et comprendre ces instructions avant le montage et l utilisation de cette console Conservez ces instructions pour une utilisation future CHARGES MAXIMUM RECOMMANDÉES AVERTISSEMENT Ne vous tenez pas debout sur le meuble lavabo Placez le meuble lavabo sur un sol plat Si le poids maximum est dépassé cela compromettra l intégrité de la structure du...

Страница 13: ...INNESOTA AVIS DE SANTÉ IMPORTANT CERTAINS DES MATÉRIAUX DE CONSTRUCTION UTILISÉS DANS CETTE MAISON OU CES MATÉRIAUX DE CONSTRUCTION ÉMETTENT DU FORMALDÉHYDE UNE IRRITATION DES YEUX DU NEZ ET DE LA GORGE DES MAUX DE TÊTE DES NAUSÉES ET UNE VARIÉTÉ DE SYMPTÔMES APPARENTÉS À L ASTHME Y COMPRIS L ESSAI DE RESPIRATION ONT ÉTÉ SIGNALÉ À LA SUITE D UNE EXPOSITION AU FORMALDÉHYDE LES PERSONNES ÂGÉES ET LE...

Страница 14: ...as utiliser le produit et contacter le Service à la clientèle au 1 866 942 5362 OUTILS NÉCESSAIRES Tournevis à Pointe cruciforme Perceuse Mèche composé de silicone Niveaul Détecteur de montant MATÉRIEL INCLUS REMARQUE Matériel non représenté à la taille réelle Pré assemblage Pièce Description Quantité AA Crayon de retouche 1 AA non inclus avec l article THMSVL36CVW ...

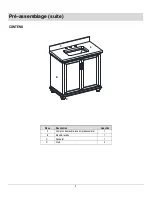
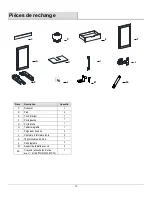
Страница 15: ...5 C Pré assemblage suite CONTENU Pièce Description Quantité A Comptoir de meuble lavabo préassemblé 1 B Meuble lavabo 1 C Dosseret 1 D Pied 4 B A D ...

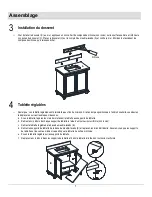
Страница 16: ... pour mettre les portes de niveau 2 Guide d installation des conduits d alimentation en eau et du drain Marquez le mur à l endroit où vous installerez le meuble lavabo et notez l emplacement des conduites d alimentation en eau et du drain sur le panneau arrière du meuble lavabo Placez le meuble lavabo B contre le mur à l endroit désiré Installez le robinet le drain et les conduites d alimentation ...

Страница 17: ...ez la déplacer en suivant les étapes ci dessous a Sous la tablette repérez les vis à bois retenant la tablette aux supports de tablette b Retirez les vis à bois de chaque support de tablette à l aide d un tournevis cruciforme non inclus c Retirez la tablette réglable de la base du meuble lavabo B d Retirez les supports de tablette de la base du meuble lavabo B et replacez les à l endroit désiré As...

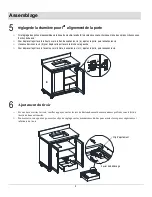
Страница 18: ... ou dévissez la vis b pour déplacer la porte vers la droite ou la gauche Pour déplacer la porte vers l avant ou vers l arrière desserrez la vis c ajustez la porte puis resserrez la vis 6 Ajustement du tiroir Si vous devez retirer le tiroir veuillez appuyer sur les leviers de déclenchement des mécanismes préfixés sous le kit du tiroir aux deux extrémités Si nécessaire vous pouvez pousser les clips ...

Страница 19: ... eau chaude L application d un scellant est également fortement conseillée Un scellant a été appliqué à la manufacture toutefois suite à une longue utilisation une nouvelle application est nécessaire La fréquence de nouvelles applications est déterminée par la qualité du scellant et l utilisation du meuble lavabo Il est recommandé d utiliser un scellant pour salle de bain Un scellant de grade alim...

Страница 20: ...rieur 1 F Porte gauche 1 G Porte droite 1 H Tablette réglable 1 I Poignée et boulons 2 J Charnière à fermeture lente 4 K 12po Glissières de tiroir 1 L Patin réglable 4 M Support de tablette avec vis 4 AA Crayon à retouche non inclus avec l article THMSVL36CVW 1 C D K E AA F L G I J H M ...

Страница 21: ...USO Y MANTENIMIENTO TOCADOR PARA BANO DE 36 Servicio al cliente 1 866 942 5362 Inglés Francés y Español Hora estándar del Pacífico 8 30 a m 4 30 p m de Lunes a Viernes Llamada gratis en los U S y Canadá solamente E mail parts whalenfurniture com www whalenfurniture com ...

Страница 22: ...enimiento y responsabilidad del consumidor 9 Partes de servicio 10 Información de seguridad Por favor lea y entienda las instrucciones antes del ensamble y uso del producto Guardar las instrucciones para referencia en el futuro CARGAS MÁXIMAS RECOMENDADAS Aviso No se pare en el tocador Use el tocador en piso nivelado Si se exceden los límites de cargas máximas se pondrá en riesgo la integridad de ...

Страница 23: ...rechos que varían de estado a estado Residentes de Minesota RESIDENTES DE MINNESOTA AVISO DE SALUD IMPORTANTE ALGUNOS DE LOS MATERIALES DE CONSTRUCCIÓN USADOS EN ESTA UNIDAD U EN LOS MATERIALES DE CONSTRUCCIÓN EMITEN FORMALDEHYDE IRRITACIÓN DE OJOS NARIZ Y GARGANTA DOLOR DE CABEZA NAUSEAS Y UNA VARIEDAD DE SÍNTOMAS SIMILARES AL ASMA INCLUYENDO LA FALTA DE AIRE HAN SIDO REPORTADOS COMO RESULTADO DE...

Страница 24: ...le esté producto y contacte al equipo de servicio al cliente llamando al 1 866 942 5362 HERRAMIENTAS REQUERIDAS Desarmador estrella Taladro Broca Compuesto de silicón Nivelador Buscador de vigas MATERIAL DE FERRETERÍA INCLUIDO NOTA El material de ferretería no está mostrado al tamaño actual Pre ensamble Parte Descripción Cantidad AA Plumón 1 AA no se incluye para el artículo THMSVL36CVW ...

Страница 25: ...5 C Pre ensamble continuación CONTENIDOS DEL PAQUETE Parte Descripción Cantidad A Tope del tocador preensamblada 1 B Base del tocador 1 C Protector contra salpicaduras 1 D Patas 6 A B D ...

Страница 26: ...sario ajustar los niveladores de piso manualmente para corregir inclinación y o puertas niveladas 2 Guía de ensamble de las tuberías de agua y de drenaje Marcar la pared donde se pondrá el tocador y notar el lugar de las tuberías de agua de y de drenaje en el panel posterior del tocador Mover el tocador B en el lugar apropiado contra la pared Instalar el grifo la tuberías de drenaje y de agua ning...

Страница 27: ... usted necesitara reposicionar la repisa siguiendo los siguientes pasos a Mirar abajo de la repisa y encontrar los pernos para madera que sujetan la repisa a los soportes de repisa b Retirar los pernos para madera de cada soporte de repisa con un desarmador estrella no incluido c Retirar la repisa ajustable del tocador B d Retirar los soportes de repisa del tocador B y reposicionar en el lugar des...

Страница 28: ...rda y derecha girar el perno b hacia adentro o hacia afuera Para ajustar la puerta hacia adentro y hacia afuera aflojar el perno c ajustar la puerta y reapretar el perno 6 Ajustar el cajón Si usted necesita retirar el cajón por favor presione las palancas de liberación en los mecanismos pre adjuntados abajo del cajón en ambos lados Si fuera necesario usted puede empujar los clips de ajuste en los ...

Страница 29: ...e frecuentemente El uso de selladores es una medida de prevención poderosa Su piedra fue sellada en la fábrica pero la replicación es necesaria con el tiempo Que tanto tiempo se determina con la calidad del sellador usado y la frecuencia de uso Nosotros recomendamos usar un sellador penetrante no toxico para áreas del baño pero un sellador seguro para la comida no es típicamente necesario Si manch...

Страница 30: ...4 E Cajón interior 1 F Puerta izquierda 1 G Puerta derecha 1 H Repisa ajustable 1 I Manija con perno 2 J Bisagra de cierre lento 4 K 12po Complemento de bisagra 1 L Nivelador 4 M Soporte para repisa con tornillo 4 AA Plumón no se incluye para el artículo THMSVL36CVW 1 G I J AA C D E K F H L M ...

Отзывы: