background image

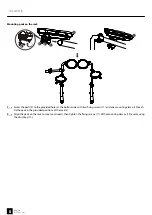
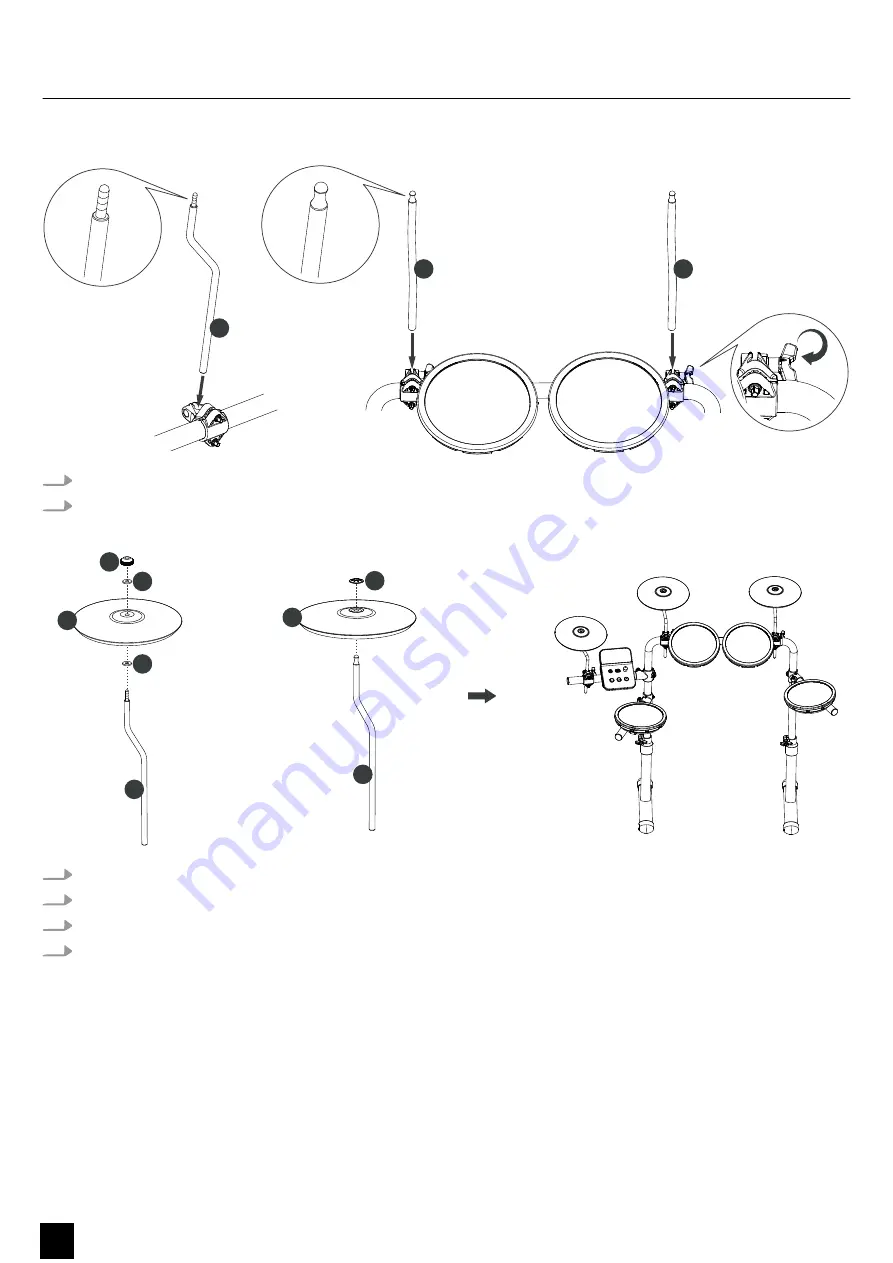
Mounting cymbals on the rack

)

(

(

1.

Insert the brackets (7, 8) for the cymbals and the Hi-hat into the provided mounting clamps on the rack.

2.

Fasten the brackets using the wing screws of the mounting clamps at the desired height.

)

(

/

/

0

%

%

.

1.

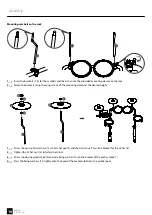
Put as shown two felt washers (14), the Hi-hat pad (4) and the Hi-hat nut (15) on the bracket for the Hi-hat (8).

2.

Tighten the Hi-hat nut (15) to fasten the Hi-hat.

3.

Put as shown one cymbal pad (4) and one fixing washer (13) on the bracket of the each cymbal (7).

4.

Press the fixing washers (13) tightly onto the head of the brackets to fasten the cymbal pads.

Assembly


10

Rookie

E-Drum Set

Содержание Millenium Drums Rookie

Страница 1: ...Rookie E Drum Set Assembly Instructions...

Страница 2: ...Thomann GmbH Hans Thomann Stra e 1 96138 Burgebrach Germany Telephone 49 0 9546 9223 0 Internet www thomann de 06 10 2022 ID 549098...

Страница 3: ...Table of contents 1 Safety instructions 4 2 Scope of delivery 5 3 Assembly 6 4 Protecting the environment 12 Table of contents Rookie 3 E Drum Set...

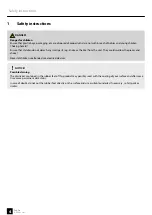
Страница 4: ...he unit They could swallow the pieces and choke Never let children unattended use electrical devices NOTICE Possible staining The plasticiser contained in the rubber feet of this product may possibly...

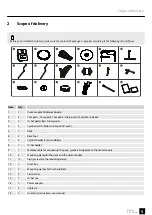
Страница 5: ...3 Cymbal Crash Ride Hi hat pad 8 each 5 1 Rack 6 2 Rack foot 7 2 Cymbal holder Crash and Ride 8 1 Hi hat holder 9 1 Multiple cable for connecting the pads cymbals and pedals to the drum module 10 5 M...

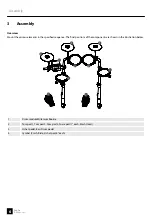
Страница 6: ...uence The final positions of the components are shown in the illustration below 1 Drum module Millenium Rookie 2 Tom pad 1 Tom pad 2 Tom pad 3 Snare pad 7 each Mesh Head 3 Hi hat pedal Bass Drum pedal...

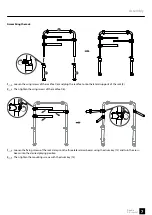
Страница 7: ...ts of the rack 5 2 Then tighten the wing screws of the rack feet 6 1 Loosen the fixing screws of the rack clamps on the three lateral crossbeams using the drum key 12 and turn the cross beams into the...

Страница 8: ...side with two fixing screws 11 and one mounting clamp 10 each Fixthe pads in the provided positions at the rack 5 2 Align the pads on the rack to meet your needs then tighten the fixing screws 11 of...

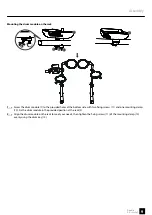
Страница 9: ...ottom side with two fixing screws 11 and one mounting clamp 10 Fix the drum module in the provided position at the rack 5 2 Align the drum module on the rack to meet your needs then tighten the fixing...

Страница 10: ...s at the desired height 0 1 Put as shown two felt washers 14 the Hi hat pad 4 and the Hi hat nut 15 on the bracket for the Hi hat 8 2 Tighten the Hi hat nut 15 to fasten the Hi hat 3 Put as shown one...

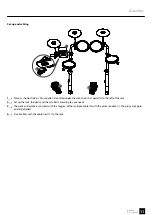
Страница 11: ...he left of the rack 2 Set up the rack the pads and the cymbals according to your needs 3 The pads and cymbals are wired with the triggers of the multiple cable 9 with the drum module 1 The plugs are a...

Страница 12: ...ted for recycling Please follow the notes and markings on the packaging Disposal of your old device This product is subject to the European Waste Electrical and Electronic Equipment Directive WEEE in...

Страница 13: ...Notes Rookie 13 E Drum Set...

Страница 14: ...Notes 14 Rookie E Drum Set...

Страница 15: ......

Страница 16: ...Musikhaus Thomann Hans Thomann Stra e 1 96138 Burgebrach Germany www thomann de...

Отзывы: