


Chapter 8. FRU replacement notices
This chapter presents notices related to removing and replacing parts. Read this chapter carefully before
replacing any FRU.
CRU statement for customers:
You can resolve some problems with your product with a replacement part you can install yourself, called
a “Customer Replaceable Unit” or “CRU.” Some CRUs are designated as self-service CRUs and others
are designated as optional-service CRUs.
Installation of self-service CRUs is your responsibility. For
optional-service CRUs, you can either install the CRU yourself or you can request that a Service Provider
installs the CRU according to the warranty service for your product.
If you intend on installing the CRU,
Lenovo will ship the CRU to you. CRU information and replacement instructions are shipped with your
product and are available from Lenovo at any time upon request. You can find a list of CRUs for your
product in this
Hardware Maintenance Manual
. An electronic version of this manual can be found at
http://www.lenovo.com/support. Click
User Guides & Manuals
and then follow the on-screen instructions
to find the manual for your product. You might be required to return the defective part that is replaced by
the CRU. When return is required: (1) return instructions, a prepaid shipping label, and a container will be
included with the replacement CRU; and (2) you might be charged for the replacement CRU if Lenovo does
not receive the defective CRU within thirty (30) days of your receipt of the replacement CRU. See your
Lenovo Limited Warranty documentation for full details.
Screw notices
Loose screws can cause a reliability problem. In the ThinkPad notebook computer, this problem is addressed
with special nylon-coated screws that have the following characteristics:
• They maintain tight connections.
• They do not easily come loose, even with shock or vibration.
• They are harder to tighten.
Do the following when you service this machine:
• Keep the screw kit in your tool bag. For the part number of the screw kit, go to
http://www.lenovo.com/serviceparts-lookup.
• It is recommended to use new screws.
• It is recommended to use each screw only once.
• Use a torque screwdriver if you have one.
Tighten screws as follows:
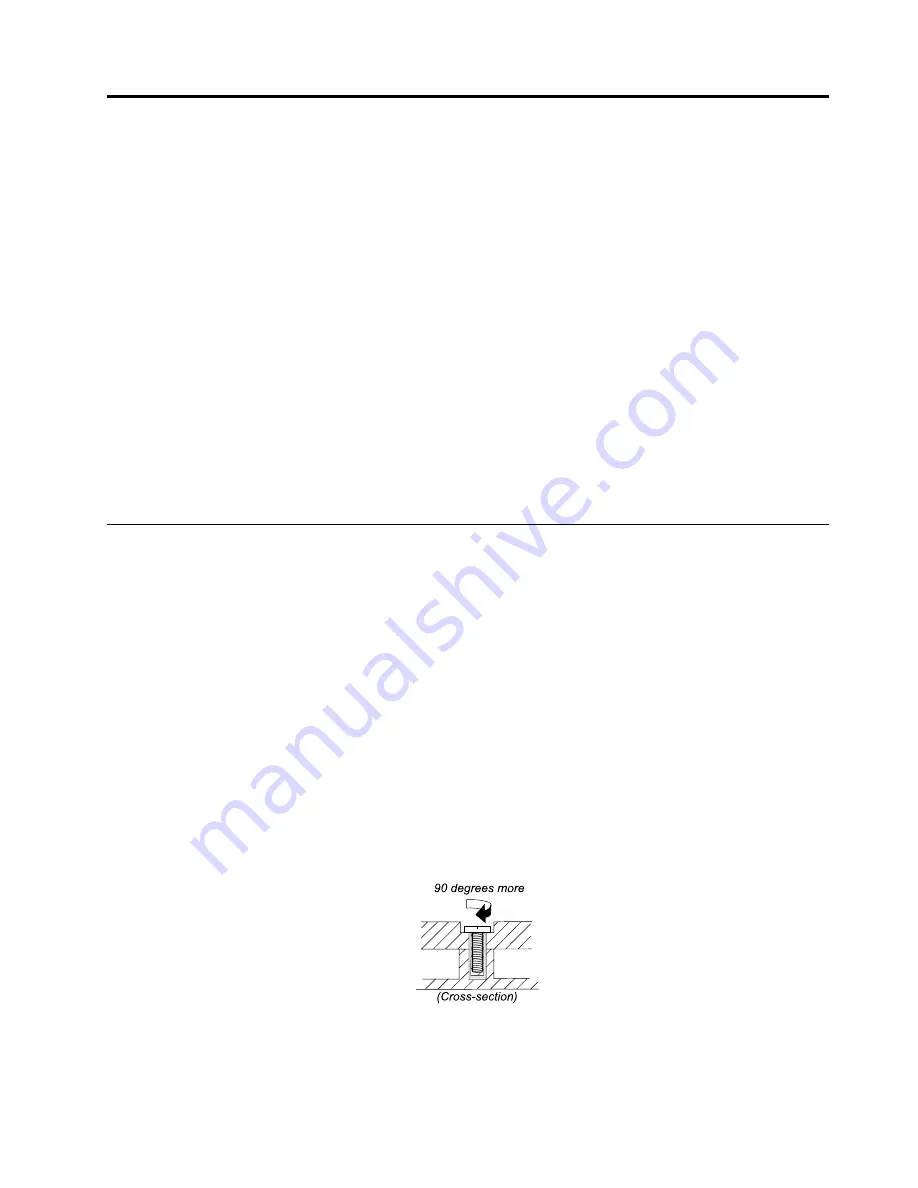
•
Plastic to plastic
Turn an additional
90 degrees
after the screw head touches the surface of the plastic part:
•
Logic card to plastic
Turn an additional
180 degrees
after the screw head touches the surface of the logic card:
© Copyright Lenovo 2012
51
Содержание X131e
Страница 1: ...Hardware Maintenance Manual ThinkPad X131e...
Страница 6: ...iv Hardware Maintenance Manual...
Страница 11: ...DANGER DANGER DANGER DANGER DANGER Chapter 1 Safety information 5...
Страница 12: ...DANGER 6 Hardware Maintenance Manual...
Страница 13: ...PERIGO PERIGO PERIGO Chapter 1 Safety information 7...
Страница 14: ...PERIGO PERIGO PERIGO PERIGO PERIGO DANGER 8 Hardware Maintenance Manual...
Страница 15: ...DANGER DANGER DANGER DANGER DANGER Chapter 1 Safety information 9...
Страница 16: ...DANGER DANGER VORSICHT VORSICHT VORSICHT 10 Hardware Maintenance Manual...
Страница 17: ...VORSICHT VORSICHT VORSICHT VORSICHT VORSICHT Chapter 1 Safety information 11...
Страница 18: ...12 Hardware Maintenance Manual...
Страница 19: ...Chapter 1 Safety information 13...
Страница 20: ...14 Hardware Maintenance Manual...
Страница 21: ...Chapter 1 Safety information 15...
Страница 22: ...16 Hardware Maintenance Manual...
Страница 23: ...Chapter 1 Safety information 17...
Страница 24: ...18 Hardware Maintenance Manual...
Страница 28: ...22 Hardware Maintenance Manual...
Страница 44: ...38 Hardware Maintenance Manual...
Страница 46: ...40 Hardware Maintenance Manual...
Страница 48: ...42 Hardware Maintenance Manual...
Страница 56: ...50 Hardware Maintenance Manual...
Страница 60: ...54 Hardware Maintenance Manual...
Страница 90: ...84 Hardware Maintenance Manual...
Страница 93: ......
Страница 94: ...Part Number 0B48698_01 Printed in China 1P P N 0B48698_01 1P0B48698_01...


