


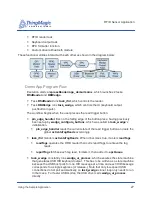


Hardware Setup
A D I V I S I O N O F T R I M B L E
22
Quick Start Guide
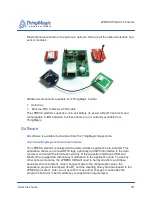
2.
Connect the supplied MMCX antenna cable to port 1 of the RFID module. Connect
your antenna to the other end of the cable (though an R-TNC to R-TNC cable if
necessary). Make sure all the antenna cable connections are tight.
3.
Make sure the Flash Erase jumper is in the “NORM” position.
4.
If you are using a Li-ion battery (not supplied with platform), plug it into the two- or
three-port jack, as appropriate.
Содержание Mercury xPRESS
Страница 1: ...A DIVISION OF TRIMBLE 1 875 0072 02 Rev B Mercury xPRESS Platform Guide SDK Version 1 7 1...
Страница 4: ...A DIVISION OF TRIMBLE 4...
Страница 84: ...A DIVISION OF TRIMBLE 84 Installing Developer Tools on LINUX OS...
Страница 106: ...A DIVISION OF TRIMBLE 106 Using the Developer Toolkit...
Страница 126: ...A DIVISION OF TRIMBLE 126 Hardware Reference Guide...
Страница 136: ...Installing SAM BA Software A DIVISION OF TRIMBLE 136...
Страница 146: ...Using SAM BA A DIVISION OF TRIMBLE 146...