


Installation guide
Installation guide
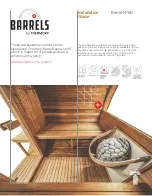
Barrel Nº60
Barrel Nº60
BARRELS
BARRELS
PARTS 1
x3
x2
x1
x2
x2
x1
x1
x2
x3
x1
x1
x6
x2
x1
x10
x3
x1
inside
outside
*if needed for
heater installation.
A
H
F
J
K
B
D
F1
J1
V
C
E
O
J2
I
C1
E1
W
L
R
CRADLES
FINAL H-TYPE
TOP STAVE
LEFT PANEL
SECTION
INTERIOR
BENCHES
EXTERIOR
BENCH PARTS
FRONT
PANEL
RIGHT
PANEL
SECTION
BENCH
SUPPORTING
LEGS
WIRE
RACEWAYS
REAR
PANEL
ASPEN
ROOF
BOARD
BACKREST
STAVES
METAL
BANDS
REAR PANEL
WITH
WINDOW
DECORATIVE
ROOF NISHING
BOARDS
FLOORING
DUCKBOARD
ADHESIVE
ROOF TAPE
x1
CENTER
STAVE
x40 (+1
reserve)
LEFT SIDE
BODY
STAVES
x40 (+1
reserve)
RIGHT
SIDE BODY
STAVES
PARTS 2
TOOLS
REQUIRED:
3 People
Recommended
+
+
x8
x70
x2
x2
x2
x2
x2
x2
x2
x2
6´
24mm
Rubber
x4
x3
x3
x2
x24
x130
x1
x24
x2
M
P
U
X
P1
N
Z
N1
Z1
SCREW
5.0X120
SCREW
4.0X50
Ø BOLT
16X140
HEX NUT
M16 (SW24)
FLAT
WASHER
SCREW
5.0X100
STAINLESS
STEEL SCREW
4.0X50
SCREW
4.2X70
WATERPROOF
ROOF COVER
STAINLESS
STEEL SCREW
4.2X70
WOODEN SLAT
FOR ROOF
COVER
STEP ZERO
Before you begin, be sure the
sauna will fit in your chosen
location.
Approximately 8’ x 8’ is ideal.
Overall dimensions are shown here.
Be sure the site is level and free of
standing water after rainfall.
Concrete, pavers or crushed stone
is preferred.
7´´6´
7´´4´


