background image

19

20

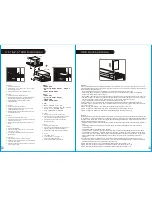
Leads Installation Guide

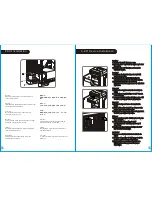
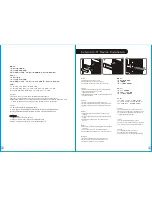
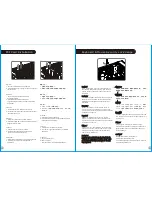
240mm Radiator Installation

English /

繁體中文

 /

1. 

Remove the top panel and top fan before 

1. 移除上蓋及上方風扇

mounting the 240mm radiator.

2. 用螺絲鎖固散熱排

2. Fix the 240mm radiator with screws.

简体中文 /

Deutsch /

1. 卸下上蓋及上方風扇

1. 

Entfernen Sie die obere Platte und den 

2. 用螺

丝锁固散热排

oberen Lüfter, bevor Sie den 240 mm 
Kühler montieren. 

日本語 /

2. Befestigen Sie den 240 mm Kühler mit 

1. 上面

パネルと上面ファンを取り外してから、

Schrauben.

240

mm

ラジエータをマウントします。

2. 240

mm

ラジエータをねじで固定します。

Français /

1. 

Enlevez le panneau supérieur et le 
ventilateur situé au-dessus avant de monter 

Русский /

le radiateur de 240 mm.

1. 

Перед установкой радиатора диаметром 

2. Fixez le radiateur de 240 mm avec des vis.

240 мм снимите верхнюю панель и верхний 

вентилятор.

Español /

2. Закрепите радиатор диаметром 240 мм 

1. 

Extraiga el panel superior y el ventilador 

винтами.

superior antes de montar el radiador de 
240 mm.

Türkçe


/

2. Fije el radiador de 240 mm con tornillos.

1. 240

mm boyutundaki soğutucuyu monte 

Italiano /

etmeden önce üst paneli ve üst fan

ı çı

kar

ı

n.

1. 

Rimuovere il pannello superiore e la ventola 

2. 240mm boyutundaki soğutucuyu vidalarla 

superiore prima di montare il radiatore da 

sabitleyin.

240 mm.

2. Fissare il radiatore da 240 mm con le viti.

1. 

ถอดแผงด้านบนและพัดลมด้านบนออกก่อนที่จะ

Português/

1. 

Remova o painel superior e a ventoinha 

ต่อเชื่อมเรดิเอเตอร์ขนาด 240 มม.

superior antes de montar o radiador de 

2. ขันสกรูยึดเรดิเอเตอร์ขนาด 240 มม. ให้แน่น

240mm.

2. Fixe o radiador de 240mm com parafusos.

ภาษาไทย /

Leads Installation Guide

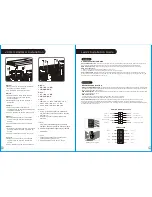
Case LED Connection

 / On the front of the case, you can find some LEDs and switch leads. Please consult your user 

manual of your motherboard manufacturer, then connect these leads to the panel header on the motherboard.

USB 2.0 Connection

 / Please consult your motherboard manual to find out the section of “USB connection”.

USB 3.0 connection

 / 

1. Make sure your motherboard supports USB 3.0 connection.
2. Connect the USB 3.0 cable to the available USB 3.0 port on your computer.

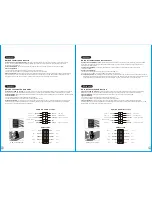
Audio Connection

 / Please refer to the following illustration of Audio connector and your motherboard user manual. 

Please select the motherboard which used AC’97 or HD Audio(Azalia),(be aware of that your audio supports AC’97 or HD 
Audio (Azalia)) or it will damage your device(s).

Anschlüsse herstellen

Gehäuse-LED-Verbindungen

 / Auf der Gehäusevorderseite finden Sie einige LEDs und Verbindungen. Bitte nehmen 

Sie die Gebrauchsanweisung Ihres Motherboard Herstellers zur Hilfe und schließen Sie diese Verbindungen an die Panel 
Header Belegung des Motherboards an.

USB 2.0 Anschluss

 / Bitte nehmen Sie die Gebrauchsanweisung Ihres Motherboards zur Hilfe und lesen Sie unter dem 

Kapitel „USB Anschlüsse“ nach.

USB 3.0 Anschluss

 / 

1. Stellen Sie sicher, dass Ihre Hauptplatine den USB 3.0 Anschluss unterstützt.
2. Verbinden Sie das USB 3.0 Kabel mit dem USB 3.0 Port auf Ihrem Computer.

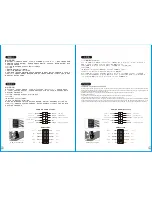
Audio Anschlüsse

 / Bitte beachten Sie die folgende Abbildung der Audio Anschlüsse und die Anweisung in der 

Gebrauchsanweisung Ihres Motherboards. Bitte wählen Sie das Motherboard, das AC’97 oder HD Audio(Azalia) 
verwendet, (achten Sie darauf, dass Ihr Audio AC’97 bzw. HD Audio (Azalia unterstützt)). Andernfalls entstehen schwere 
Schäden an Ihrem(n) Gerät(en)!!!

USB 3.0 Connection

PRESENCE#

BLACK

SENSE1_RETURN

AUD GND

SENSE2_RETURN

YELLOW

BROWN

RED

PORT1 R

PORT2 R

PORT1 L

BLUE

PORT2 L

SENSE_SEND

KEY

PURPLE

GREEN

ORANGE

BLACK

AUDIO HD AUDIO Function

N

.

C

KEY

RED

2

WHITE

2

GREEN

2

BLACK

RED

1

WHITE

1

GREEN

1

BLACK

USB


F


unction

VCC1

D1-

D1+

GND

NC

VCC2

D2-

D2+

GND

KEY

藍色線條為尺寸標示,請勿印刷上去!

產 品料 號

VP 5 00 M 1W 2 N- B

Urban S71 WOT Editi on

說明 書

1

4

/0

5

/

1 3

A

產 品名稱

印 刷項 目

子件 料號

發 稿日 期

版本

MARKETING

CHECK

DESIGN

PRODUCT GM

Poki

刀模線

125 

mm

176 

mm

騎馬釘

28

80

4

雙銅

157G

P

X

書寫紙

單色

其他特殊處理效果

表面處理

2

厚度

(g/m )

裝訂方式

材質

頁數

印刷色彩

規格樣式

整本

其他特殊處理效果

表面處理

2

厚度

(g/m )

材質

印刷色彩

封面樣式

(當封面與內頁樣式不同時尚須填寫

)

Milk.Lin

Содержание Urban S71 WOT Edition

Страница 1: ...s www thermaltake com Tested To Comply With FCC Standards FOR HOME OR OFFICE USE Full Tower U Ur rb b n n Simple Yet Elegant 71 Руководство пользователя TM Wargaming net LLP 2010 2014 藍色線條為尺寸標示 請勿印刷上去 14 05 13 A 子件料號 發稿日期 版本 MARKETING CHECK DES PRODUCT GM Pok 刀模 125 mm 4 雙銅 157G P X 無 殊處理效果 其他特殊處理效果 表面處理 2 厚度 g m 材質 印刷色彩 封面樣式 當封面與內頁樣式不同時尚須填寫 色 亮 Milk Lin ...

Страница 2: ...st 200 x 200 x 30 mm fan 600 800rpm 13 15dBA Bottom Intake optional 120 x 120 x 25 mm or 140 x 140 x 25 mm fan USB 3 0 x 2 USB 2 0 x 2 HD Audio x 1 Supports 1 2 3 8 1 4 water tube 3 x 5 25 1 x 3 5 5 x 3 5 or 2 5 1 x 3 5 or 2 5 Side Panel Disassembly Motherboard Installation PSU Installation 5 25 Device Installation External 3 5 Device Installation 3 5 2 5 HDD Installation PCI Card Installation Key...

Страница 3: ...6 3 Limite di lunghezza per la VGA schede grafiche Il limite di lunghezza per la VGA scheda grafica è 344 mm 13 6 Atenção Limite de altura para o dissipador do CPU O limite de altura para o dissipador do CPU é 160 mm 6 3 polegadas Limite de comprimento para VGA placa gráfica O limite de comprimento para VGA placa gráfica é 344 mm 13 6 polegadas 警告 CPU散熱器的高度限制 CPU散熱器的高度限制為160mm 6 3英吋 VGA 顯示卡 的長度限制 ...

Страница 4: ...rews Deutsch 1 Legen Sie das Gehäuse auf die Seite 2 Installieren Sie die Hauptplatine in ihrer vorgesehenen Position und sichern Sie sie mit Schrauben Français 1 Posez à plat le châssis 2 Installez la carte mère dans l endroit approprié et sécurisez la avec des vis Español 1 Tumbe el chasis 2 Instale la placa madre en la ubicación adecuada y asegúrela con tornillos Italiano 1 Poggiare lo chassis ...

Страница 5: ...achts 2 Schieben Sie the 5 25 Zoll Einheit in den Laufwerksschacht um die Einheit zu sperren Anmerkung Drücken Sie den 5 25 Zoll werkzeuglosen Mechanismus um die Einheit zu verriegeln Français 1 Enlevez le couvercle de la baie de lecteur de 5 25 2 Faites glisser le périphérique de 5 25 dans la baie de lecteur Remarque Appuyez sur le mécanisme sans outil de 5 25 pour déverrouiller le périphérique E...

Страница 6: ...ouvercle de la baie de lecteur 3 5 2 Insérez le périphérique 3 5 dans la baie pour lecteur 3 Insérez le disque dur de 3 5 et sécurisez le avec les vis Español 1 Extraiga la cubierta de la bahía de unidad de 3 5 pulgadas 2 Coloque el dispositivo de 3 5 pulgadas en la bahía de unidad 3 Inserte el disco duro de 3 5 y apriételo con los tornillos Italiano 1 Rimuovere il coperchio dell alloggiamento del...

Страница 7: ...pply Ensure AHCI Advanced Host Controller Interface is enabled on your motherboard or SATA controller card The AHCI enables for hotswap capability of the SATA hard drives without having to turn off the computer prior to connecting or disconnecting of the hard drive Please follow instruction provided by your motherboard or SATA controller card to enable the AHCI function If you are using a brand ne...

Страница 8: ...llegare il cavo di alimentazione all alimentatore Verificare che l interfaccia AHCI Advanced Host Controller Interface sia abilitata sulla scheda madre o sulla scheda del controller SATA L interfaccia AHCI consente la funzionalità hotswap delle unità rigide SATA senza dovere spegnere il computer prima di collegare o scollegare il disco rigido Seguire le istruzioni fornite per la scheda madre o la ...

Страница 9: ...çin gerekli tüm sürücülerin yüklü olduğundan emin olun SATA kablosunu ana kart veya SATA denetleyici kartı üzerindeki kullanılabilir bir SATA konektörüne bağlayın Güç kablosunu güç kaynağına bağlayın Ana kartta veya SATA denetleyici kartında AHCI nin Gelişmiş Ana Bilgisayar Denetleyici Arabirimi etkinleştirildiğinden emin olun AHCI sabit disk sürücüsünü bağlamadan veya sürücünün bağlantısını kesme...

Страница 10: ...sis com parafusos Place the keyboard or mouse cables through the Keyboard Mouse Security Lock then secure it back to the back panel from inside of the chassis with screw Führen Sie die Kabel durch die Einheit Tastatur Maussperren und sichern Sie sie dann wieder an der Rückwand innerhalb des Gehäuses mit den Schrauben Mettez les câbles du clavier ou de la souris à travers le verrou de sécurité de c...

Страница 11: ...se consult your motherboard manual to find out the section of USB connection USB 3 0 connection 1 Make sure your motherboard supports USB 3 0 connection 2 Connect the USB 3 0 cable to the available USB 3 0 port on your computer Audio Connection Please refer to the following illustration of Audio connector and your motherboard user manual Please select the motherboard which used AC 97 or HD Audio A...

Страница 12: ... GND NC VCC2 D2 D2 GND KEY Guida di installazione dei contatti Connessione del LED del case Nella parte anteriore del case sono presenti alcuni contatti per interruttori e LED Consultare il manuale utente del produttore della scheda madre quindi connettere i contatti alla parte superiore del pannello sulla scheda madre Connessione USB 2 0 Consultare il manuale per la scheda madre che comprende la ...

Страница 13: ...аты Подключение USB 2 0 См раздел Подключение в руководстве материнской платы Подключение USB 3 0 1 Убедитесь что материнская плата поддерживает подключение по стандарту USB 3 0 2 Подсоедините кабель USB 3 0 к свободному порту USB 3 0 компьютера Подключение аудиоразъема См следующую иллюстрацию аудиоразъема и руководство пользователя материнско й платы Выберите материнскую плату в которой использу...

Страница 14: ...N RED PORT1 R PORT2 R PORT1 L BLUE PORT2 L SENSE_SEND KEY PURPLE GREEN ORANGE BLACK AUDIO HD AUDIO Function N C KEY RED2 WHITE2 GREEN2 BLACK2 RED1 WHITE1 GREEN1 BLACK1 USB Function VCC1 D1 D1 GND NC VCC2 D2 D2 GND KEY Ara Kablo Kurulum Kılavuzu Kasanın ön kısmında bazı ışıklar ve anahtar ara kabloları görebilirsiniz Lütfen anakart üreticinizin sağladığı kullanım kılavuzuna bakın ve daha sonra bu a...

Отзывы: