


1
4
5
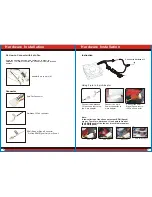
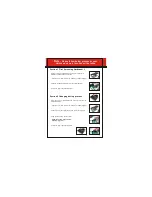
2.1 How to Install in case
Connect the 2 pin connector of thermal
sensor cable to the 2pin socket of Hardcano 13.
You may place the
Thermal Sensor Probes
to
different chassis locations.
Connect the 4 pin MOLEX connector from computer
power supply to the 4pin socket of Hardcano 13.
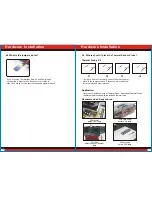
STEP 1:
Connect the Fans
STEP 2:
Connect the Thermal Sensor
STEP 4:
Connect the Power Cable
Connect the USB signal cable to the USB
socket on Motherboard
Note: Please refer to your motherboard
manual for USB connectors.
STEP 5:
Install The Card Reader To Motherboard
Connect the 3 pin connector of the fan directly to the
3 pin socket of Hardcano 13. If the cable length is not
long enough, use the 3pin extension adapter.
Some fan units uses 4 pin connector instead of 3 pin
connector. In this case, please use the
4pin to 3 pin
adapter
provided in the package to connect it
to the 3pin socket of Hardcano 13.
Part II
Installation
Hardware Installation
STEP 3:
Install the Hardcano 13.
Secure the Hardcano 13 into any open
external 5.25" drive bay with the
screws provided in the package.
Note: Some PC chassis requires 5.25"
guide rails to be mounted on the
drive units in order to
slide into the drive bay.


