N7700PRO DOM upgrading V1 to V2 SOP 2/7 05/03/2012
N7700PRO DOM upgrading V1 to V2 SOP
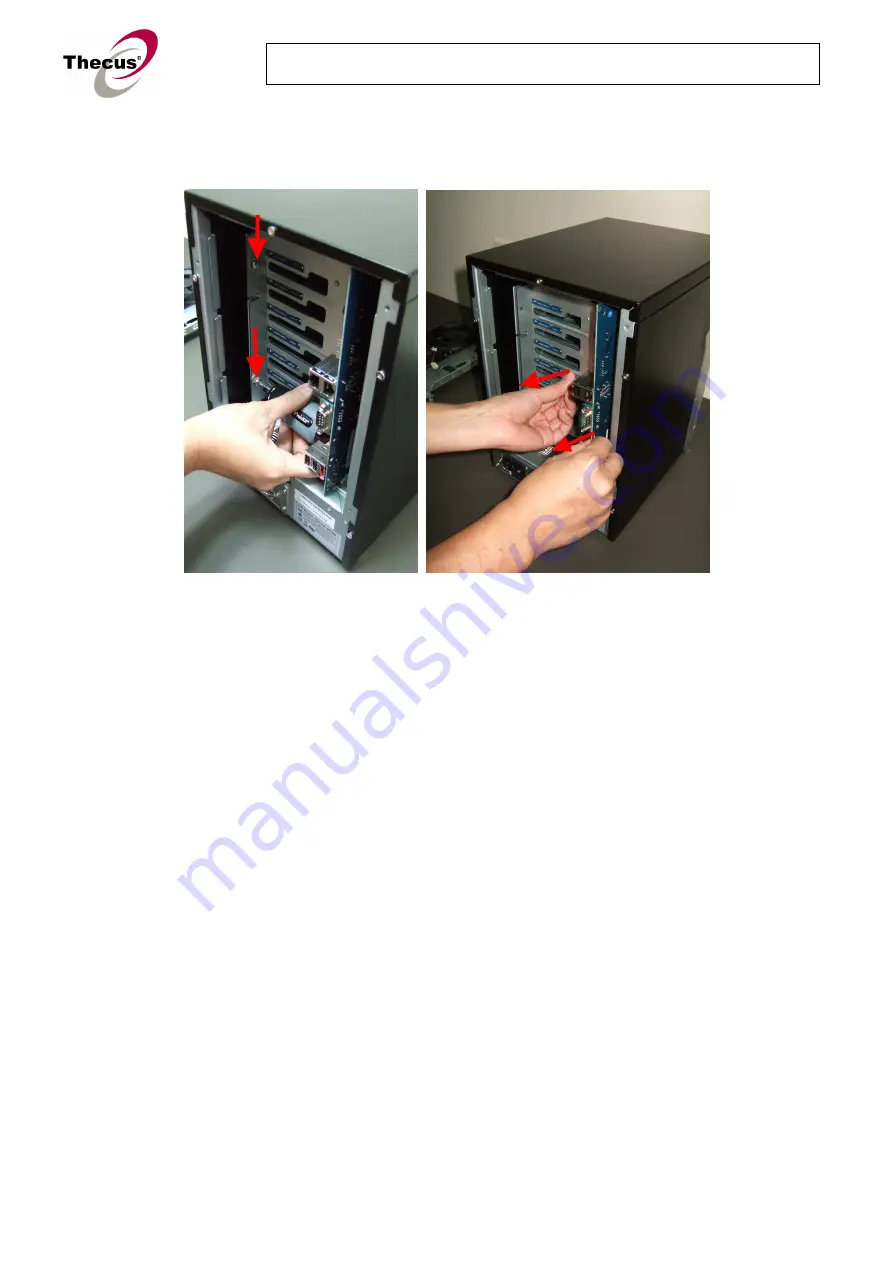
2-3. Loosen two screws on back plate by a short screw driver, and then slide out the
motherboard.
Страница 1: ...upgrading V1 to V2 SOP 1 Purpose Upgrading from N7700PRO to N7700PROv2 2 Procedures 2 1 Prepare for two screw drivers Pull out HDD trays one by one 2 2 Loosen four screws on back plate by a screw driv...
Страница 2: ...N7700PRO DOM upgrading V1 to V2 SOP 2 7 05 03 2012 N7700PRO DOM upgrading V1 to V2 SOP 2 3 Loosen two screws on back plate by a short screw driver and then slide out the motherboard...
Страница 3: ...SOP 3 7 05 03 2012 N7700PRO DOM upgrading V1 to V2 SOP 2 4 You may have to lift up the backplane board to slide out the motherboard then loosen the screw on the motherboard and then detach the backpl...
Страница 4: ...grading V1 to V2 SOP 4 7 05 03 2012 N7700PRO DOM upgrading V1 to V2 SOP 2 5 Detach case open wire from the motherboard to slide out the motherboard 2 6 Detach ATX 20 pin power connecter to slide out t...
Страница 5: ...RO DOM upgrading V1 to V2 SOP 2 7 Detach two flat cable connectors to slide out the motherboard NOTICE When you want to connect the flat cable connectors back please make sure that the pink lines on t...
Страница 6: ...N7700PRO DOM upgrading V1 to V2 SOP 6 7 05 03 2012 N7700PRO DOM upgrading V1 to V2 SOP 2 8 Detach ATX 12V power connectors completely slide out the motherboard from the chassis...
Страница 7: ...to V2 SOP 7 7 05 03 2012 N7700PRO DOM upgrading V1 to V2 SOP 2 9 Detach the original Dual DOM from motherboard and then install the new 512 MB DOM on it 2 10 Reverse the above steps from 2 8 to 2 2 to...