background image

— E23 —

Operation

Using a Bluetooth Device (Continued)

11


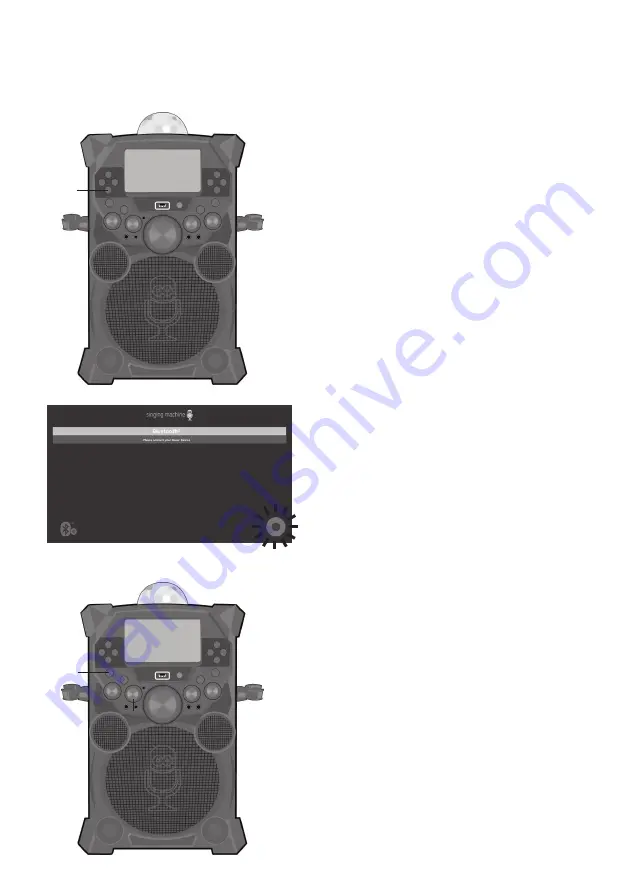
RECORD YOUR VOCAL 
PERFORMANCE


To record your singing as well as 
the music, press the 

RECORD


button. Recording will begin and 
the record icon at the bottom right 
corner of the monitor will blink red 
and blue.


When done recording, press the 

RECORD 

button again; the Record 

icon will stop blinking.

Notes

• The recorded audio file will record onto 

the USB drive. 

• The recorded audio file will be named 

with the “BT” prefix.  

• See page E24 to play back your recorded 

files. 

12    

  Press the 

ON/OFF 

button to turn 

the unit off.

ak

al

Содержание FIESTA PLUS

Страница 1: ...SDL9039 FIESTA PLUS INSTRUCTION MANUAL www singingmachine com The Singing Machine is a registered trademark of The Singing Machine Co Inc...

Страница 2: ...the presence of important operating and maintenance servicing instructions in the literature accompanying this product FCC WARNING This equipment may generate or use radio frequency energy Changes or...

Страница 3: ...E2 Included Please make sure the following items are included HDMI Cable Main Unit Singing Machine Flash Drive AC Adapter Manual Wired Interactive Microphone Wired Microphone...

Страница 4: ...utton 8 ON OFF Button 9 MIC Holder 10 EXTERNAL INPUT VOLUME Control 11 MIC 1 VOLUME Control 12 EXTERNAL INPUT Jack 13 LINE IN Jack 14 Tweeter 15 Bluetooth Indicator 16 Speaker Lights 17 Navigation LEF...

Страница 5: ...E4 Location of Controls Rear 1 2 3 4 5 1 Adjustable Handle 2 DC IN Jack 3 Wheels 4 Handle Release 5 HDMI Jack...

Страница 6: ...ransmitter Rear 6 Battery Compartment Rear Location of Controls Playback Display Master Volume 0 20 Record Status Battery Status Lead Vocal Status Current Playlist Song Elapsed Time Song Total Time So...

Страница 7: ...ection Connecting the Unit to a TV HDMI Cable Rear of External TV HDMI Jack Out HDMI Jack In HDMI IN 1 2 The video and lyrics will be displayed on the built in screen You may also want to connect a TV...

Страница 8: ...ecautions when using batteries in this device 1 Warning Danger of explosion if battery is incorrectly replaced Replace only with the same or equivalent type 2 Use only the size and type of batteries s...

Страница 9: ...omatically when the battery is not full Recycling and Disposal Information Do not dispose of electronic devices or any of their components especially batteries and LCD displays in your municipal trash...

Страница 10: ...from this unit There are two songs included on the Singing Machine USB Flash Drive but you can access the Karaoke Store for many more songs Just follow the Welcome Kit Instructions Before you insert...

Страница 11: ...hine USB Flash Drive into a powered USB slot on your computer 2Double click the file named Karaoke_Store_Win_Setup 3Follow the online instructions to install the software on your computer 4After insta...

Страница 12: ...oke Store folder 5Double click Karaoke Store App to open the software 6On this page you can now sign up and enter your code located in your welcome kit for ten free downloads and then download them to...

Страница 13: ...NTER Navigation and MENU buttons When a step says to press one of these buttons you can use either the unit or the Microphone Remote To turn the Microphone On slide the ON OFF switch u to the ON posit...

Страница 14: ...e DISCO BALL button to turn the lights on and they will illuminate onto the ceiling To save the battery power of the unit when you are outdoor the TFT screen will turn off after 30 seconds of no actio...

Страница 15: ...unit so it faces upward Note The Singing Machine flash drive has an 8 GB capacity the actual capacity may vary slightly 3The USB mode will be selected by default press the ENTER button to enter the U...

Страница 16: ...he USB menu 6Adjust the volume to a comfortable level using the MASTER VOLUME control Notes If connected to a TV there will be no display on the built in monitor If connected to a TV you can also cont...

Страница 17: ...pear over the Lead Vocal Status icon Note The song must be recorded with separate vocals that is downloaded aka multiplex recording in order to utilize the Lead Vocal function 11 SKIP Advance or go ba...

Страница 18: ...g title See page E24 to play back your recorded files 14 SEARCHING BY ARTIST OR TITLE While in the USB menu select Search using the Navigation Left and Right buttons then press the ENTER button The al...

Страница 19: ...ngs then press the ENTER button to play your selection or select the next letter the same way Note You can search up to six letters After the sixth letter the search will reset 16 CREATING THE PLAYLIS...

Страница 20: ...n and the numbers will change to 0001 0002 etc According to the numbers displayed the songs will be listed in that order from top to bottom c After setting all songs on your priority list press the ME...

Страница 21: ...ong that was added and pressing the ENTER button again it will change from blue to white 19USING THE PLAYLIST To play or edit your previously created Favorite playlist you can use the Navigation Right...

Страница 22: ...ways refer to the user manual of your Bluetooth device for detailed instructions You can also press the VOCAL PAIR button to disconnect any paired devices in order to pair another device 4The Bluetoot...

Страница 23: ...phone s as shown on page E6 Slide the Mic s ON OFF switch to the ON position 8Adjust the MIC VOLUME 1 or 2 control as desired Increasing this will increase the volume of the the respective microphone...

Страница 24: ...record icon at the bottom right corner of the monitor will blink red and blue When done recording press the RECORD button again the Record icon will stop blinking Notes The recorded audio file will re...

Страница 25: ...the Recordings mode Notes The Recording mode cannot be entered unless a USB flash drive is inserted A loading icon will appear when the system is loading the files 3Use the Navigation Up and Down but...

Страница 26: ...position 7Adjust the MIC VOLUME control as desired Increasing this will increase the volume of connected microphone s 8Rotate the ECHO control to add an echo effect to your voice Rotate towards MAX t...

Страница 27: ...recommended to set the volume on the auxiliary unit to 1 3 or lower to avoid distortion Skipping files tracks is not possible when using an external device 3Press the Navigation Right or Left button t...

Страница 28: ...OUR SINGING To record your singing as well as the music press the RECORD button recording will begin and the record icon at the bottom right of the monitor will blink red and blue When done recording...

Страница 29: ...to set the volume on the auxiliary unit to 1 3 and the EXTERNAL INPUT Volume control on this unit to 1 3 as well to avoid distortion Skipping files tracks is not possible when using an external devic...

Страница 30: ...TV usually HDMI The file track being played is not a track recording with lyrics These are the only files that allow you to view the lyrics on the TV screen No sound from the microphone Make sure it...

Страница 31: ...the software can become corrupted and the unit will no longer function properly 1 Create a folder on the Singing Machine USB Flash Drive named user_updata 2 Download the latest software e g xxxxxx im...

Страница 32: ...Main Unit 22 05 H x 13 3 W x 14 2 D in 560 x 340 x 339 mm Weight Main Unit 19 2 lbs 8 7 kg Microphone 74 dB 600 Ohms impedance with 6 3 mm Dynamic Microphone Specifications are subject to change with...

Страница 33: ...The Singing Machine Company Inc 4060 E Jurupa Street Unit B Ontario CA 91761 1413 USA PRINTED IN CHINA 9039 1710 ENG01 Visit Our Website www singingmachine com Copyright 2017 All Rights Reserved...

Отзывы: