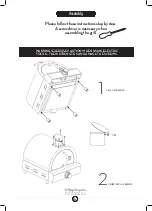
PIZZAGRILL
WARNING
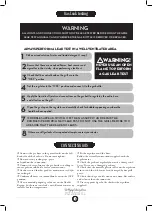
ALL JOINTS AND CONNECTIONS MUST NOW BE LEAK TESTED BEFORE USING THE GRILL.
LEAK TEST ANNUALLY, AND WHENEVER THE GAS BOTTLE IS REMOVED OR REPLACED.
ALWAYS PERFORM A LEAK TEST IN A WELL-VENTILATED AREA.
8
If there are still gas leaks after repeated attempts, contact your dealer.
7
IF BUBBLES APPEAR, SWITCH OFF THE GAS SUPPLY AND REPAIR THE
PROBLEM. PERFORM A NEW LEAK TEST. DO NOT USE THE GRILL BEFORE YOU
ARE SURE THAT THERE ARE NO LEAKS.
6
Open the gas tap on the regulator and carefully check for bubbles appearing anywherethe
liquid has been applied.
1
Make a mixed solution ( water and liquid detergent / soap).
2
Ensure that there are no naked flames, heat sources and
cigarettes in the vicinity when performing a leak test.
3
Check that the control knob on the grill are in the
”OFF” position.
4
Set the regulator to the ”OFF” position and connect it to the gas bottle.
5
Apply the liquid to all joints and connections on the gas bottle, regulator, the entire hose
and all valves on the grill.
!
WARNING!
NEVER USE AN OPEN
FLAME TO PERFORM
A GAS LEAK TEST
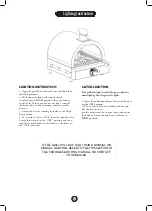
Connect the gas hose to the gas rail inlet on the left
hand side of the barbecue. Do not overtighten.
Do not use any sealing tape, paste
or liquid on the connection.
Connect the regulator to the gas bottle according to
your regulator and bottle dealer’s instructions.
Gas hoses used for this product must not exceed 150
cm in length
Confirm all barbecue control knobs are in the OFF
position.
We recommend propane gas for use in the Nordic
Region, but butane can also be used.Butane is not very
suitable for low temperatures.
Fit the regulator and the hose.
Follow the assembly instructions supplied with the
regulator set
Check the gas hose regularly for cracks, damage and
decay. Never use a damaged gas hose.
Check that the movable plastic collar on the regulator
is intact and that it has not been damaged by hot grill
parts.
Check that the gas bottle stands on a firm, flat surface
and is lower than the connector.
Use an approved gas bottle that fits the regulator
supplied.
10
Gas Leak testing
CONNECTING GAS
Содержание FCC-G-18400-00
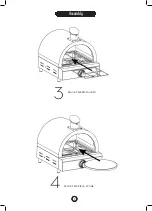
Страница 7: ...PLACE THE PIZZA STONE PLACE THE PIZZA GRID 3 4 7 Assembly ...
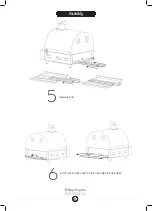
Страница 8: ...PIZZAGRILL Assembly GREASE PAN BOTTOM PANEL SHOULD BE CLEANED REGULARLY 5 6 8 ...
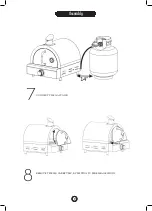
Страница 9: ...CONNECT THE GAS TANK REMOVE THE LID CAREFULLY BY LIFTING IT LIKE IMAGE SHOWS 7 8 9 Assembly ...
Страница 17: ...17 Troubleshooting ...


