background image

V2.1 

 1/12/2021                                                Need help? Visit 

ContactUs.TH3DStudio.com


TH3D EZABL

 Pro Installation Guide -


Copyright © 2021 TH3D Studio LLC 

 ALL RIGHTS RESERVED


3


Getting Started 

Welcome to the EZABL

 Pro kit installation guide!  

This will walk through the steps to install the EZABL

 Pro sensor on the printer. Be sure to 

follow all the steps and if you have issues or a question do not hesitate to reach out to us by 
visitin

http://ContactUs.TH3DStudio.com


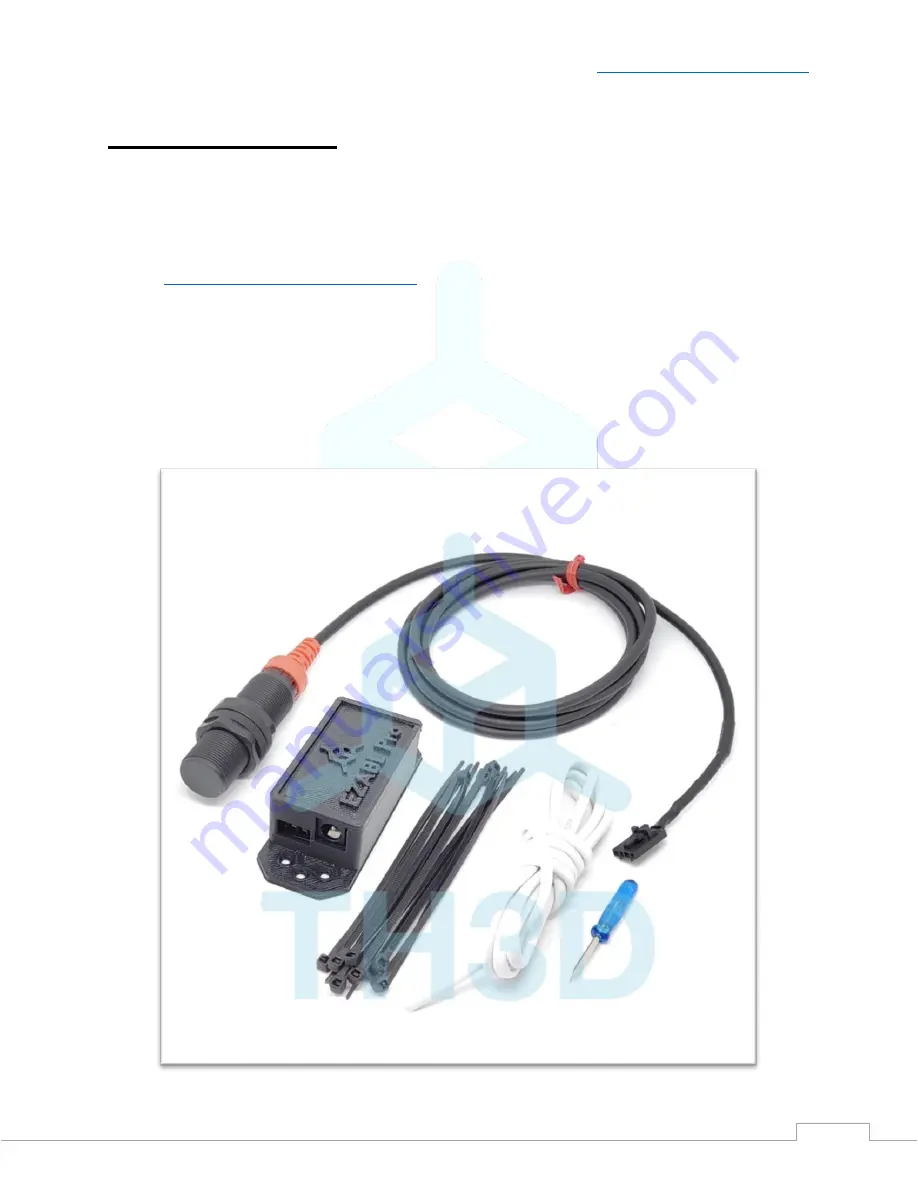
There are optional accessories for the EZABL

 Pro Kit like AC power adapter or USB power 

adapter that are not pictured below. If you ordered these options, they will be in the EZABL


Pro kit package when you receive it. 

We are always making things better so the case or sensor may look slightly different than the 
below pictures. 


Содержание EZABL Pro

Страница 1: ...gh testing on every kit before packaging Unlike other companies that use off the shelf hardware and or low quality parts on their boards we only use the best and work directly with our suppliers to bring you the best performing and reliable kits that we can We would not be where we are without YOU and your feedback If you see something that needs changing updating or you just want to suggest a new...

Страница 2: ...right 2021 TH3D Studio LLC ALL RIGHTS RESERVED 2 TH3D EZABL Pro Installation Guide V2 1 1 12 2021 This guide is property of TH3D Studio LLC Re distribution is NOT permitted and must be downloaded from our website ONLY FOR USE WITH EZABL PRO KITS Copyright 2019 TH3D Studio LLC ALL RIGHTS RESERVED ...

Страница 3: ...e printer Be sure to follow all the steps and if you have issues or a question do not hesitate to reach out to us by visiting http ContactUs TH3DStudio com There are optional accessories for the EZABL Pro Kit like AC power adapter or USB power adapter that are not pictured below If you ordered these options they will be in the EZABL Pro kit package when you receive it We are always making things b...

Страница 4: ...nified Firmware package in the EZABL STL Files folder You can also use any custom ones if you know the sensor offset values this is noted in the firmware o We offer printed parts if you do not want to print your own Prices are about 10 30 depends on the mount for an ABS printed mount If you want one please contact us with the STL files for a quote o Small ones like the can be purchased on the EZAB...

Страница 5: ...ce that can cause the sensor to not work a If you are using a separate power adapter make sure the power adapter usb power source is on the same power strip as the printer 4 Depending on what mount you are using printer model etc you may need additional screws Most mounts use M3 screws so it would be recommended to pick up an M3 screw assortment from TH3D Amazon or your local hardware store 5 Some...

Страница 6: ...nozzle but not too high Most of the flat wrenches included with the printers are about 2mm in height and can be used to set the sensor height If you are using the EZABL Mini size sensor and using the standard 18mm sensor mount use the included adapter rings to center the EZABL Mini in the 18mm mounting hole The smaller side should be inside the ring of the 18mm hole to center the probe Once mounte...

Страница 7: ... your printer power supply OR if you ordered the AC adapter USB adapter you can power it externally Do not press the self test button with a sensor connected to the EZABL control board It is only for use when directed to be used by our support team This emulates the sensor trigger signal when pressed EZABL Pro Control Board Connections Features Separate Power Adapter If you are using our AC adapte...

Страница 8: ...e has a red wire and a black wire contained inside the outer sheathing Strip this back at both ends and then strip the black and red wires at each end as well Positive is labeled with on our board and usually is V on your power supply Use the red wire for this connection Negative is labeled with on our board and usually is V on your power supply Use the black wire for this connection Use the inclu...

Страница 9: ...eader on the EZABL Pro Control Board If you have a 2 pin JST XH you will want to connect to pins 1 and 2 Printers with soldered Z endstop wires If you have a printer with wires that are soldered to the Z endstop switch or one without a JST plug you will cut the wires and insert them into the black screw terminal on the right Wire placement does not matter Use the included screwdriver to secure the...

Страница 10: ...r Detection When you power on your printer the Power LED on the EZABL Pro Control Board will light up green If the power LED is not lighting check that you have the polarity correct if directly wired or if you are using a separate power adapter that it is plugged into a power source that is on Now plug the EZABL Pro Sensor plug into the EZABL Pro Sensor Connector on the control board ...

Страница 11: ...th your finger The Red LED light on the Sensor AND the Status LED on the EZABL Pro Control Board should light up Depending on your sensor it may or may not also have a green power LED that will be lit this will shut off when triggered If they do not light up place your finger on the tip of the sensor while adjusting the gold screw clockwise on the side of the sensor until it lights up when you tou...

Страница 12: ... use this value on beds up to 300x300 Larger beds should use 5 If you have a printer that needs a bootloader this must be flashed before you can load any firmware on the machine Most printers with a 1284p CPU will need their bootloader flashed You can follow our bootloader flashing guide by visiting Bootloader TH3DStudio com The EZABL Probe mount STL files are included in the Unified Firmware pack...

Страница 13: ...e light on the sensor and the Status LED on the EZABL Pro Control Board turn off Next connect to your printer over your preferred slicer or Octoprint and issue an M119 and see if the Z_min is showing TRIGGERED or open If it shows open place your finger or an object under the sensor so the light comes ON and then issue M119 again If it shows TRIGGERED then proceed to setting your sensor sensitivity...

Страница 14: ...e included zip ties to secure the sensor wire to your hotend wires When you route the wire for your sensor so NOT create a pinch point with a zip tie where the wire will be bending back and forth while the print head is moving This will internally break the wires on the cable and the sensor will no longer work Leave some slack do NOT make a loop with the wire Install the sensor wire exactly as see...

Страница 15: ...D that lights when the sensor is triggered 18mm Size Has 2 LEDs a GREEN LED that lights to indicate power and shuts off when the RED LED lights triggered 12mm Mini Size ONLY has the RED LED triggered and no green power led If you print at different temperatures depending on the material you are printing then select one in the middle of the highest and lowest print temps you use Lower the Z until y...

Страница 16: ...our screw driver AND move your hand away from the sensor If it shuts off or flickers when you do this turn it just a hair clockwise and move the screwdriver and your hand out of the way again RED LED Turning off Repeat the clockwise adjustment until the RED LED stays on when you remove your screwdriver and hand from the sensor If you are having issues getting the RED LED to stay on check the groun...

Страница 17: ...n the ZOffset section using your printer LCD look for Probe Z offset This is located under Menu Control Motion Make sure you store your Z Offset by going to Menu Control Store Settings If you do not store your memory the Z offset will be forgotten when you restart the printer Now do another G28 command The Z should show 5mm still but if you notice it will be 5mm as the offset is considered when ho...

Страница 18: ...g Gcode V2 txt file located in the Installation Guides folder Copy the entire file contents and paste it into the starting code scripts section of your slicer replacing the existing code The new gcode will have a 10 second wait for heaters to recover after probing If 10 seconds is not enough to let your heaters recover change the S10 in the starting code above to however many seconds you want to w...

Страница 19: ...heels if any and hotend mount o If you have a Creality Ender 3 3X Pro look up The Edge of Tech as they have some great assembly troubleshooting guides for the Ender 3 Be sure to check the sensor nuts from time to time to make sure they are not walking loose If they are you can secure them with some Loctite Blue thread locker to make sure they are staying put Most issues that come up are machine re...

Страница 20: ...rg plugins eeprom_marlin This plugin is pre installed on our EZPi kits that we sell Sensor Connector Wiring When disconnecting the EZABL Pro sensor wiring you must press the locking tab to release the plug from the EZABL Pro Board With the locking tab pressed use your other fingers to grasp the sides of the plug and pull out Do NOT use the wires to pull the plug out of the socket Do NOT try to rem...

Страница 21: ...f this kit Firmware Setup and Support Support for your printer using the Unified Firmware is included free with the purchase of the kit TH3D supports covers features listed on the Unified Firmware page If you need more advanced configuration in a case where you have a custom machine or swapped a board on a standard machine this may or may not be included depending on how much time is required this...

Страница 22: ... V called out for direct power connection V1 4 Added note about slicer setting NOT to be set to put home in the center of the bed since many people were doing this for some reason Updated support info for new contact page V1 5 Improved firmware directions and added further clarification for custom probe mounts V1 6 Added more words to convey the proper way to mount the wire to the hotend Added app...

Страница 23: ...V2 1 1 12 2021 Need help Visit ContactUs TH3DStudio com TH3D EZABL Pro Installation Guide Copyright 2021 TH3D Studio LLC ALL RIGHTS RESERVED 23 Appendix Sensor wire incorrect routing example ...

Отзывы: