background image

TH COMMUNICATION SDN BHD    

www.thcomm.com.my

      [email protected] 

3.  Select

 Add 

— the countdown will begin. 

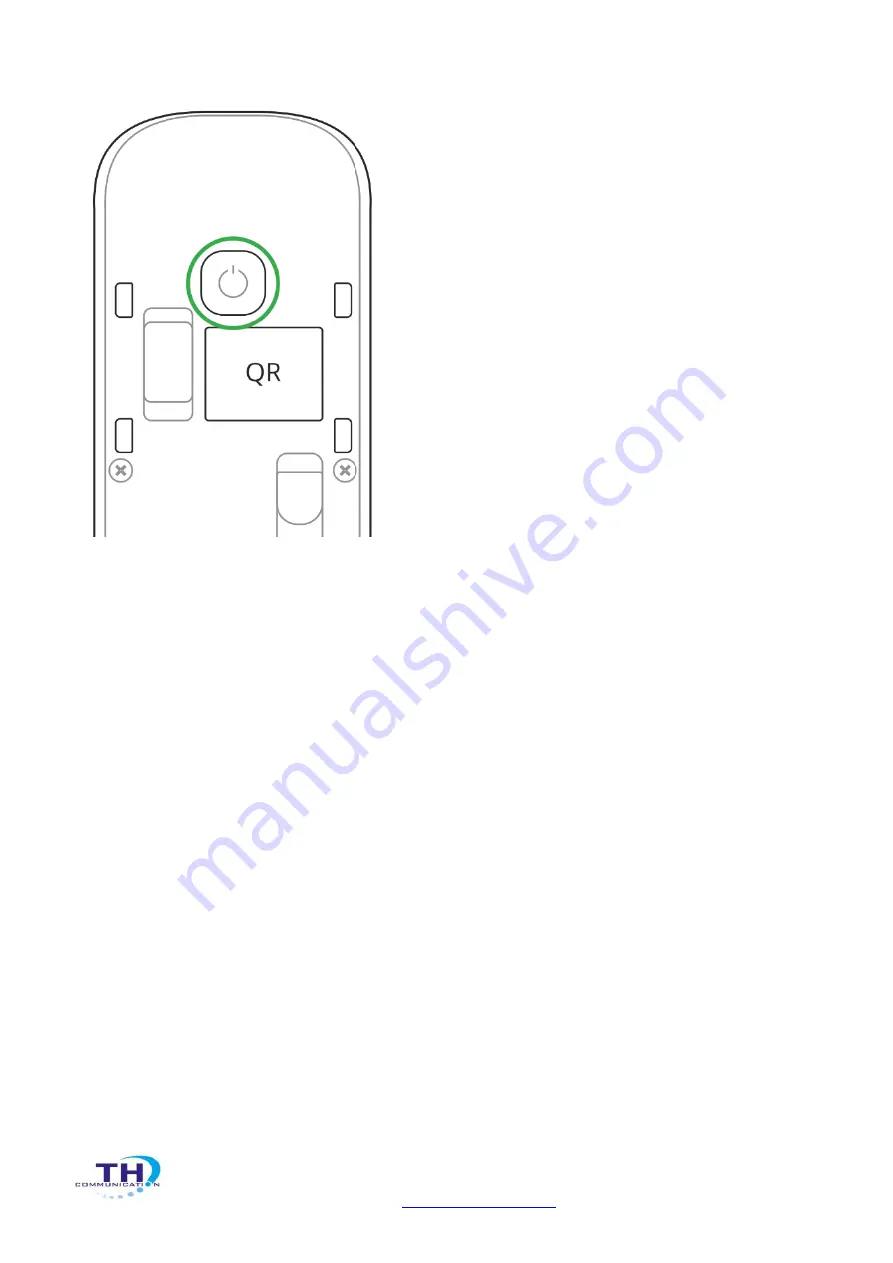
4.  Switch on the device by pressing the on/off button for 3 seconds. 


For the detection and interfacing to occur, the detector should be located within the coverage 
area of the wireless network of the hub (at a single protected object). Request for connection to 
the hub is transmitted for a short time at the time of switching on the device. 

MotionProtect Outdoor turns off automatically after 6 seconds, if it failed to connect to the hub. 
To retry the connection, you do not need to turn off the device. If the detector has already been 
assigned to another hub, turn off MotionProtect Outdoor, and then follow the standard addition 
procedure. 

If the connection to the hub failed, repeat the connection attempt after 30 seconds. 

The device connected to the hub will appear in the list of devices of the hub in the application. 
Update of the MotionProtect Outdoor statuses in the list depends on the device inquiry time set 
in the hub settings, with the default value - 36 seconds. 

To avoid masking alarms, switch off anti-masking in the device settings prior to 
installation!


Содержание MotionProtect Outdoor

Страница 1: ...nal power source for up to 5 years The device detects motion at a distance of up to 15 m and ignores pets The detector only operates with hub Connection to ocBridge and uartBridge integration modules is not provided The detector is set up via a mobile application for iOS and Android based smartphones The user is notified of all MotionProtect Outdoor events through push notifications SMS messages a...

Страница 2: ...ted part is necessary for tamper activation when attempting to pull the detector away from the surface 8 The hole for attaching SmartBracket panel with a screw 9 On button 10 Tamper button 11 QR Code 12 Connector for external power supply cable outlet 13 Scrollbar for adjusting detection range How it works When the system is armed the detector continuously receives signals from two PIR sensors Whe...

Страница 3: ...e of up to 20 cm in front of the detector An obstacle in front of any of the lenses an object is placed at a distance of up to 10 cm in front of one of the lenses Painting or pasting any of the lenses with an opaque material Pasting the front of the detector with an opaque material Applying an aerosol lacquer paint or brushing the front of the MotionProtect Outdoor If one or more types of masking ...

Страница 4: ...stall the Ajax application on your smartphone Create an account add the hub to the application and create at least one room Go to the Ajax application Switch on the hub and check the internet connection via Ethernet cable and or GSM network Ensure that the hub is disarmed and does not start updates by checking its status in the mobile application Only users with administrative privileges can add t...

Страница 5: ...ally after 6 seconds if it failed to connect to the hub To retry the connection you do not need to turn off the device If the detector has already been assigned to another hub turn off MotionProtect Outdoor and then follow the standard addition procedure If the connection to the hub failed repeat the connection attempt after 30 seconds The device connected to the hub will appear in the list of dev...

Страница 6: ...emperature Temperature of the Detector Measured on the processor and changes gradually Signal Strength Signal strength between the hub and the detector Battery Charge Battery level of the detector displayed in increments of 25 Lid The tamper mode of the detector which reacts to the detachment of or damage to the body ...

Страница 7: ...ion Connection status between the hub and the detector Sensitivity Sensitivity level of the motion detector low normal high Anti masking If active sensor will detect masking Always Active If active the motion detector always detects movement Firmware Detector firmware version Device ID Device identifier Setting Up the Detector Devices MotionProtect Outdoor Settings ...

Страница 8: ...ty Choosing the sensitivity level of the motion sensor High Normal Low Anti masking If active sensor will always detect masking Always active When turned on the detector always registers motion Delay when entering sec Selecting delay time when entering Delay when leaving sec Selecting delay time on exit Delays in night mode If active the detector will experience a delay in the night mode ...

Страница 9: ...ode available in detectors with firmware version 3 50 and later User Guide Opens the detector User Guide Unpair Device Disconnects the detector from the hub and deletes its settings Indication MotionProtect Outdoor light indicator may light up red or green depending on the device status Indication When Pressing the On button Event Indication Pressing the power button detector is switched on Lights...

Страница 10: ...t the upper lens axis is parallel to ground level and the supposed path of intruder entry passes perpendicular to the lens axis The MotionProtect Outdoor sends an alarm to the hub only if identical motion signals are detected with two PIR sensors In this case the difference in motion capture time shall not exceed 1 5 seconds in this case It is recommended to check the functioning of the detector a...

Страница 11: ... leading to its malfunctioning Detector installation procedure 1 Temporarily fix the SmartBracket attachment panel on the surface to determine the optimal place for installing the detector The detector must be installed at a height of 0 8 1 3 meters 2 Select the required detection distance 3 to 15 m for the detector with the detection distance adjustment scroll bar ...

Страница 12: ... com my 3 Put the MotionProtect Outdoor on the SmartBracket attachment panel Leave the detector detection area horizontal detection angle 90 and ensure that there is no motion within the detection coverage area to provide for calibration of masking sensors ...

Страница 13: ...LED indicators of the detector 4 Perform detection area and masking tests in the Ajax Security System application In the case of a bad motion response select the appropriate sensitivity level detection range and check the slope angle of the detector 5 Fasten the SmartBracket attachment panel to the surface with wood screws place the detector on the attachment panel and wait until calibration is co...

Страница 14: ...plug of the SmartBracket attachment panel 1 For power supply cable outlet behind the SmartBracket attachment panel 2 For power supply cable outlet below the SmartBracket attachment panel Run the external power supply dead cable through the attachment panel and blind plug on the back of the detector body Connect the cable to the terminal strips observing polarity Fix the wires with a clamp Turn on ...

Страница 15: ...tivity The battery installed in the detector provides up to 5 years of autonomous operation at a hub polling rate of 3 minutes When the detector battery is discharged the security system will send the appropriate notification and the LED will smoothly light up and go out when the detector detects a movement or tamper is triggered The detector has a built in battery charge control system As soon as...

Страница 16: ...tery life Up to 5 years External power 5 28 V DC 200 mA Usage Indoors and outdoors Body protection level IP54 Tamper protection Yes Operating temperature range From 25 С to 60 С Operating humidity Up to 95 Overall dimensions 184 x 70 x 65 mm Weight 322 g Complete Set 1 MotionProtect Outdoor 2 CR123A battery 2 pcs pre installed 3 Installation kit 4 Quick Start Guide Warranty Warranty for the AJAX S...

Отзывы: