


16
17
AXIS
– Wireless weather station
7.1 Setting Mode
• Press the
SET/MODE
button for 3 seconds while in normal
mode to enter the normal setting mode.
• In the setting modes, press
+/CH
button or
-/MAX/MIN
button
to select the units or scroll the value. Holding the buttons will
increase/decrease digits in great steps.
• Press the
SET/MODE
button to select the following setting in
sequence:
1. Time Zone S-12 hrs.: The time zone is used for
countries where the DCF signal can be received but the
time zone is different from the German time (e.g. +
1=one hour later).
2. 12/24 hour format
3. Manual time setting (hours/minutes)
4. Calendar setting(year /month/ day)
5. Temperature display unit degree Celsius or Fahrenheit
6. Pressure threshold setting (default 3hPa, see 7.4)
7.2 Alarm clock function
• Press twice
+/CH
button in normal mode. Alarm Time (“AL”)
appears on the LCD.
• When viewing the Alarm Time, hold
SET/MODE
button for
3 seconds to enter Alarm Time setting. Press
+/CH
button or
-/MAX/MIN
button to adjust the alarm time. Confirm hours
with
SET/MODE
button and switch to minutes setting. Con-
firm with
SET/MODE
button.
• Press
-/MAX/MIN
button to switch alarm on or off. If it is on,
is shown on the LCD.
• Press
+/CH
button to return to time mode.
• On the display appear the current time and the alarm symbol.
• Press any button to stop the alarm (120 sec).
• If the alarm is not stopped, the increasing alarm will automati-
cally turn off after 2 minutes and will be reactivated at the
same time.
7.3 Min/Max Mode
7.3.1 Indoor Temperture & Humidity
• Press the
SET/MODE
button to make the arrow point to
INDOOR TEMPERATURE & HUMIDITY display section
• Press the
-/MAX/MIN
button to display the following values:
• Indoor temperature maximum
• Indoor temperature minimum
• Indoor humidity maximum
• Indoor humidity minimum
• Press the
-/MAX/MIN
button for 3 seconds, the above indivi-
dual minimum or maximum record will be reset to zero.
AXIS
– Wireless weather station
Your radio-controlled clock receives this signal and converts it to
show the precise time. Changeover from summer time or winter
time is automatic.
The quality of the reception depends mainly on the geographic
location. Normally there should be no reception problems with-
in a 1,500 km radius around Frankfurt.
Please take note of the following:
• The recommended distance to any interfering sources like
computer monitors or TV sets is a minimum of 1.5 - 2 metres.
• Within ferro-concrete rooms (basements, superstructures), the
received signal is naturally weakened. In extreme cases, please
place the unit close to a window and/or point its front or back
towards the Frankfurt transmitter.
• During night-time, the atmospheric disturbances are usually
less severe and reception is possible in most cases. A single
daily reception is adequate to keep the accuracy deviation
under 1 second.
• The clock automatically scans the time signal at 2.00 a.m., 8.00
a.m., 2.00 p.m. and 8 p.m. every day to maintain accurate tim-
ing. If the reception is not successful, the DCF reception sym-
bol disappears, but the DCF time reception will be repeated
again. The manually set time will be overwritten by the DCF
time when the signal is received successfully.
6.3 Additional transmitters
• The wireless weather station can receive up to 3 temperature
sensors. If you have purchased additional transmitters, repeat
step 1) for all extra sensors.
However, ensure that you leave
10 seconds in between the reception of the last sensor and
the set-up of the following sensor.
The wireless weather sta-
tion will number the sensors in the order of set-up automati-
cally.
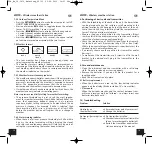
7. How to operate
• The base station has three sections on the LCD: Time Mode,
Indoor Temperature & Humidity Mode and Outdoor tempera-
ture mode. Press
SET/MODE
button to change between the
sections (arrow).
• Press the
+/CH
button in time mode to select the display of
time, calendar (day-month-year) and alarm time.
• In outdoor temperature mode press
+/CH
button to toggle
between the outdoor sensor 1,2,3 (If more than 1 sensor is
used)
• During operation, all successful settings will be confirmed by
an acoustical signal.
• The instrument will quit the setting mode, if there is no but-
ton used within 30 seconds.
TFA_No_35.1079_Anleitung_05/13 21.05.2013 14:27 Uhr Seite 9


